September 30: LEMON manuals is back up on a temporary server! Slowness is possible
Auto Leveling Sensor Removal/Installation
- Disconnect the negative battery cable. (See
NEGATIVE BATTERY CABLE DISCONNECTION/CONNECTION [SKYACTIV-G 2.0, SKYACTIV-G 2.5]
.)
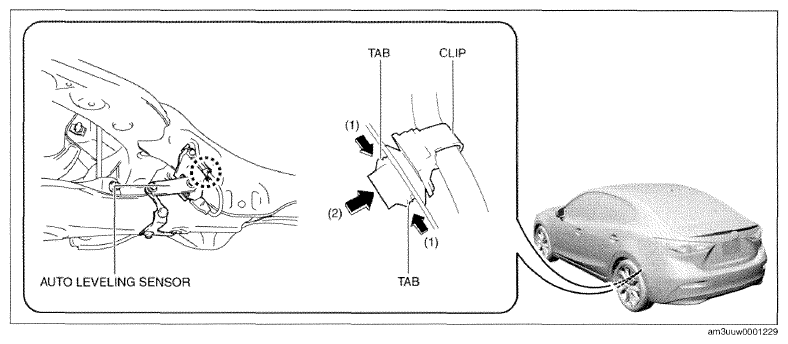
- While pressing the clip tabs in the direction of arrows (1) shown in the figure, press the clip in the direction of arrow (2) to remove the clip from the auto leveling sensor.
 Courtesy of MAZDA MOTORS CORP.
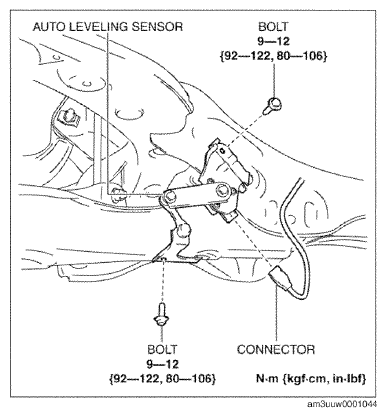
- Disconnect the connector.
- Remove the bolts.
 Courtesy of MAZDA MOTORS CORP.
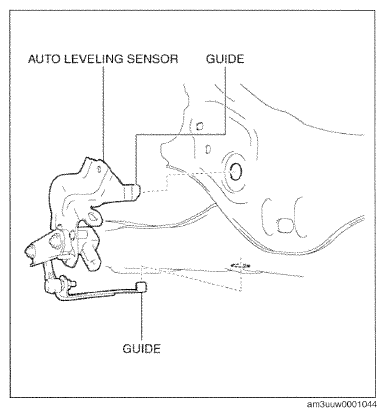
- Pull the guides from the rear crossmember and remove the auto leveling sensor from the rear crossmember.
- Install in the reverse order of removal.
- Perform headlight auto leveling system initialization. (See
HEADLIGHT AUTO LEVELING SYSTEM INITIALIZATION .)
 Courtesy of MAZDA MOTORS CORP.