Removal Procedure
 Courtesy of GENERAL MOTORS CORP.
- Relieve the fuel system pressure. Refer to Fuel Pressure Relief Procedure .
- Drain the fuel tank. Refer to Fuel Tank Draining Procedure .
- Raise and support the vehicle. Refer to Lifting and Jacking the Vehicle
in General Information.
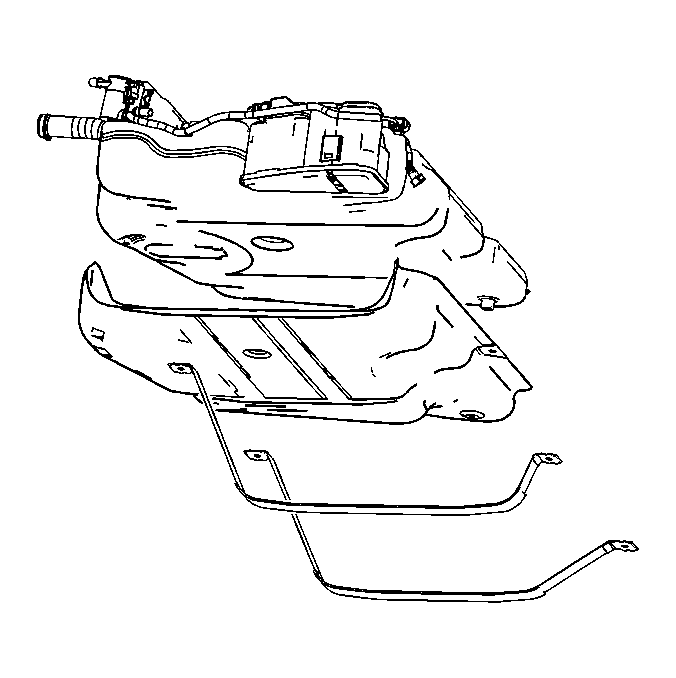
- Loosen the fuel filler pipe jumper hose clamp at the fuel tank (1).
- Disconnect the fuel filler pipe jumper hose from the fuel tank.
- Disconnect the vapor recirculation line that runs parallel to the fuel filler pipe jumper hose.
 Courtesy of GENERAL MOTORS CORP.
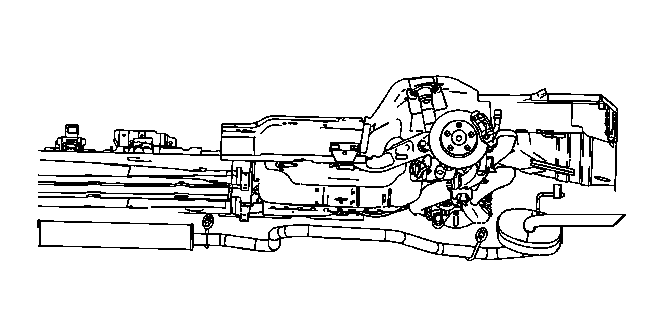
- Release the exhaust pipe insulators from the underbody hangers.
- Release the muffler insulator from the underbody hanger and slowly lower the exhaust to rest on a tall jackstand. If this is not possible, remove the rear half of the exhaust system at the take down flange.
- Disconnect the fuel pump module harness electrical connector from the vehicle underbody wiring harness.
- Disconnect the evaporative emissions (EVAP) vent valve solenoid harness electrical connector from the vehicle underbody wiring harness.
- If applicable, disengage the antilock brake system (ABS) wiring harness from the retainer on the side of the EVAP canister.
 Courtesy of GENERAL MOTORS CORP.
- Use an appropriate adjustable jack to support the fuel tank during removal.
- Remove the front left hand (LH) fuel tank strap bolts and strap.
- Remove the right hand (RH) tank strap bolts and strap.
- Using the adjustable jack, lower the fuel tank slightly in order to access the fuel line connections.
- Disconnect the fuel feed and purge lines at the fuel and brake line bundle on the right side of the vehicle.
- Cap or plug the fuel tank feed and vapor return pipes to prevent fuel loss and/or contamination.
- In order to clear the exhaust pipe, slowly lower the RH side of the fuel tank.
- Once the tank is clear of the RH frame rail, remove the fuel tank down and forward toward the RH side of the vehicle.
- If only the fuel tank is to be replaced, remove the fuel pump module assembly from the fuel tank. Refer to Fuel Sender Assembly Replacement .