Rear Window Defogger Grid Line Repair
- Disconnect the negative battery cable.
- Disconnect the rear window defogger electrical connector.
- Inspect the rear window defogger grid lines.
- Mark the grid line break on the outside of the glass with a wax pencil or a crayon.
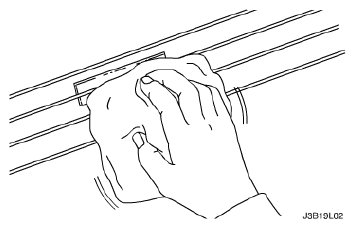
- Buff the grid lines that are to be repaired with steel wool. Wipe the lines clean using a cloth dampened with alcohol. Buff and clean about 6 mm (0.25 in.) beyond each side of the break in the grid line.
 Courtesy of SUZUKI OF AMERICA CORP.
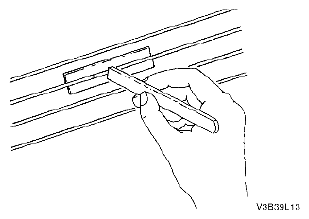
- Attach a grid line repair decal or two strips of tape above and below the repair areas.
- A repair decal or tape must be used in order to control the width of the repair areas.
- If a decal is used, the die-cut metered slot must be the same width as the grid line.
- Apply the grid repair material to the repair area using a small wooden stick or a spatula. The grid repair material should be at room temperature.
- Carefully remove the decal or the tape.
 Courtesy of SUZUKI OF AMERICA CORP.
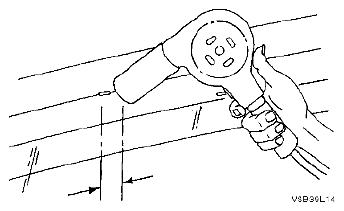
- Heat the repair area for 1 to 2 minutes.
- Hold the heat gun nozzle 25 mm (1 in.) from the surface. A minimum temperature of 149 °C (300 °F) is required.
- Inspect the grid line repair area. If the repair appears discolored, apply a coating of tincture of iodine to the area using a pipe cleaner or a line brush. Allow the iodine to dry for about 30 seconds. Carefully wipe off the excess iodine with a lint-free cloth.
- Test the operation of the rear window defogger in order to verify that the repair was successful.
 Courtesy of SUZUKI OF AMERICA CORP.