- Remove the rear subframe. See SMALL RDU
.
- Move the subframe fixture and transmission jack to the gantry area.
- Place a coolant catcher under the subframe fixture.
NOTE:
The 2 coolant hoses that are still attached to the small rear drive unit are removed as an assembly.
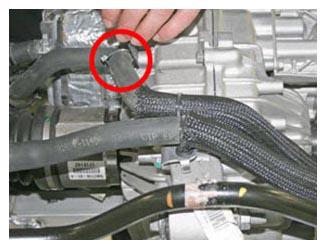
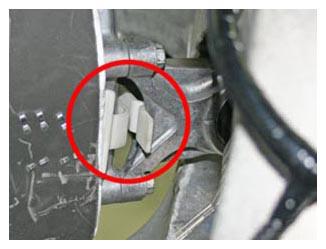
- Release the clip that attaches the coolant hoses to the rear subframe.
 Courtesy of TESLA, INC. Courtesy of TESLA, INC.
|
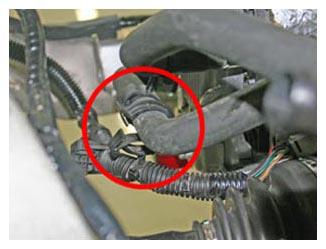
- Release the clip that attaches the low voltage harness to the coolant hoses.
 Courtesy of TESLA, INC. Courtesy of TESLA, INC.
|
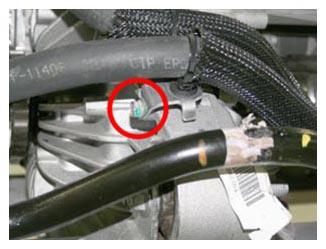
- At the front of the small rear drive unit, remove the bolt that attaches the coolant hose bracket (torque 5.5 N.m).
 Courtesy of TESLA, INC. Courtesy of TESLA, INC.
|
- Plug the holes for the HV cables.
CAUTION:
Do not allow coolant to enter the openings for the HV cables.
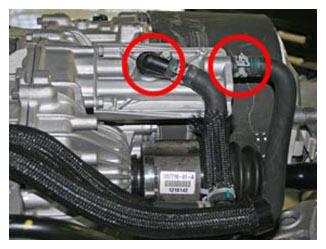
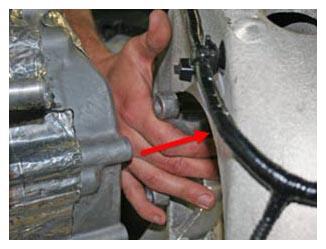
- Disconnect the 2 coolant hoses from the front LH side of the small rear drive unit.
 Courtesy of TESLA, INC. Courtesy of TESLA, INC.
|
- Disconnect the 2 coolant hoses from the RH side of the small rear drive unit.
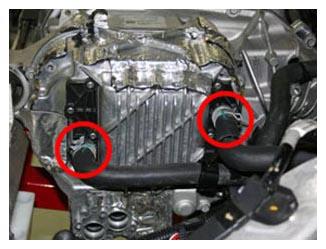 Courtesy of TESLA, INC. Courtesy of TESLA, INC.
|
- On each side of the rear subframe, release the 2 grommets that attach the wheel speed sensor harness.
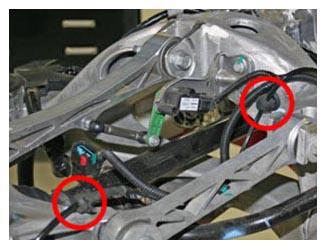 Courtesy of TESLA, INC. Courtesy of TESLA, INC.
|
- On each side of the rear subframe, remove the bolt that attaches the upper link to the knuckle (torque 140 N.m).
- On each side of the rear subframe, remove the bolt that attaches the toe link to the knuckle (torque 130 N.m).
- Position the axle remover cable around the inner joint of the LH small rear drive unit halfshaft, and then use a cable tie to hold the axle remover cable in position.
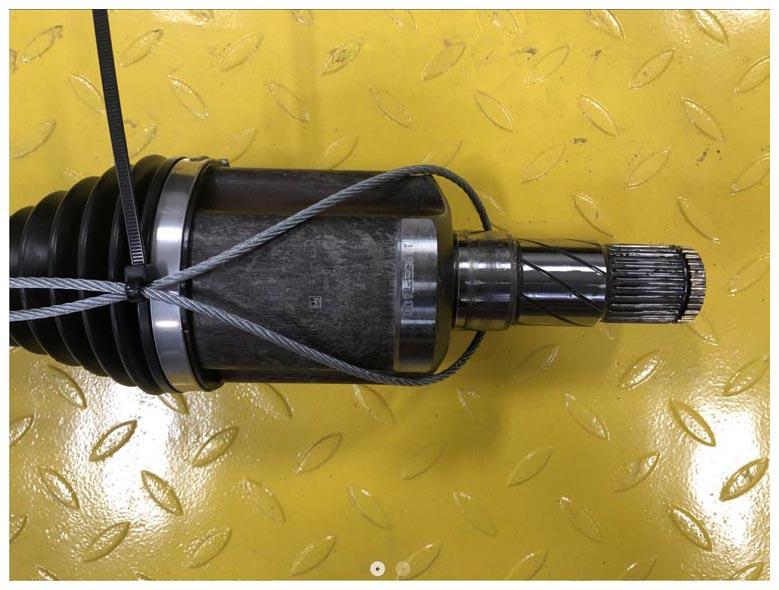 Courtesy of TESLA, INC. Courtesy of TESLA, INC.
|
- Hook the axle remover slide hammer on the 2 axle remover cable loops, and then use the slide hammer to remove the halfshaft from the small rear drive unit.
- Repeat the previous 2 steps to remove the RH small rear drive unit halfshaft.
- Remove and discard the cable tie that attaches the NVH pad to the small rear drive unit.
 Courtesy of TESLA, INC. Courtesy of TESLA, INC.
|
- Working from behind the small rear drive unit, release the hook-and-loop straps that attach the NVH pad.
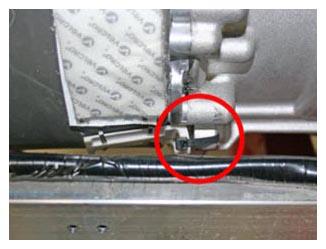
- Working in front of the small rear drive unit, remove the clip that attaches the NVH pad to the LH side motor mount.
 Courtesy of TESLA, INC. Courtesy of TESLA, INC.
|
- Pull the NVH pad outboard to remove it.
- Remove the NVH pad from the LH side of the small rear drive unit:
- Remove the bolt that attaches the front of the small rear drive unit to the rear subframe (torque 90 N.m).
- Remove the bolt that attaches the rear of the small rear drive unit to the rear subframe (torque 90 N.m).
- Remove the 3 bolts that attach the LH side motor mount to the small rear drive unit (torque 22 N.m).
NOTE:
This causes the LH side of the small rear drive unit to drop slightly.
- Remove the bolt that attaches the LH side motor mount to the rear subframe (torque 90 N.m).
- Push the LH side motor mount outboard.
 Courtesy of TESLA, INC. Courtesy of TESLA, INC.
|
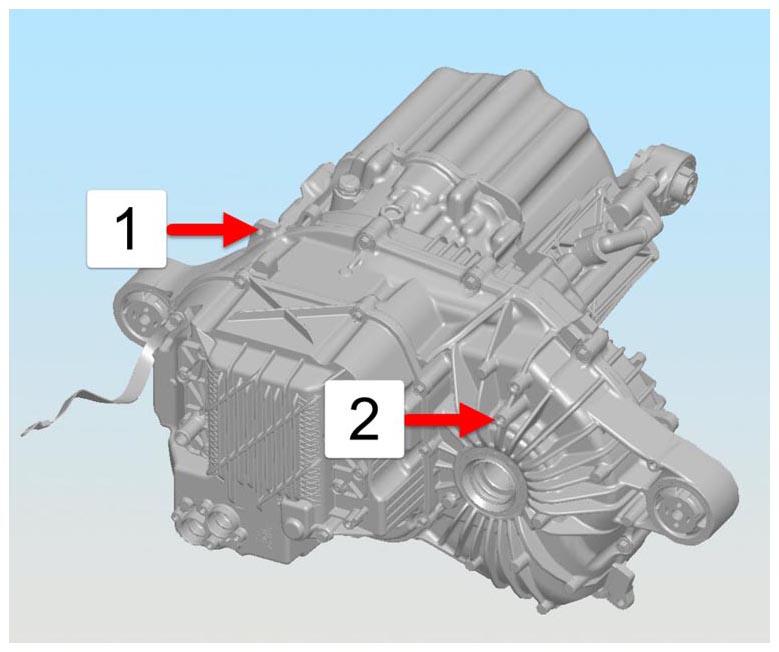
- Attach the blue, red, and yellow sling mounts of the sling tool to the small rear drive unit.
NOTE:
The black sling mount is not used in this procedure.
 Courtesy of TESLA, INC. Courtesy of TESLA, INC.
|
 Courtesy of TESLA, INC. Courtesy of TESLA, INC.
|
| 1 |
Red sling mount |
| 2 |
Blue sling mount |
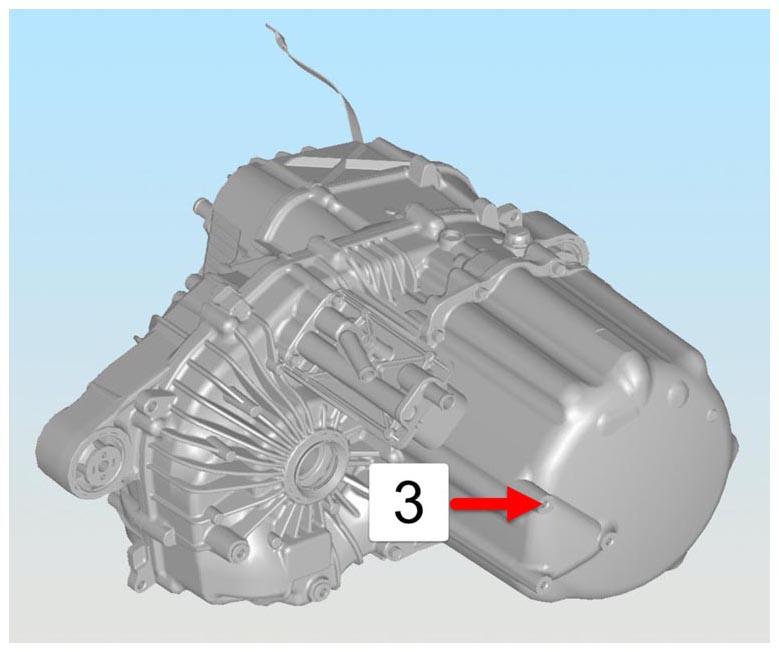
| 3 |
Yellow sling mount |
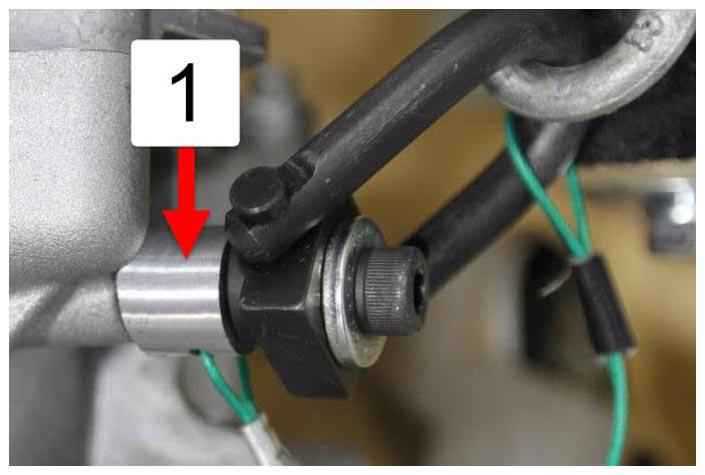
NOTE:
When securing the yellow sling mount, use the hoist ring with the sleeve spacer.
 Courtesy of TESLA, INC. Courtesy of TESLA, INC.
|
- Secure the sling tool to the gantry.
- Lift the small rear drive unit out of the rear subframe.
- Set the small rear drive unit down onto a pallet, and then remove the sling tool from the gantry and from the small rear drive unit.