- Move the vehicle to a 2 post lift. See Raise Vehicle - 2 Post Lift
.
- Perform a cooling system thermal fill drain. See Thermal Fluid - Cooling System (Fill/Drain)
.
- Remove the LH and RH rocker panel scuff plates. See Scuff Plate - Rocker Panel - LH (Remove and Replace)
.
- Remove the LH and RH rocker panel moldings. See Molding - Rocker Panel - LH (Remove and Replace)
.
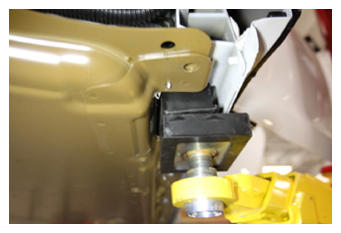
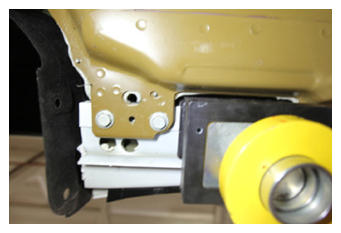
- Position the 2 post lift pads for HV battery removal.
 Courtesy of TESLA, INC. Courtesy of TESLA, INC.
|
 Courtesy of TESLA, INC. Courtesy of TESLA, INC.
|
 Courtesy of TESLA, INC. Courtesy of TESLA, INC.
|
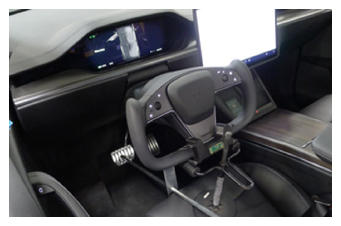
- Set the steering wheel straight ahead, place a protector sheet onto the driver seat, and then install the steering wheel lock.
 Courtesy of TESLA, INC. Courtesy of TESLA, INC.
|
- Remove the rear underhood apron. See Underhood Apron - Rear (Remove and Replace)
.
- Disconnect LV power. See LV Power (Disconnect and Connect)
.
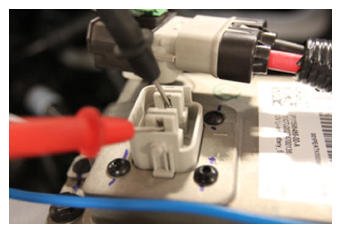
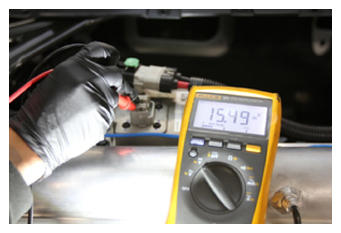
- Set the high voltage multimeter to DC voltage, lightly touch the probes to the auxiliary battery connector contacts, and verify that the multimeter displays a voltage.
NOTE:
Battery voltage is typically 14.5 to 15.5 volts.
 Courtesy of TESLA, INC. Courtesy of TESLA, INC.
|
 Courtesy of TESLA, INC. Courtesy of TESLA, INC.
|
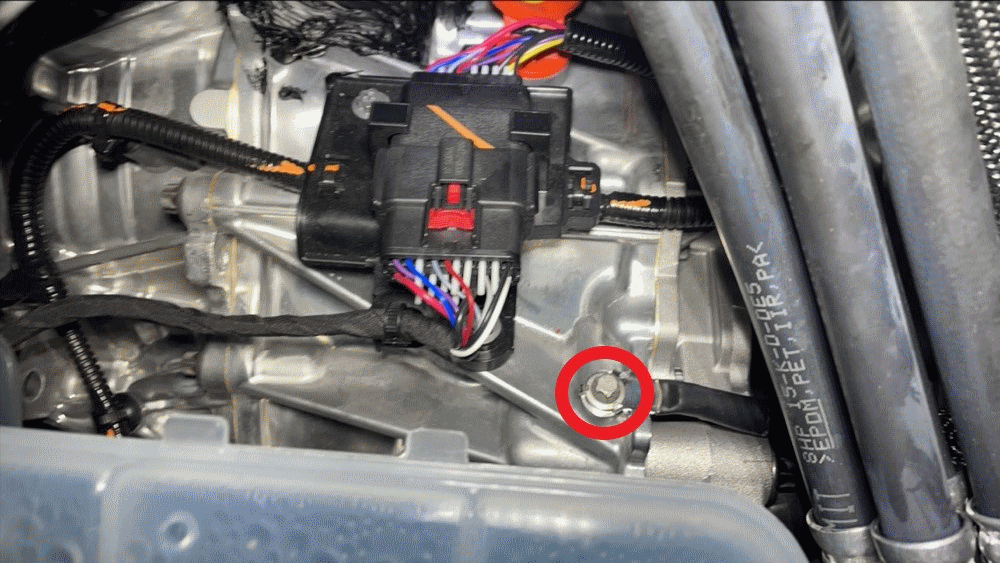
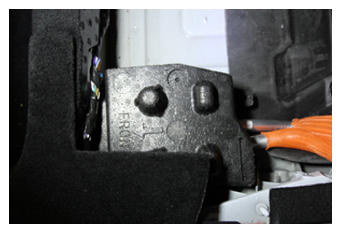
- Remove the bolt that attaches the ground strap to the front drive unit.
NOTE:
The bolt is captive to the ground strap.
 Courtesy of TESLA, INC. Courtesy of TESLA, INC.
|
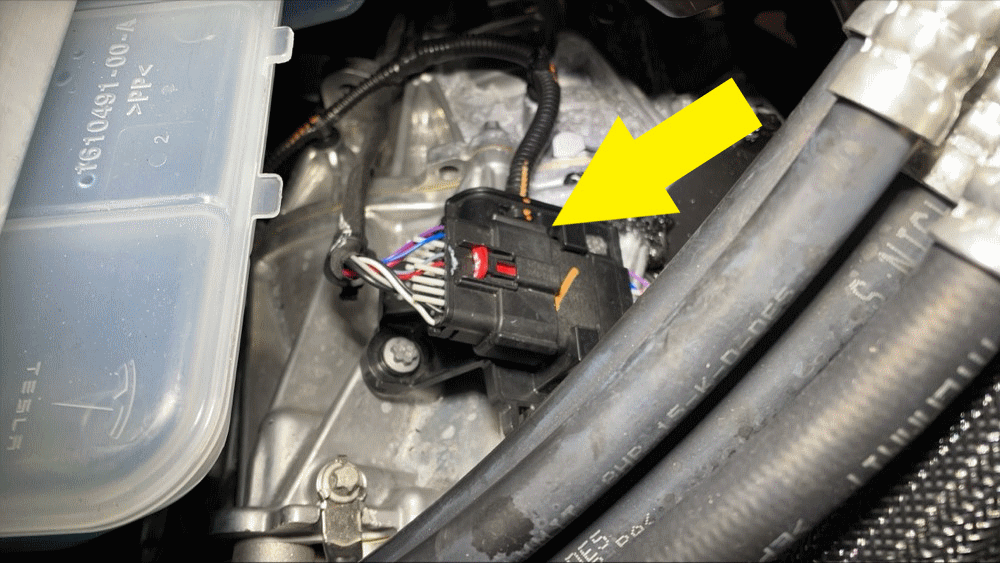
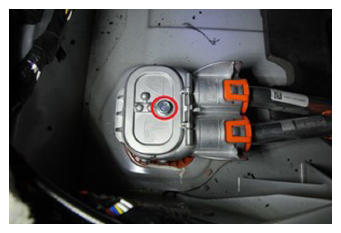
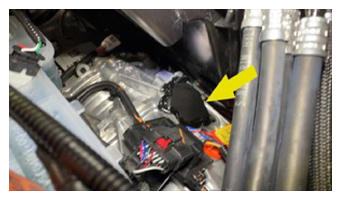
- Pull the red tab, and then pull the tab again to disconnect the frunk harness from the front drive unit harness connector.
 Courtesy of TESLA, INC. Courtesy of TESLA, INC.
|
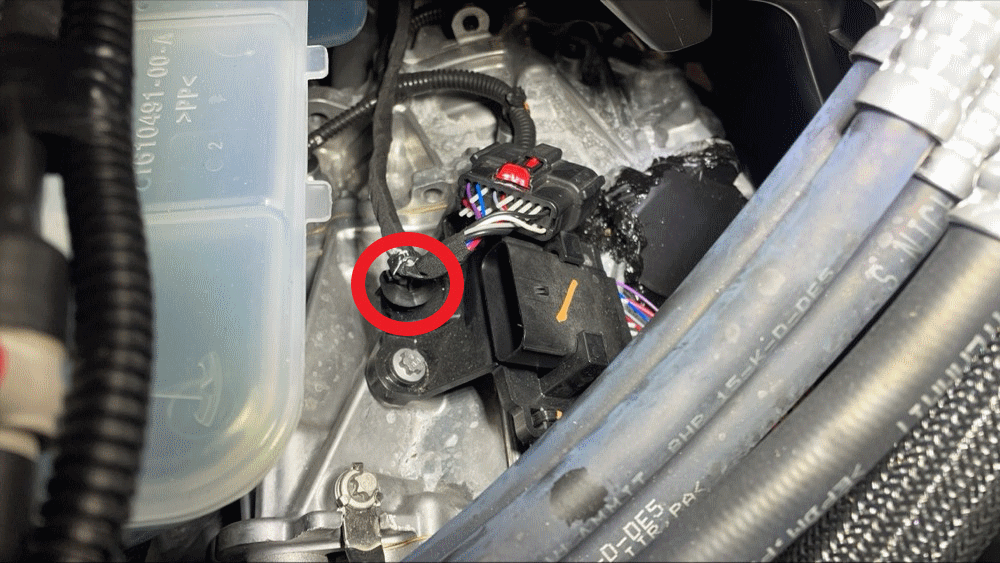
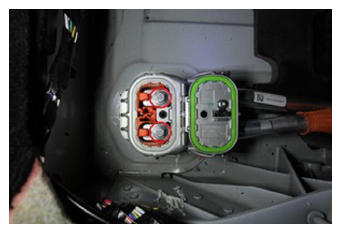
- Release the clip that attaches the frunk harness to the front drive unit.
 Courtesy of TESLA, INC. Courtesy of TESLA, INC.
|
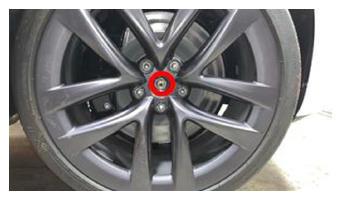
- Loosen the LH and RH front axle nuts.
 Courtesy of TESLA, INC. Courtesy of TESLA, INC.
|
- Remove the LH and RH front wheels. See Wheel (Remove and Install)
.
- Remove the mid aero shield panel. See Panel - Aero Shield - Mid (Remove and Replace)
.
- Perform the vehicle electrical isolation procedure. See Vehicle Electrical Isolation Procedure
.
- Remove the leather glove protectors and the HV insulating gloves.
 Courtesy of TESLA, INC. Courtesy of TESLA, INC.
|
- Remove the LH and RH 2nd row seat side bolsters. See Bolster - Outer - Seat - 2nd Row - LH (Remove and Replace)
.
- Remove the 2nd row lower seat cushion. See Seat Cushion - Lower - 2nd Row (Remove and Replace)
.
- Remove the DC input HV header foam block.
 Courtesy of TESLA, INC. Courtesy of TESLA, INC.
|
- Remove the bolt that secures the charge port busbar connector access door.
 Courtesy of TESLA, INC. Courtesy of TESLA, INC.
|
- Remove the bolts (x2) that attach the charge port busbar connector to the DC input HV header.
 9 N.m (6.6 ft-lbs)
 Courtesy of TESLA, INC. Courtesy of TESLA, INC.
|
- Lift the charge port busbar connector to remove the connector from the DC input HV header.
 Courtesy of TESLA, INC. Courtesy of TESLA, INC.
|
- Remove the LH and RH shear plates. See Shear Plate - Rear Subframe - LH (Remove and Replace)
.
- Remove the front aero shield panel. See Panel - Aero Shield - Front (Remove and Replace)
.
- Remove the front skid plate. See Skidplate - Front (Remove and Replace)
.
- Remove the HV battery. See HV Battery (AWD) (Remove and Install)
.
- Remove the front fascia valance. See Valance - Front Fascia (Remove and Replace)
.
- Remove the front subframe. See Subframe Assembly - Front (Remove and Install)
.
- Remove the LH and RH front halfshafts. See HALFSHAFT - FRONT DRIVE UNIT - LH (REMOVE AND REPLACE) and HALFSHAFT - FRONT DRIVE UNIT - RH (REMOVE AND REPLACE) .
- Remove the front drive unit. See DRIVE UNIT - FRONT (REMOVE AND INSTALL) .
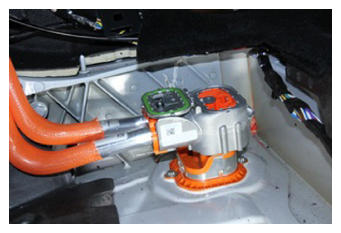
- Release the clip, disconnect the front drive unit inverter hose from the front drive unit inverter, release the clips (x3) that attach the hose to the drive unit, and then remove the hose.
 Courtesy of TESLA, INC. Courtesy of TESLA, INC.
|
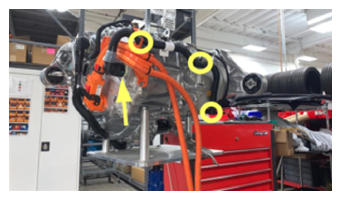
- Release the clips (x2), disconnect the front drive unit inverter to front drive unit heat exchanger hose from the inverter and heat exchanger, release the clips (x5) that attach the hose to the drive unit, and then remove the hose.
 Courtesy of TESLA, INC. Courtesy of TESLA, INC.
|
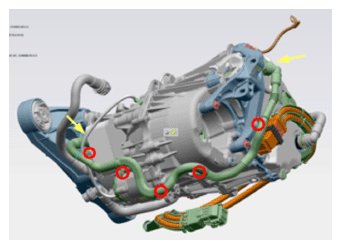
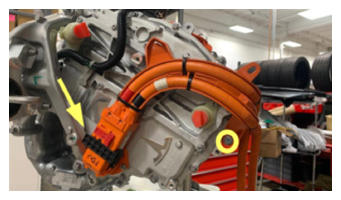
- Slide the red connector locking tab, open the black release lever, and then disconnect the front drive unit HV harness from the front drive unit inverter.
- Remove the bolt that attaches the front drive unit HV harness to the front drive unit, and then remove the harness from the drive unit.
 Courtesy of TESLA, INC. Courtesy of TESLA, INC.
|
- Release the clip that attaches the breather shroud to the front drive unit, and then remove the shroud from the drive unit.
NOTE:
If there is no breather shroud installed, order a new shroud for the replacement front drive unit.
 Courtesy of TESLA, INC. Courtesy of TESLA, INC.
|
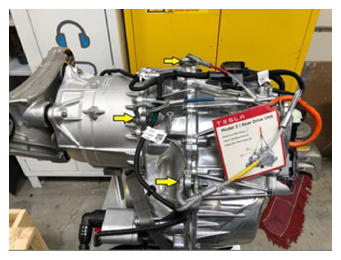
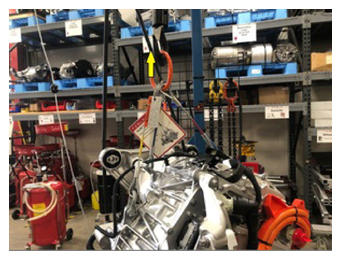
- Use the hooks (x3) to attach the drive unit sling tool to the front drive unit.
NOTE:
Follow the attachment locations for the Model 3 rear drive unit.
 Courtesy of TESLA, INC. Courtesy of TESLA, INC.
|
- Position the transmission jack fixture underneath the gantry.
 Courtesy of TESLA, INC. Courtesy of TESLA, INC.
|
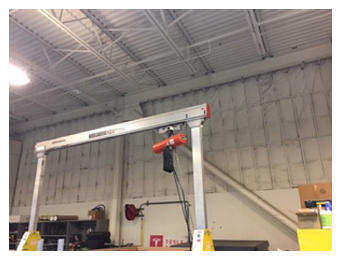
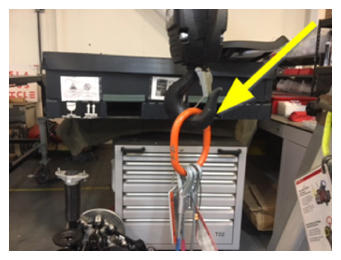
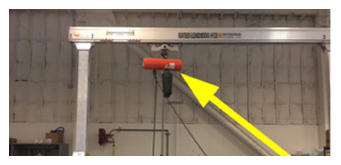
- Attach the drive unit sling tool to the gantry.
 Courtesy of TESLA, INC. Courtesy of TESLA, INC.
|
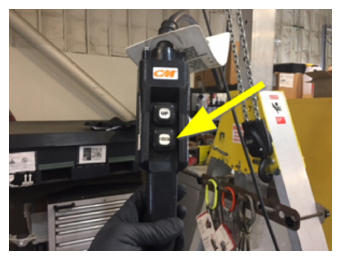
- Use the gantry to raise the drive unit sling tool and lift the front drive unit off of the transmission jack fixture.
 Courtesy of TESLA, INC. Courtesy of TESLA, INC.
|
- Position the empty front drive unit crate underneath the front drive unit.
NOTE:
Use a pallet if no empty crate is available.
 Courtesy of TESLA, INC. Courtesy of TESLA, INC.
|
- Lower the front drive unit into the front drive unit crate.
 Courtesy of TESLA, INC. Courtesy of TESLA, INC.
|
- Remove the drive unit sling tool from the front drive unit.