Module - Body Controller - LH - Remove And Replace: Install
- Install LH body controller into vehicle
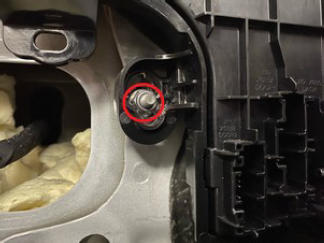
- Install a new nut that attaches the LH body controller to the body.
 6 N.m (4.4 lbs-ft)
- 10 mm deep socket
- Flex head ratchet/flex head torque wrench
- Ratchet/torque wrench
 Courtesy of TESLA, INC. Courtesy of TESLA, INC.
|
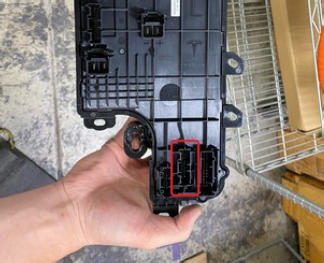
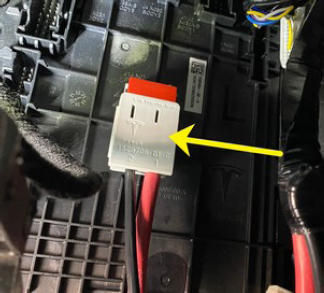
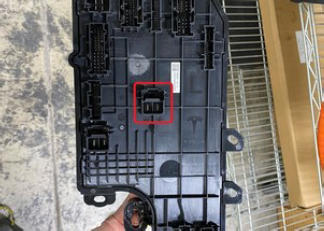
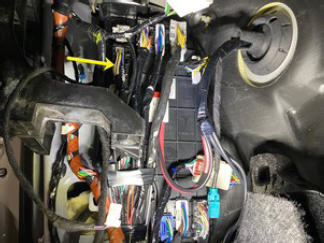
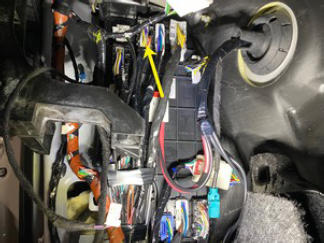
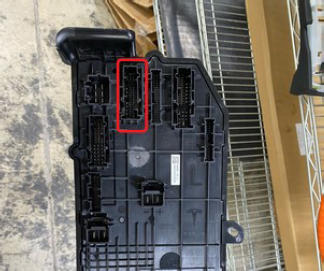
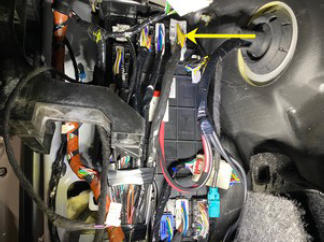
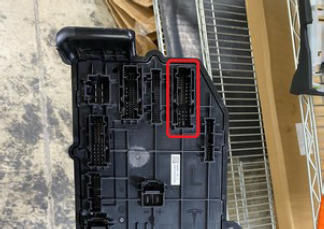
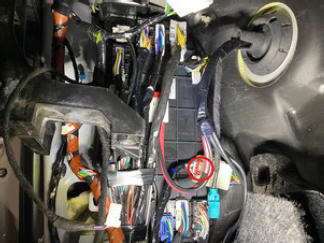
- Connect the harness electrical connector.
 Courtesy of TESLA, INC. Courtesy of TESLA, INC.
|
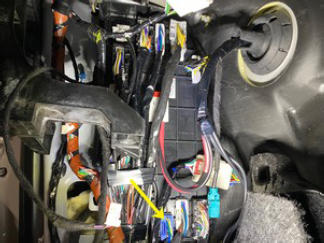
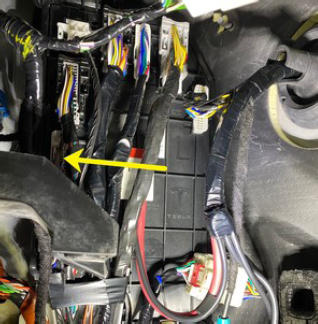
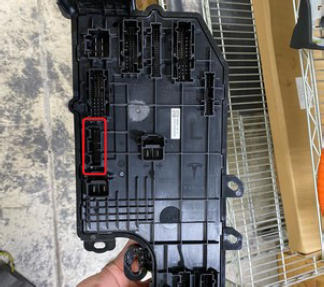
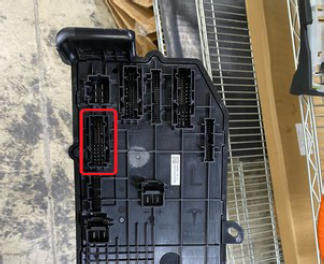
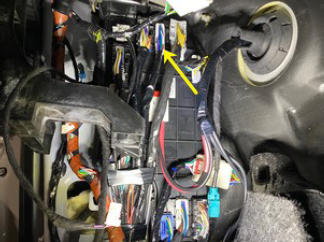
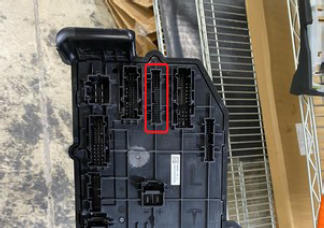
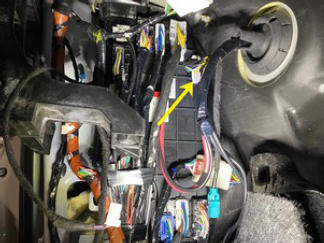
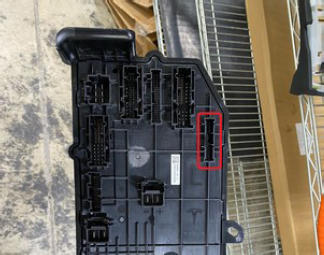
- Connect the dash electrical connector to the LH body controller module.
 Courtesy of TESLA, INC. Courtesy of TESLA, INC.
|
 Courtesy of TESLA, INC. Courtesy of TESLA, INC.
|
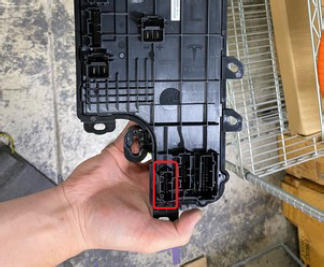
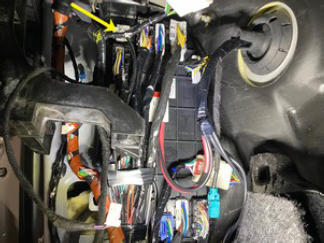
- Connect the door electrical connector to the LH body controller module.
 Courtesy of TESLA, INC. Courtesy of TESLA, INC.
|
 Courtesy of TESLA, INC. Courtesy of TESLA, INC.
|
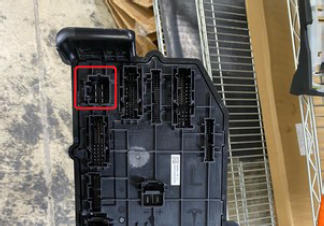
- Connect the door 2 electrical connector to the LH body controller module.
 Courtesy of TESLA, INC. Courtesy of TESLA, INC.
|
 Courtesy of TESLA, INC. Courtesy of TESLA, INC.
|
- Connect the power electrical connector to the LH body controller module.
 Courtesy of TESLA, INC. Courtesy of TESLA, INC.
|
 Courtesy of TESLA, INC. Courtesy of TESLA, INC.
|
- Connect the body 6 electrical connector to the LH body controller module.
 Courtesy of TESLA, INC. Courtesy of TESLA, INC.
|
 Courtesy of TESLA, INC. Courtesy of TESLA, INC.
|
- Connect the body 2 electrical connector to the LH body controller module.
 Courtesy of TESLA, INC. Courtesy of TESLA, INC.
|
 Courtesy of TESLA, INC. Courtesy of TESLA, INC.
|
- Connect the body 4 electrical connector to the LH body controller module.
 Courtesy of TESLA, INC. Courtesy of TESLA, INC.
|
 Courtesy of TESLA, INC. Courtesy of TESLA, INC.
|
- Connect the body 5 electrical connector to the LH body controller module.
 Courtesy of TESLA, INC. Courtesy of TESLA, INC.
|
 Courtesy of TESLA, INC. Courtesy of TESLA, INC.
|
- Connect the body 3 electrical connector to the LH body controller module.
 Courtesy of TESLA, INC. Courtesy of TESLA, INC.
|
 Courtesy of TESLA, INC. Courtesy of TESLA, INC.
|
- Connect the body 1 electrical connector to the LH body controller module.
 Courtesy of TESLA, INC. Courtesy of TESLA, INC.
|
 Courtesy of TESLA, INC. Courtesy of TESLA, INC.
|
- Connect the understood storage unit electrical connector to the LH body controller module.
 Courtesy of TESLA, INC. Courtesy of TESLA, INC.
|
 Courtesy of TESLA, INC. Courtesy of TESLA, INC.
|
- Fasten the clip that attaches the harness to the LH body controller.
 Courtesy of TESLA, INC. Courtesy of TESLA, INC.
|
- Return the LH main carpet back in place.
- Install the driver knee airbag. See Knee Airbag - Driver (Remove and Replace)
.
- Install the driver outboard footwell cover. See Cover - Footwell - Outboard - Driver (Remove and Replace)
.
- Connect LV power. See LV Power (Disconnect And Connect)
.
- Connect a laptop with Toolbox 3 to the vehicle. See Toolbox 3 (Connect and Disconnect)
.
- Unlock the vehicle gateway. See Gateway (Unlock)
.
- In Toolbox 3, click the Actions
tab, type "CAN Redeploy" into the search field, click SERVICE CAN REDEPLOY,
click Run,
and allow the routine to complete.
- Install the rear underhood apron. See Underhood Apron - Rear (Remove and Replace)
.
- Install the LH lower A-pillar trim. See Trim - A-Pillar - Lower - LH (Remove and Replace)
.
- Install the LH middle A-pillar trim. See Trim - A-Pillar - Middle - LH (Remove and Replace)
.
- Install the LH IP end cap. See End Cap - Instrument Panel - LH - Remove And Replace
.
- Install the LH front sill panel trim. See Trim - Sill Panel - Front - LH - Remove And Replace
.
- Move the LH front seat back to its original position.
- In Toolbox 3, click the Actions
tab, type "VCLEFT replacement" into the search field, click PROC_VCLEFT_X_POST-REPLACEMENT-PROCEDURE, click Run
, and allow the routine to complete.
- Disconnect Toolbox and remove the laptop from the vehicle. See Toolbox 3 (Connect and Disconnect)
.