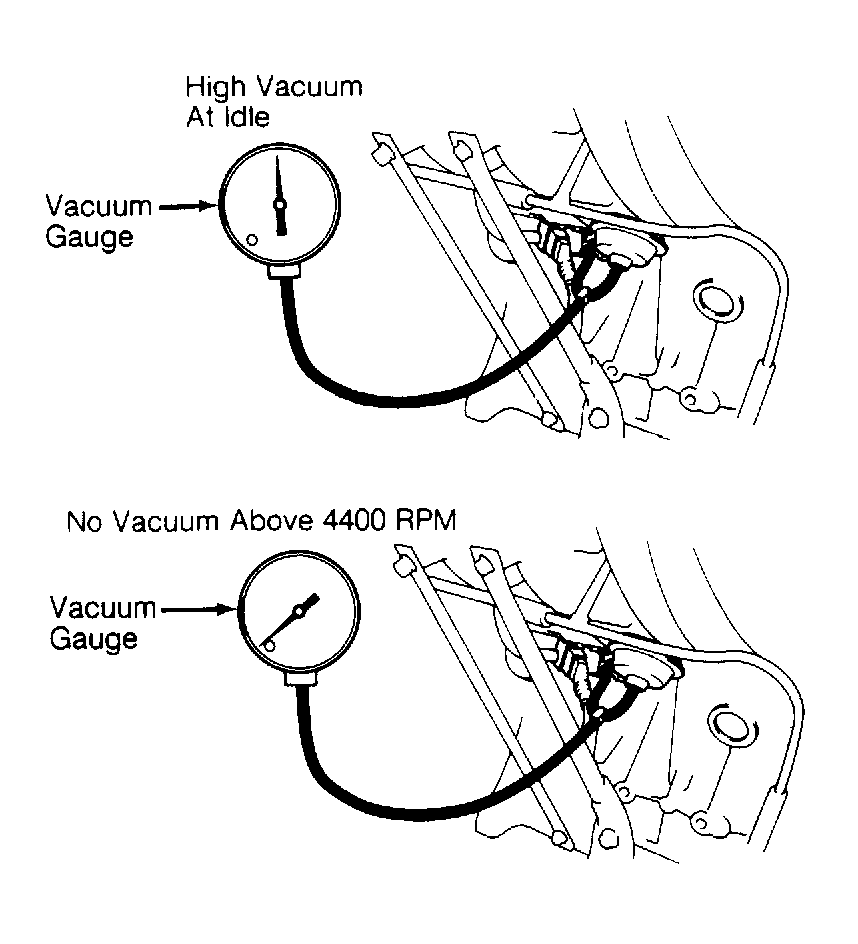
Variable Induction System Check
- Tee a vacuum gauge into vacuum line between the vacuum switching valve and the Toyota Variable Induction System (T-VIS) diaphragm. Connect tachometer to engine. See ADJUSTMENTS
article for correct tachometer attachment.
- Start engine and warm to normal operating temperature. Vacuum gauge should show high vacuum at idle (internal throttle valve closed).
- Increase engine speed to above 5000 RPM on Corolla and MR2, or 4400 on Celica. Vacuum gauge should indicate zero. If not, test vacuum switching valve and use hand held vacuum pump to test if T-VIS diaphragm holds vacuum.
 Courtesy of © TOYOTA, LICENSE AGREEMENT TMS1002
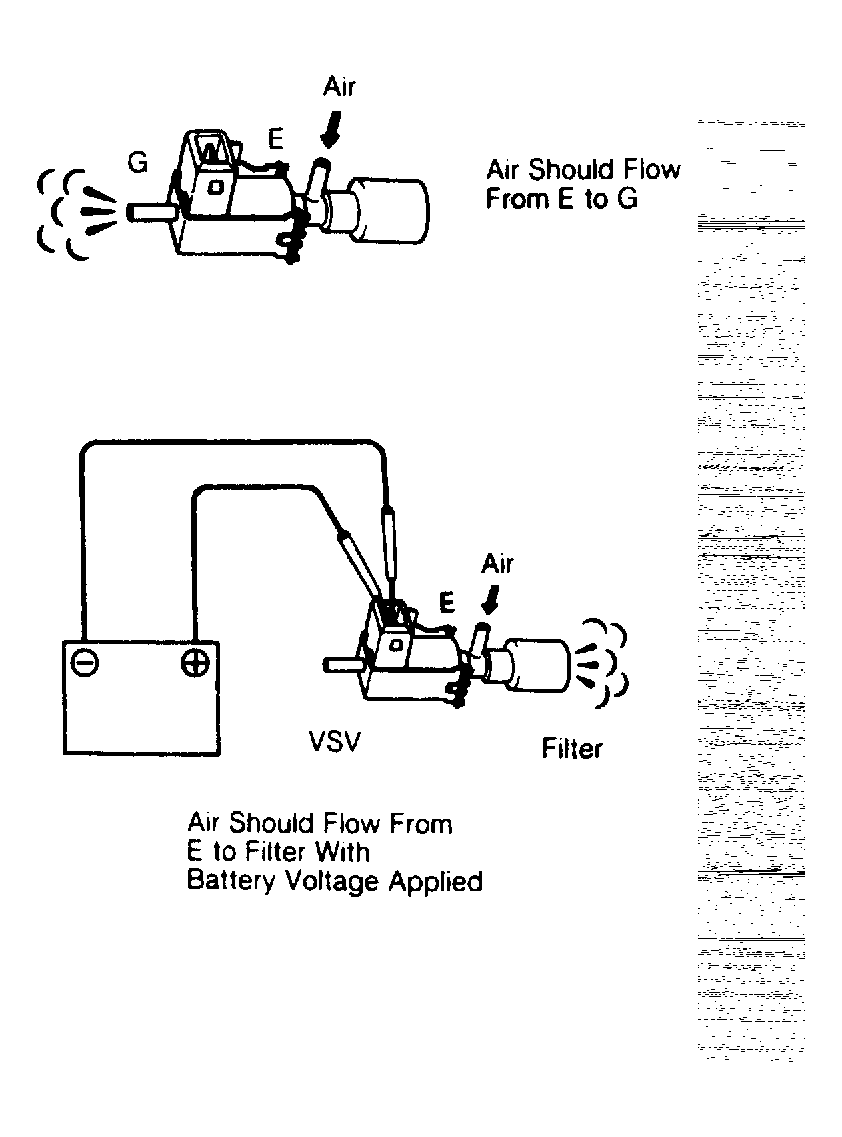
- To test vacuum switching valve, remove valve from vehicle. On Celica (3S-GE), valve is on top of cylinder head near No. 2 spark plug; on Celica (3S-GTE), valve is top of the intake manifold.
- Ensure resistance across vacuum switching valve wiring terminals is 33-39 ohms. Ensure there is no continuity between wiring terminals and body of valve. To check air flow through valve.
 Courtesy of © TOYOTA, LICENSE AGREEMENT TMS1002
 Courtesy of © TOYOTA, LICENSE AGREEMENT TMS1002