Rear Console Removal/Installation
Rear Console Removal/Installation
Special Tools Required
- KTC trim tool set SOJATP2014*
NOTE:
- Use the appropriate tool from the KTC trim tool set to avoid damage when removing components.
- Take care not to scratch the front seat or related parts.
1. Remove these items:
- Center console Center Console Removal/Installation
- Rear tray (except CR model) Interior Trim Removal/Installation - Rear Tray Area (Except CR model)
- Rear cover (CR model) Interior Trim Removal/Installation - Rear Tray Area (CR model)
- Roll bar lower trim, both sides Interior Trim Removal/Installation - Seat Side Area
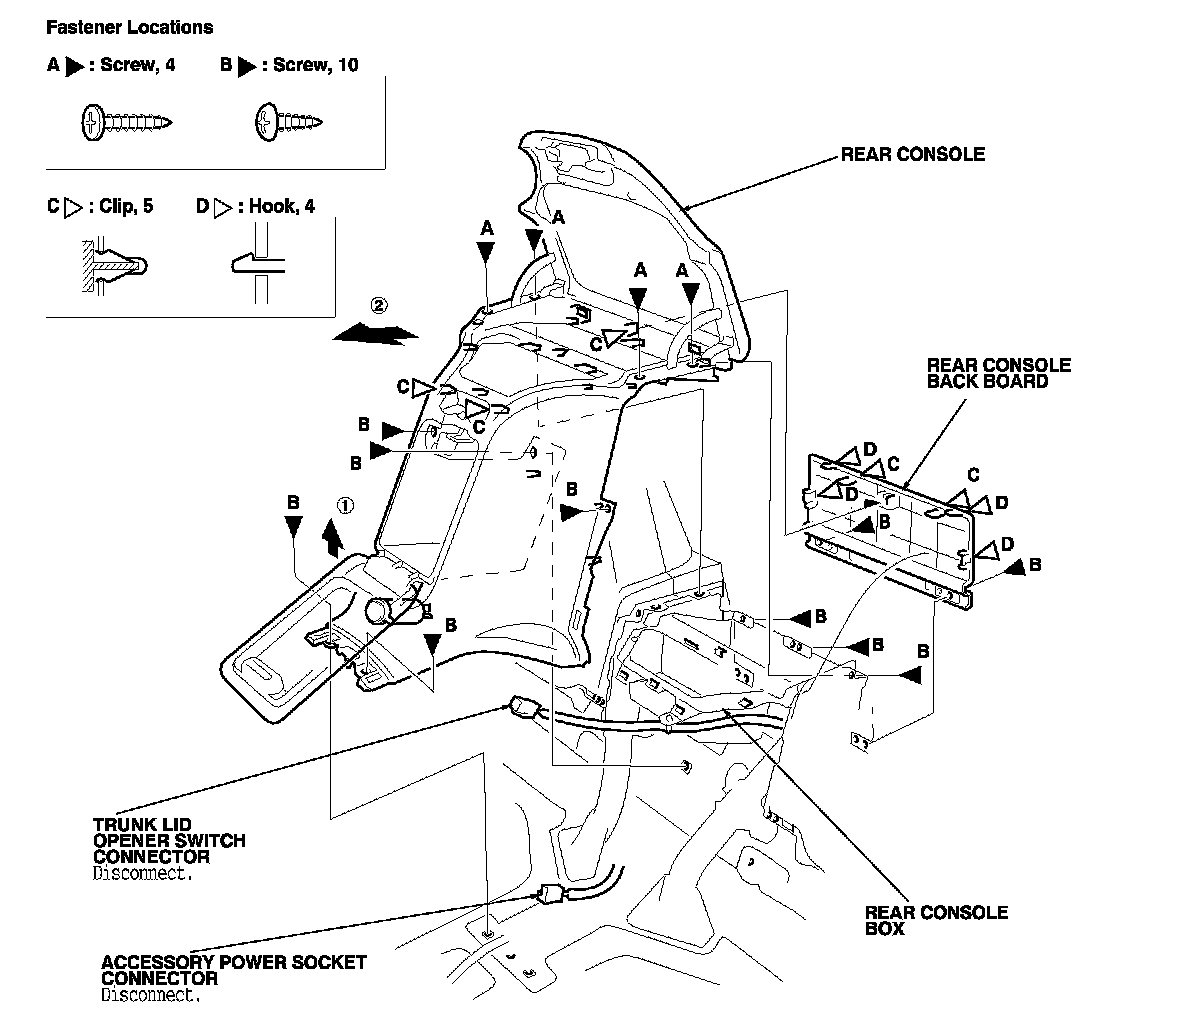
2. Remove the rear console as shown.
3. Install the rear console in the reverse order of removal, and note these items:
- If the clips are damaged or stress-whitened, replace them with new ones.
- Make sure the connectors are plugged in properly.
- Push the clips into place securely.