Communication Interface Module Replacement (Z06)
WARNING: This page is about a different car, the 2007 Chevrolet Corvette. However, it is still accessible from the selected car via links, so may be relevant.
 Courtesy of GENERAL MOTORS CORP.
 Communication Interface Module Replacement (Z06)
| Callout |
Component Name |
|
Preliminary Procedure
- Remove the right hand side front floor panel carpet. Refer to Front Floor Panel Carpet Replacement
.
|
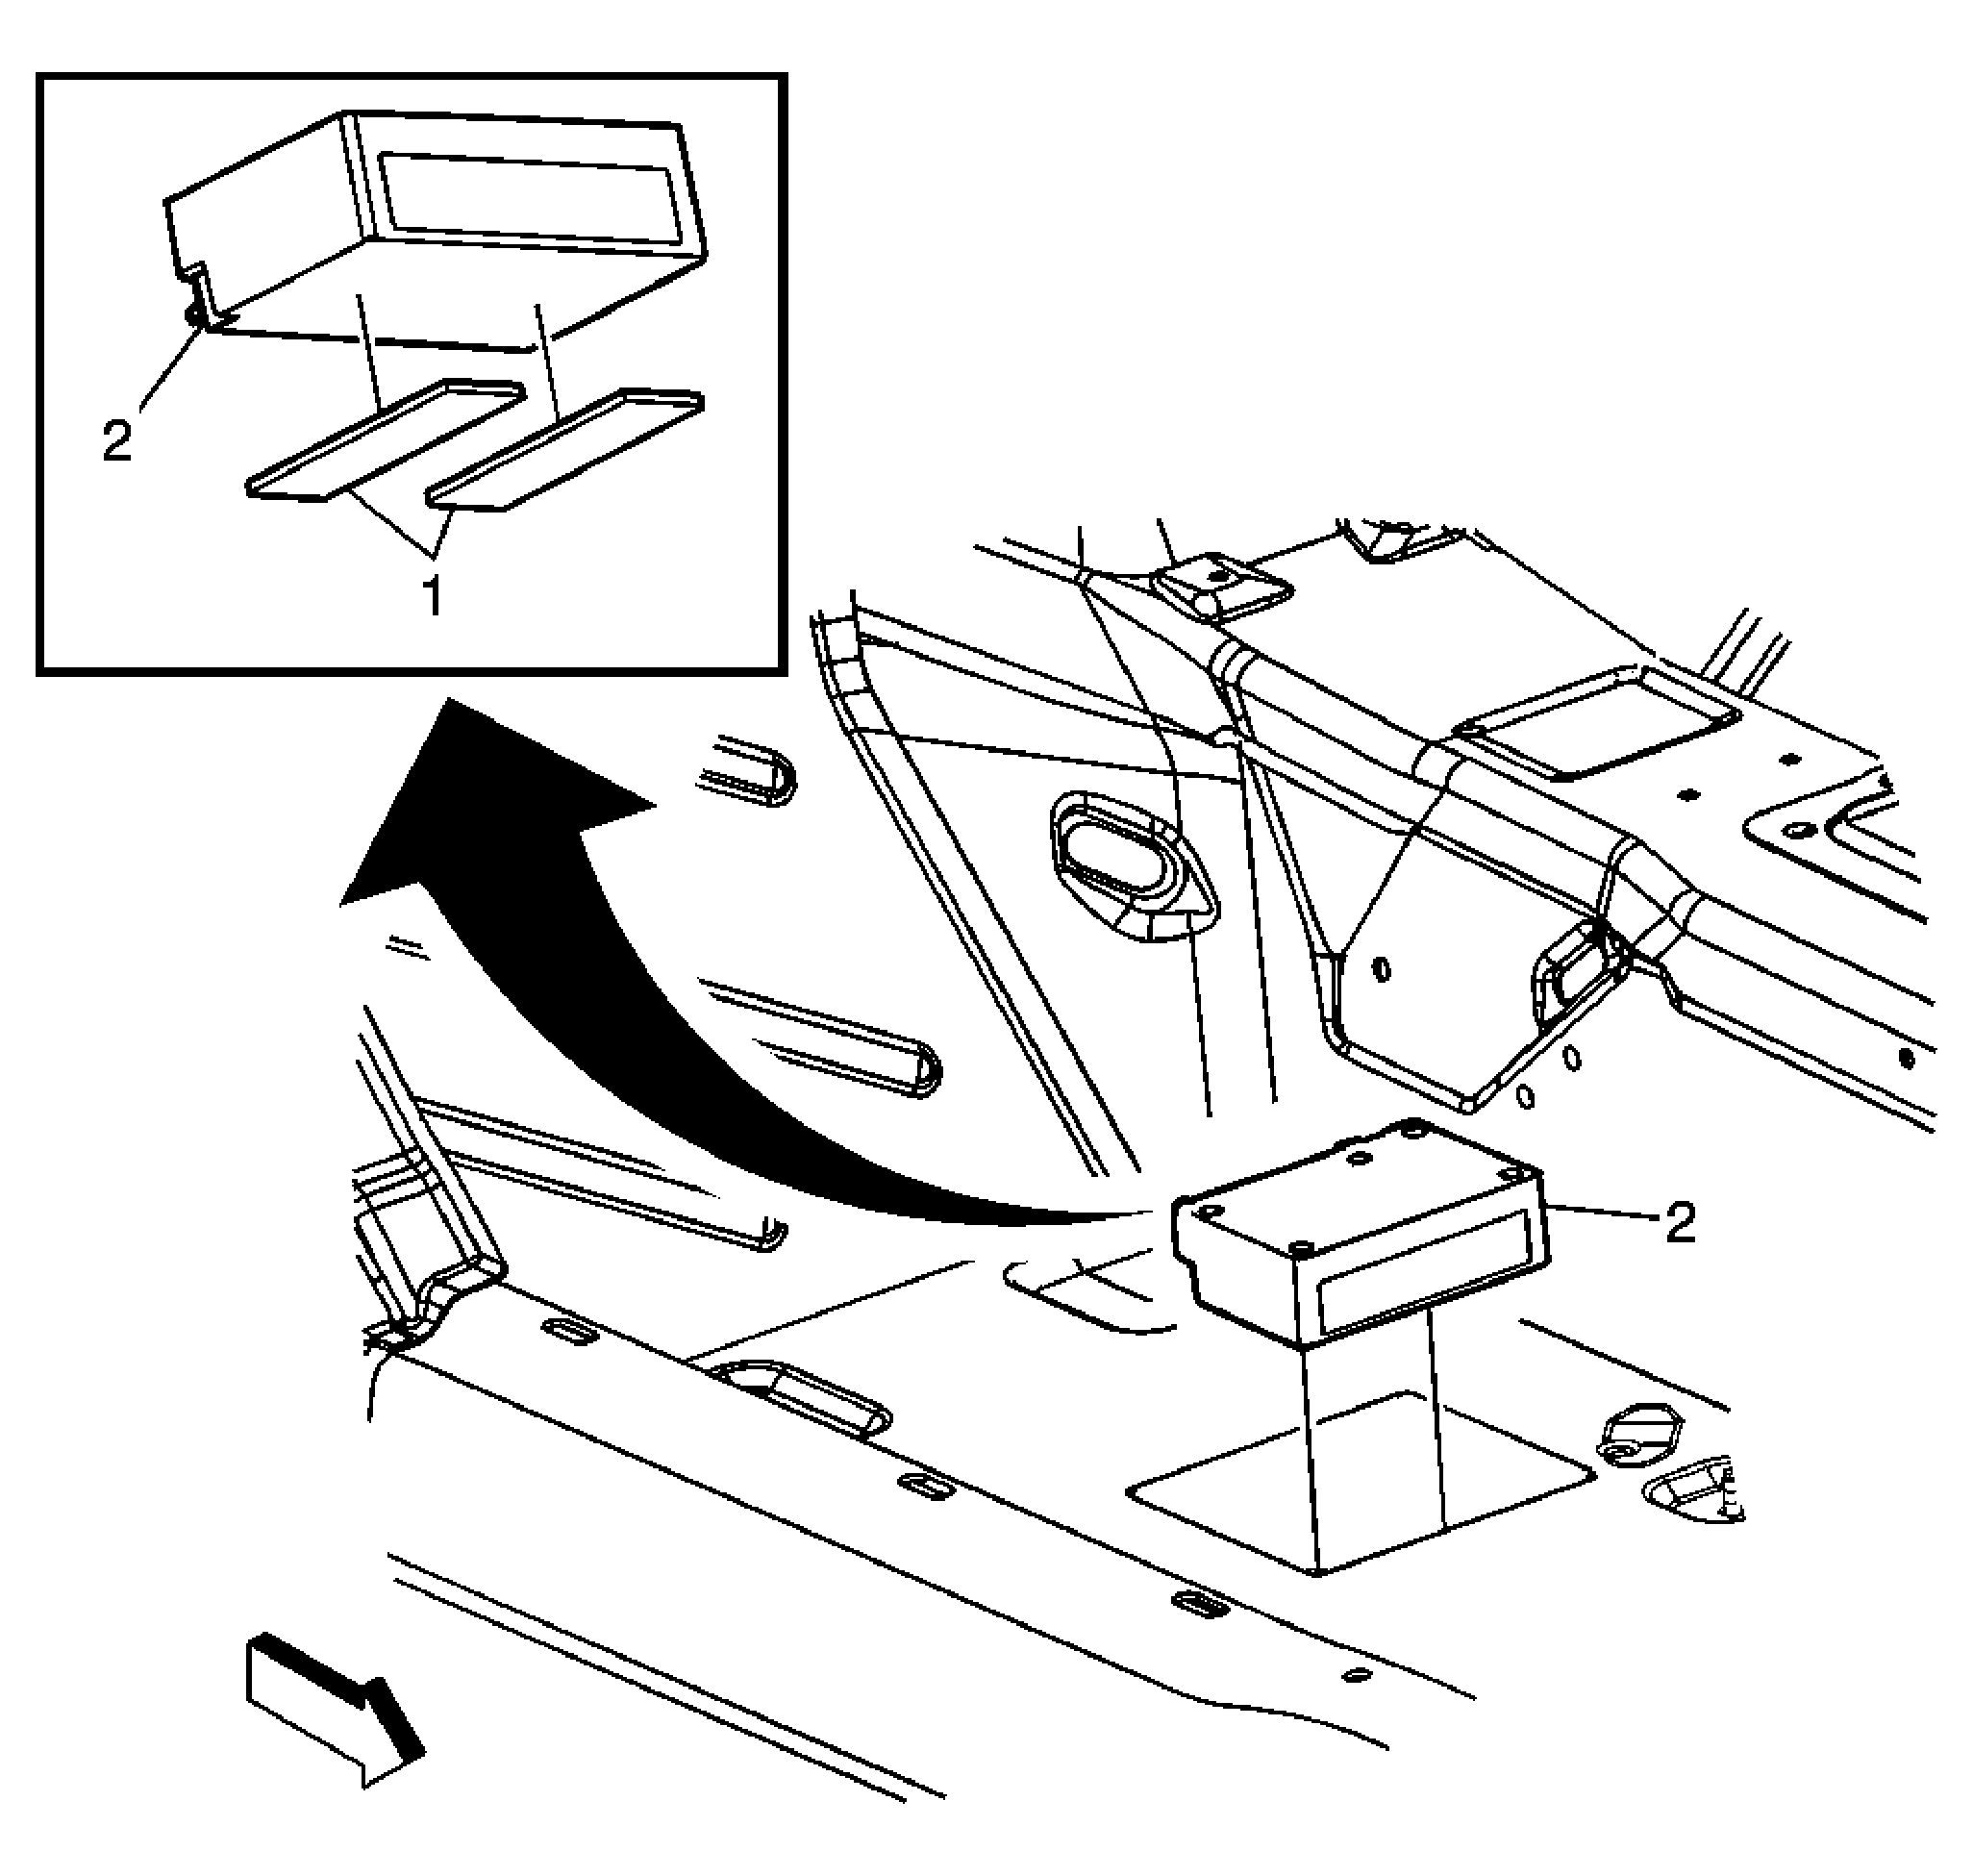
| 1 |
Tape (Qty: 2)
Procedure
- Wipe area of module installation with alcohol based solvent prior to module installation.
- Module to be positioned along the forward edge of scribe marks with the connections facing rearward.
- Remove backing from tape prior to installation.
|
| 2 |
Communication Interface Module Assembly
Procedure
- Disconnect the electrical connectors.
- Reprogram the communication interface module if replaced. Refer to Control Module References
.
- When replacing the VCIM, record the 11-digit electronic serial number (ESN) and the 10-digit station identification (STID) number from the label on the new VCIM.
Tip:
- The vehicle communication interface module (VCIM) has a specific set of unique numbers that tie the module to each vehicle. These numbers, the 10-digit station identification (STID) and the 11-digit electronic serial number (ESN), are used by the National Cellular Network and OnStar® to identify the specific vehicle. Because these numbers are tied to the vehicle identification number of the vehicle, you must never exchange these parts with those of another vehicle.
- After replacing the VCIM, you must reconfigure the OnStar® system. Failure to reconfigure the system will result in an additional customer visit for repair. In addition, pressing and holding the white dot button on the key pad will NOT reset this version of the OnStar® system. This action will cause a DTC to set.
- Reconfigure the OnStar® system. Refer to Control Module References
for programming and setup information.
|