Power Liftgate Module Replacement
REMOVAL1. Disconnect and isolate the negative battery cable.
2. Remove left D-pillar trim panel from the vehicle. Refer to Body for the procedure.
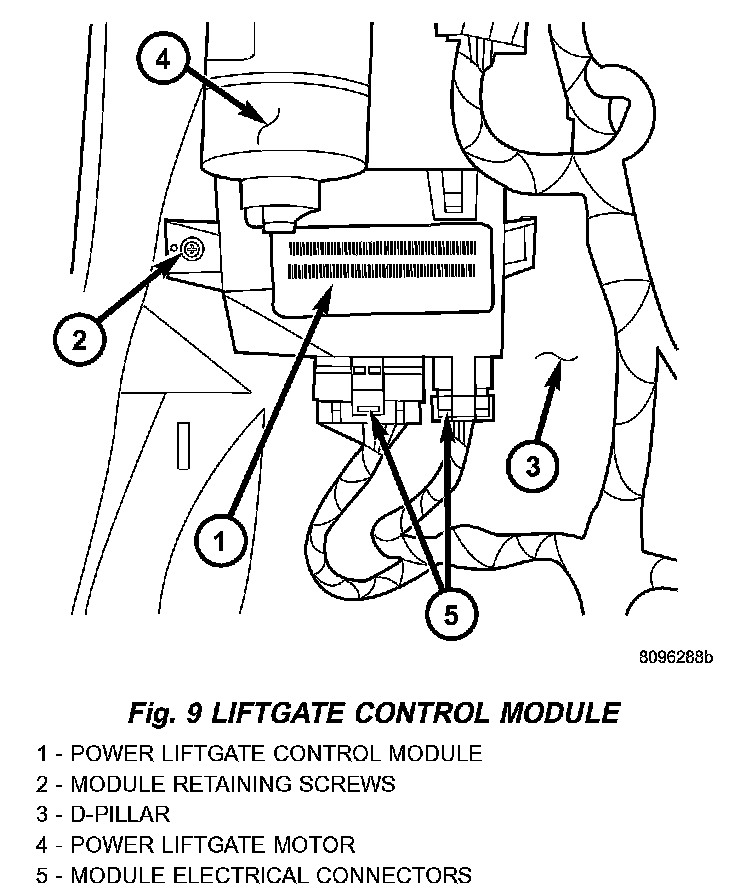
Fig.9 Liftgate Control Module:
3. Disconnect the wire harness connections from the PLG motor assembly.
4. Remove the screw holding the PLG control module to the D-pillar.
5. Remove the PLG control module from the vehicle.
INSTALLATION
1. Install the PLG control module on the D-pillar and install retaining screw. Torque the screw to 14.5 in. lbs.
2. Connect the wire harness connections on the PLG control module. Be certain to slide connector locks to the locked position.
3. Install the D-pillar trim panel on the vehicle. Refer to the Body section for the procedure.
4. Connect the negative battery cable.
5. Using an appropriate scan tool, check any erase any PLG control module diagnostic trouble codes.
6. Verify PLG system operation. Cycle the PLG through one complete open and close cycle, this will allow the PLG control module to relearn its cycle with the new components.