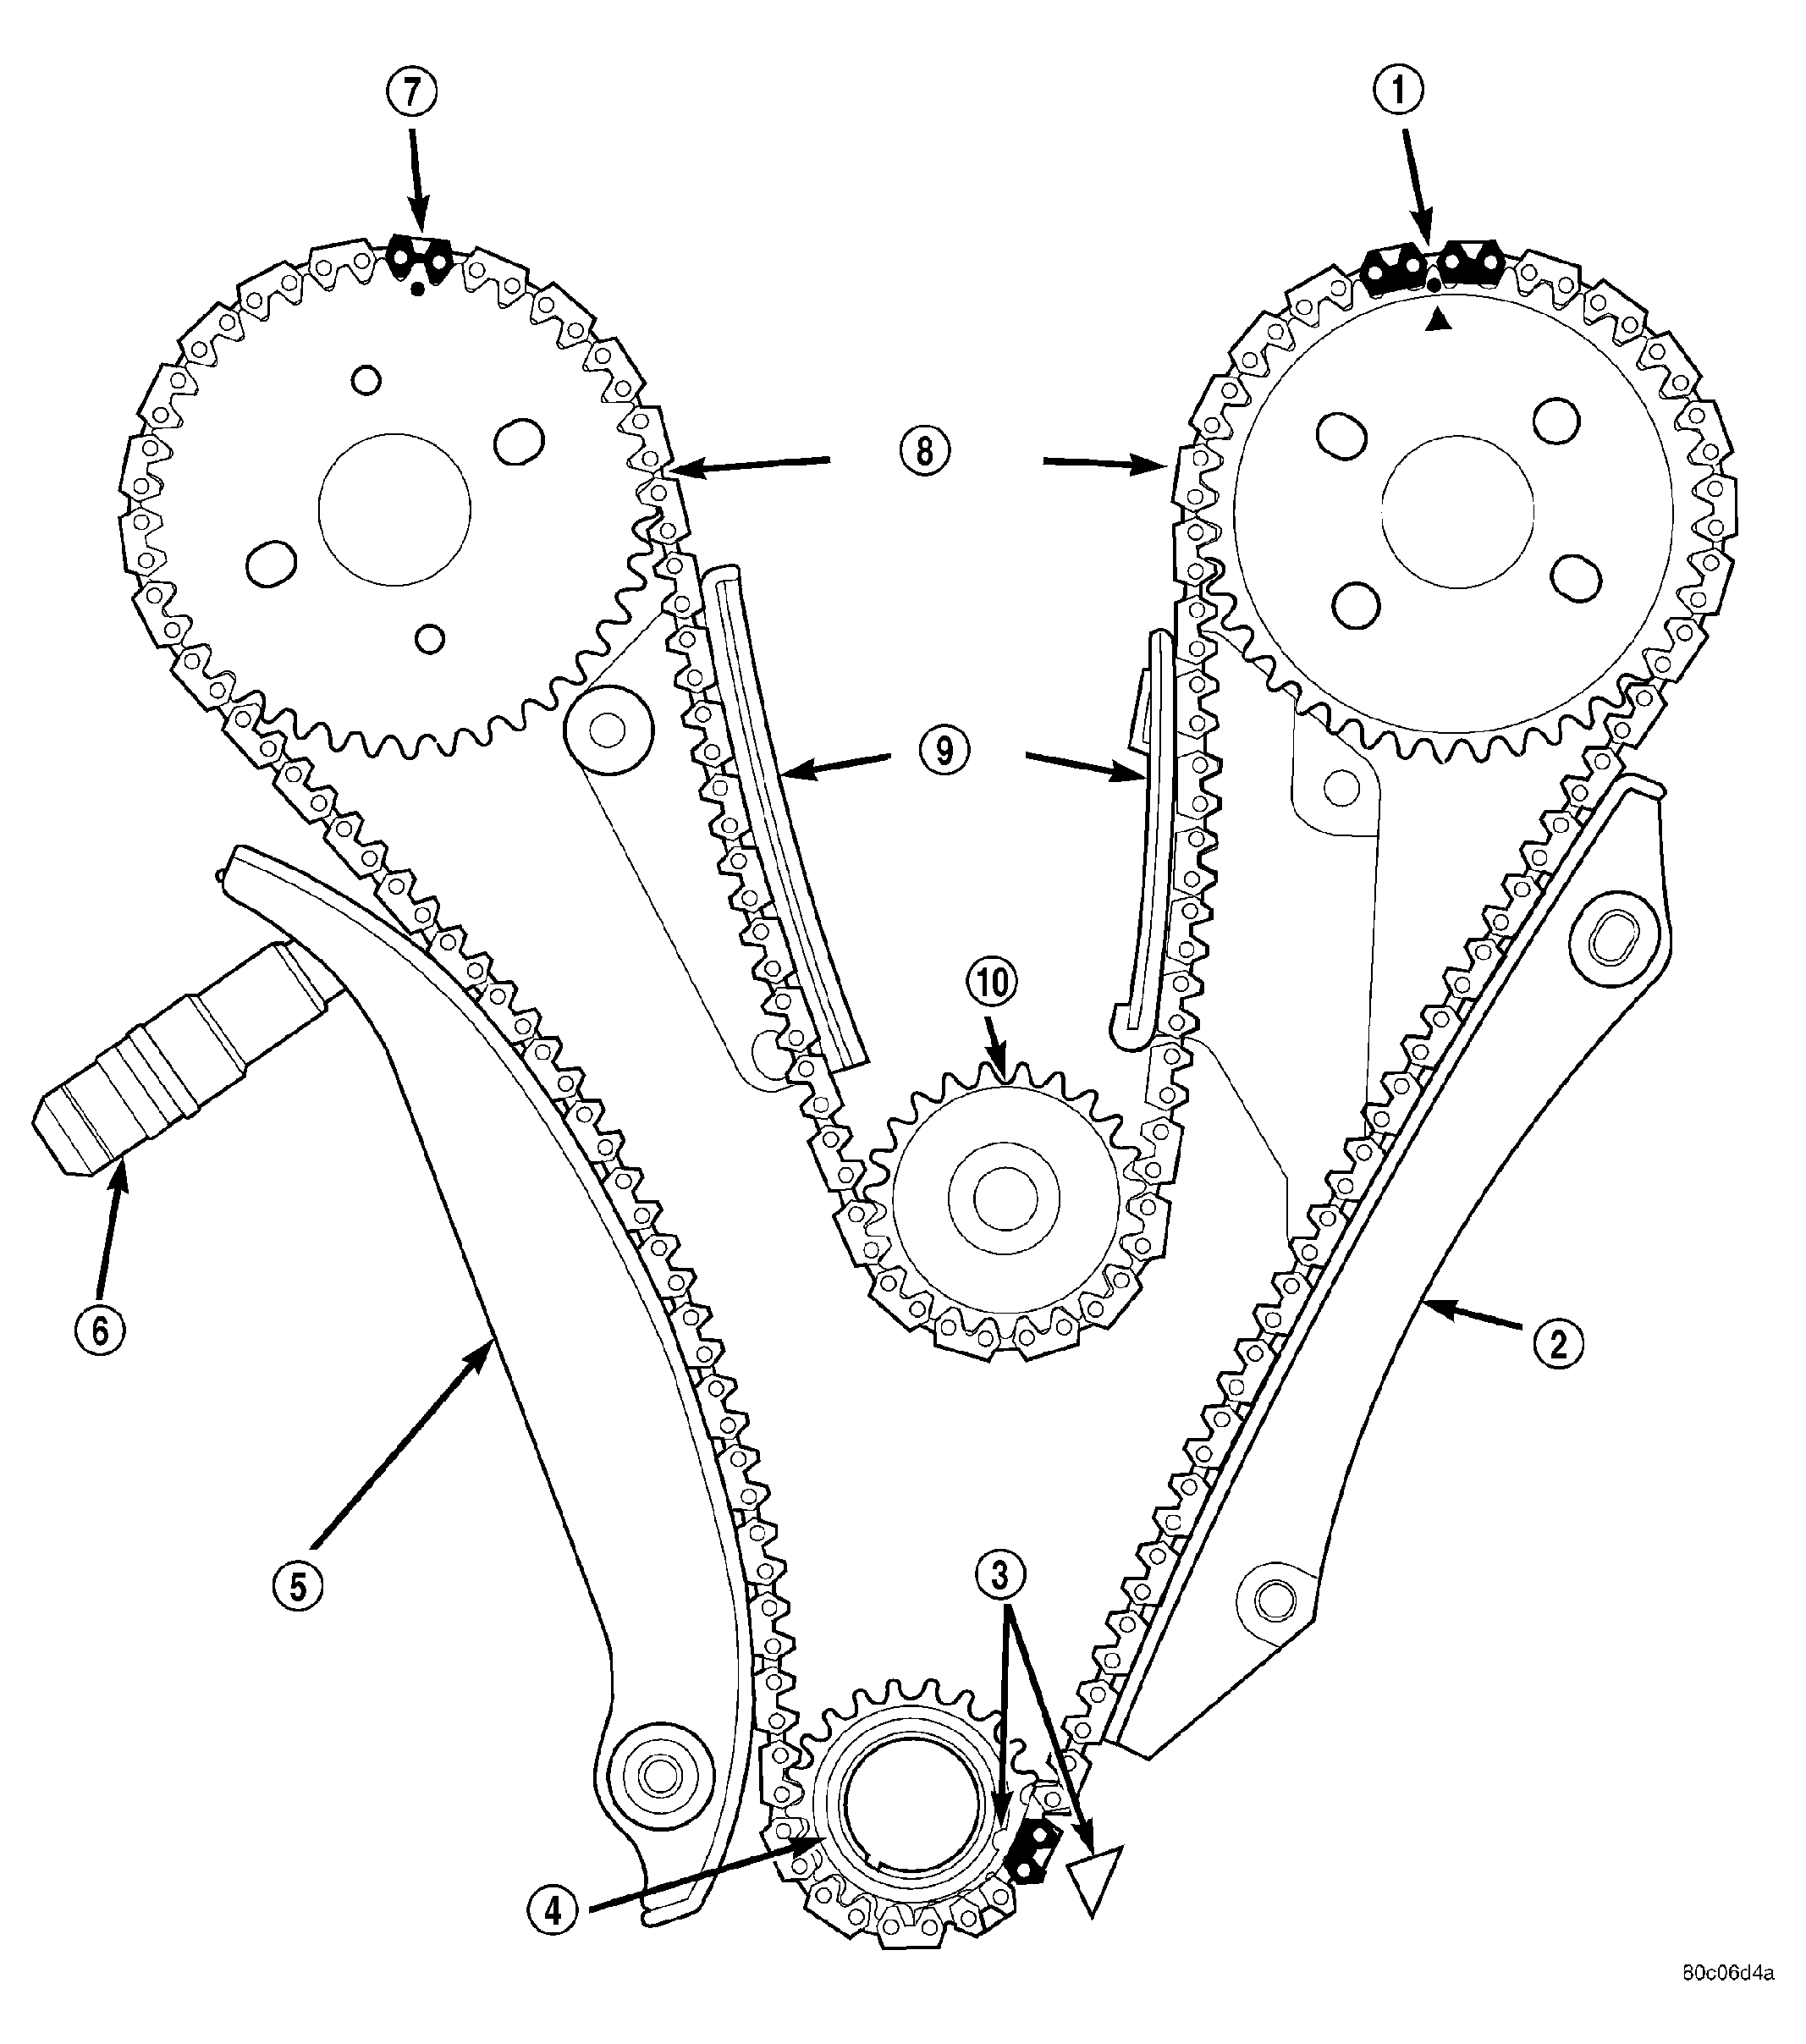
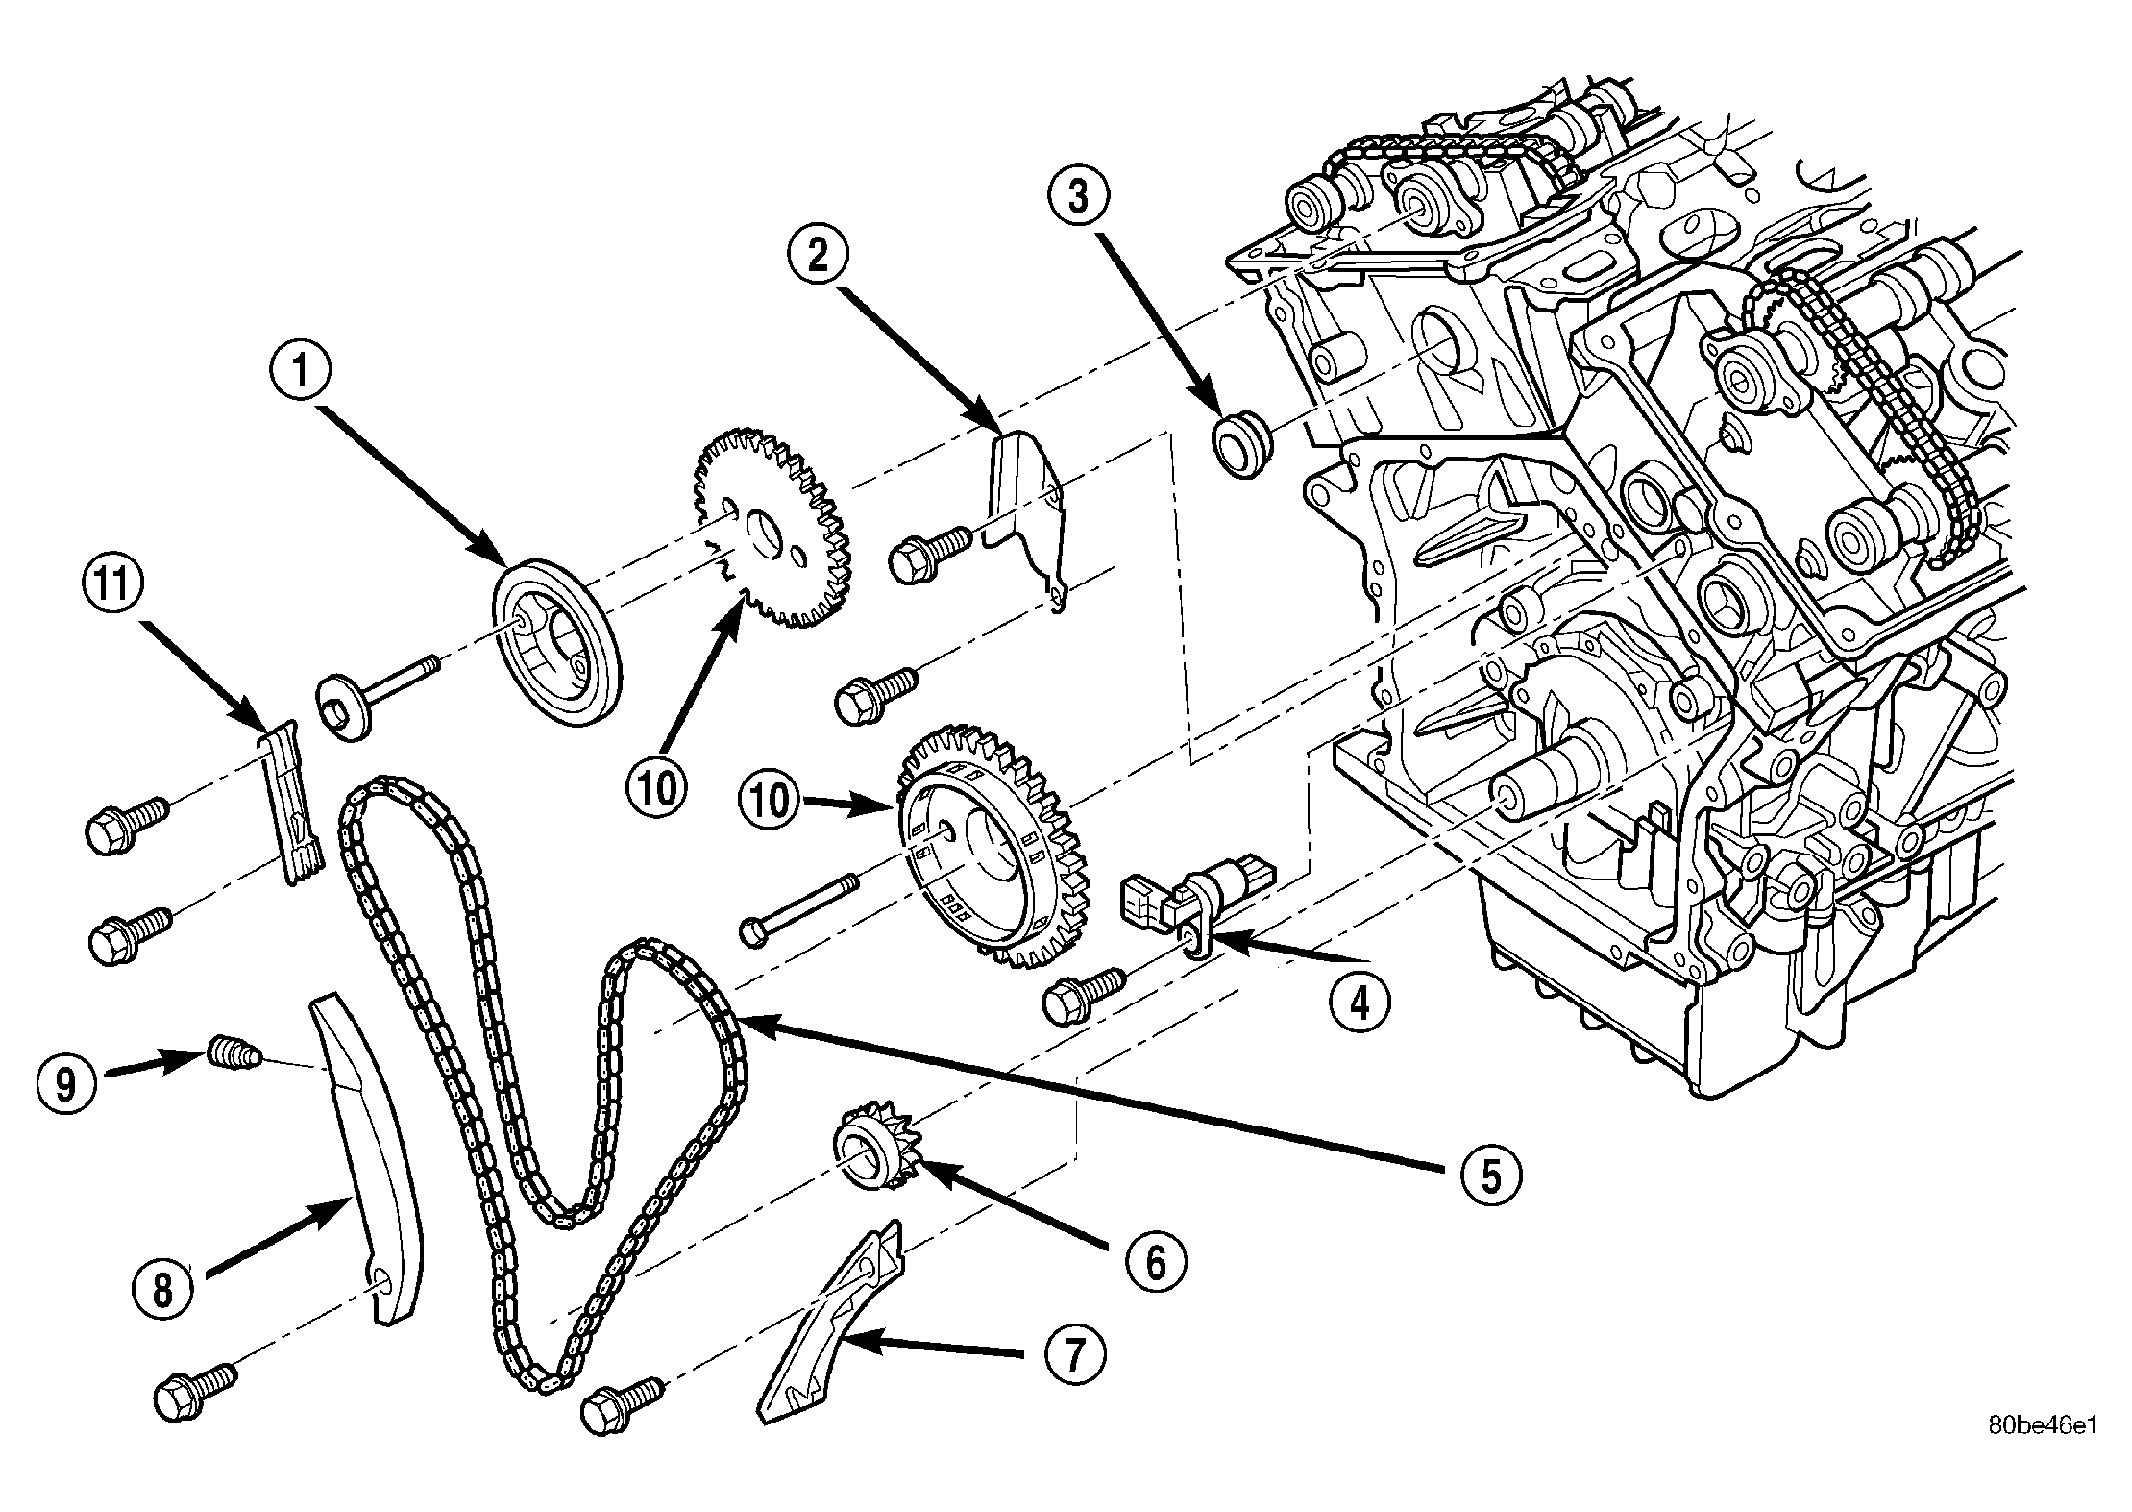
- Inspect all sprockets (4),(9),(11) and chain guides (2),(5),(10). Replace if worn.
- For crankshaft sprocket installation procedures. See INSTALLATION .
- If removed, install right and left side short chain guides (11). Tighten attaching bolts to 28 N.m (250 in. lbs.).
- Align crankshaft sprocket timing mark to the mark on oil pump housing(3).
NOTE:
Lubricate timing chain and guides with engine oil before installation.
- Place left side primary chain sprocket onto the chain so that the timing mark is located in between the two (plated) timing links (1).
 Courtesy of CHRYSLER LLC
- Lower the primary chain with left side sprocket through the left cylinder head opening.
NOTE:
The camshaft sprockets can be allowed to float on the camshaft hub during installation.
- Loosely position left side camshaft sprocket over camshaft hub.
- Align timing (plated) link to the crankshaft sprocket timing mark (3).
- Position primary chain onto water pump drive sprocket (11).
- Align right camshaft sprocket timing mark to the timing (plated) link on the timing chain (8) and loosely position over camshaft hub.
- Verify that all chain timing (plated) links are properly aligned to the timing marks on all sprockets.
- Install left side lower chain guide (2) and tensioner arm (5). Tighten attaching bolts to 28 N.m (250 in. lbs.).
NOTE:
Inspect O-ring on chain guide access plugs before installing. Replace O-ring as necessary.
- Install chain guide access plugs to cylinder heads. Tighten plugs to 20 N.m (15 ft. lbs.).
NOTE:
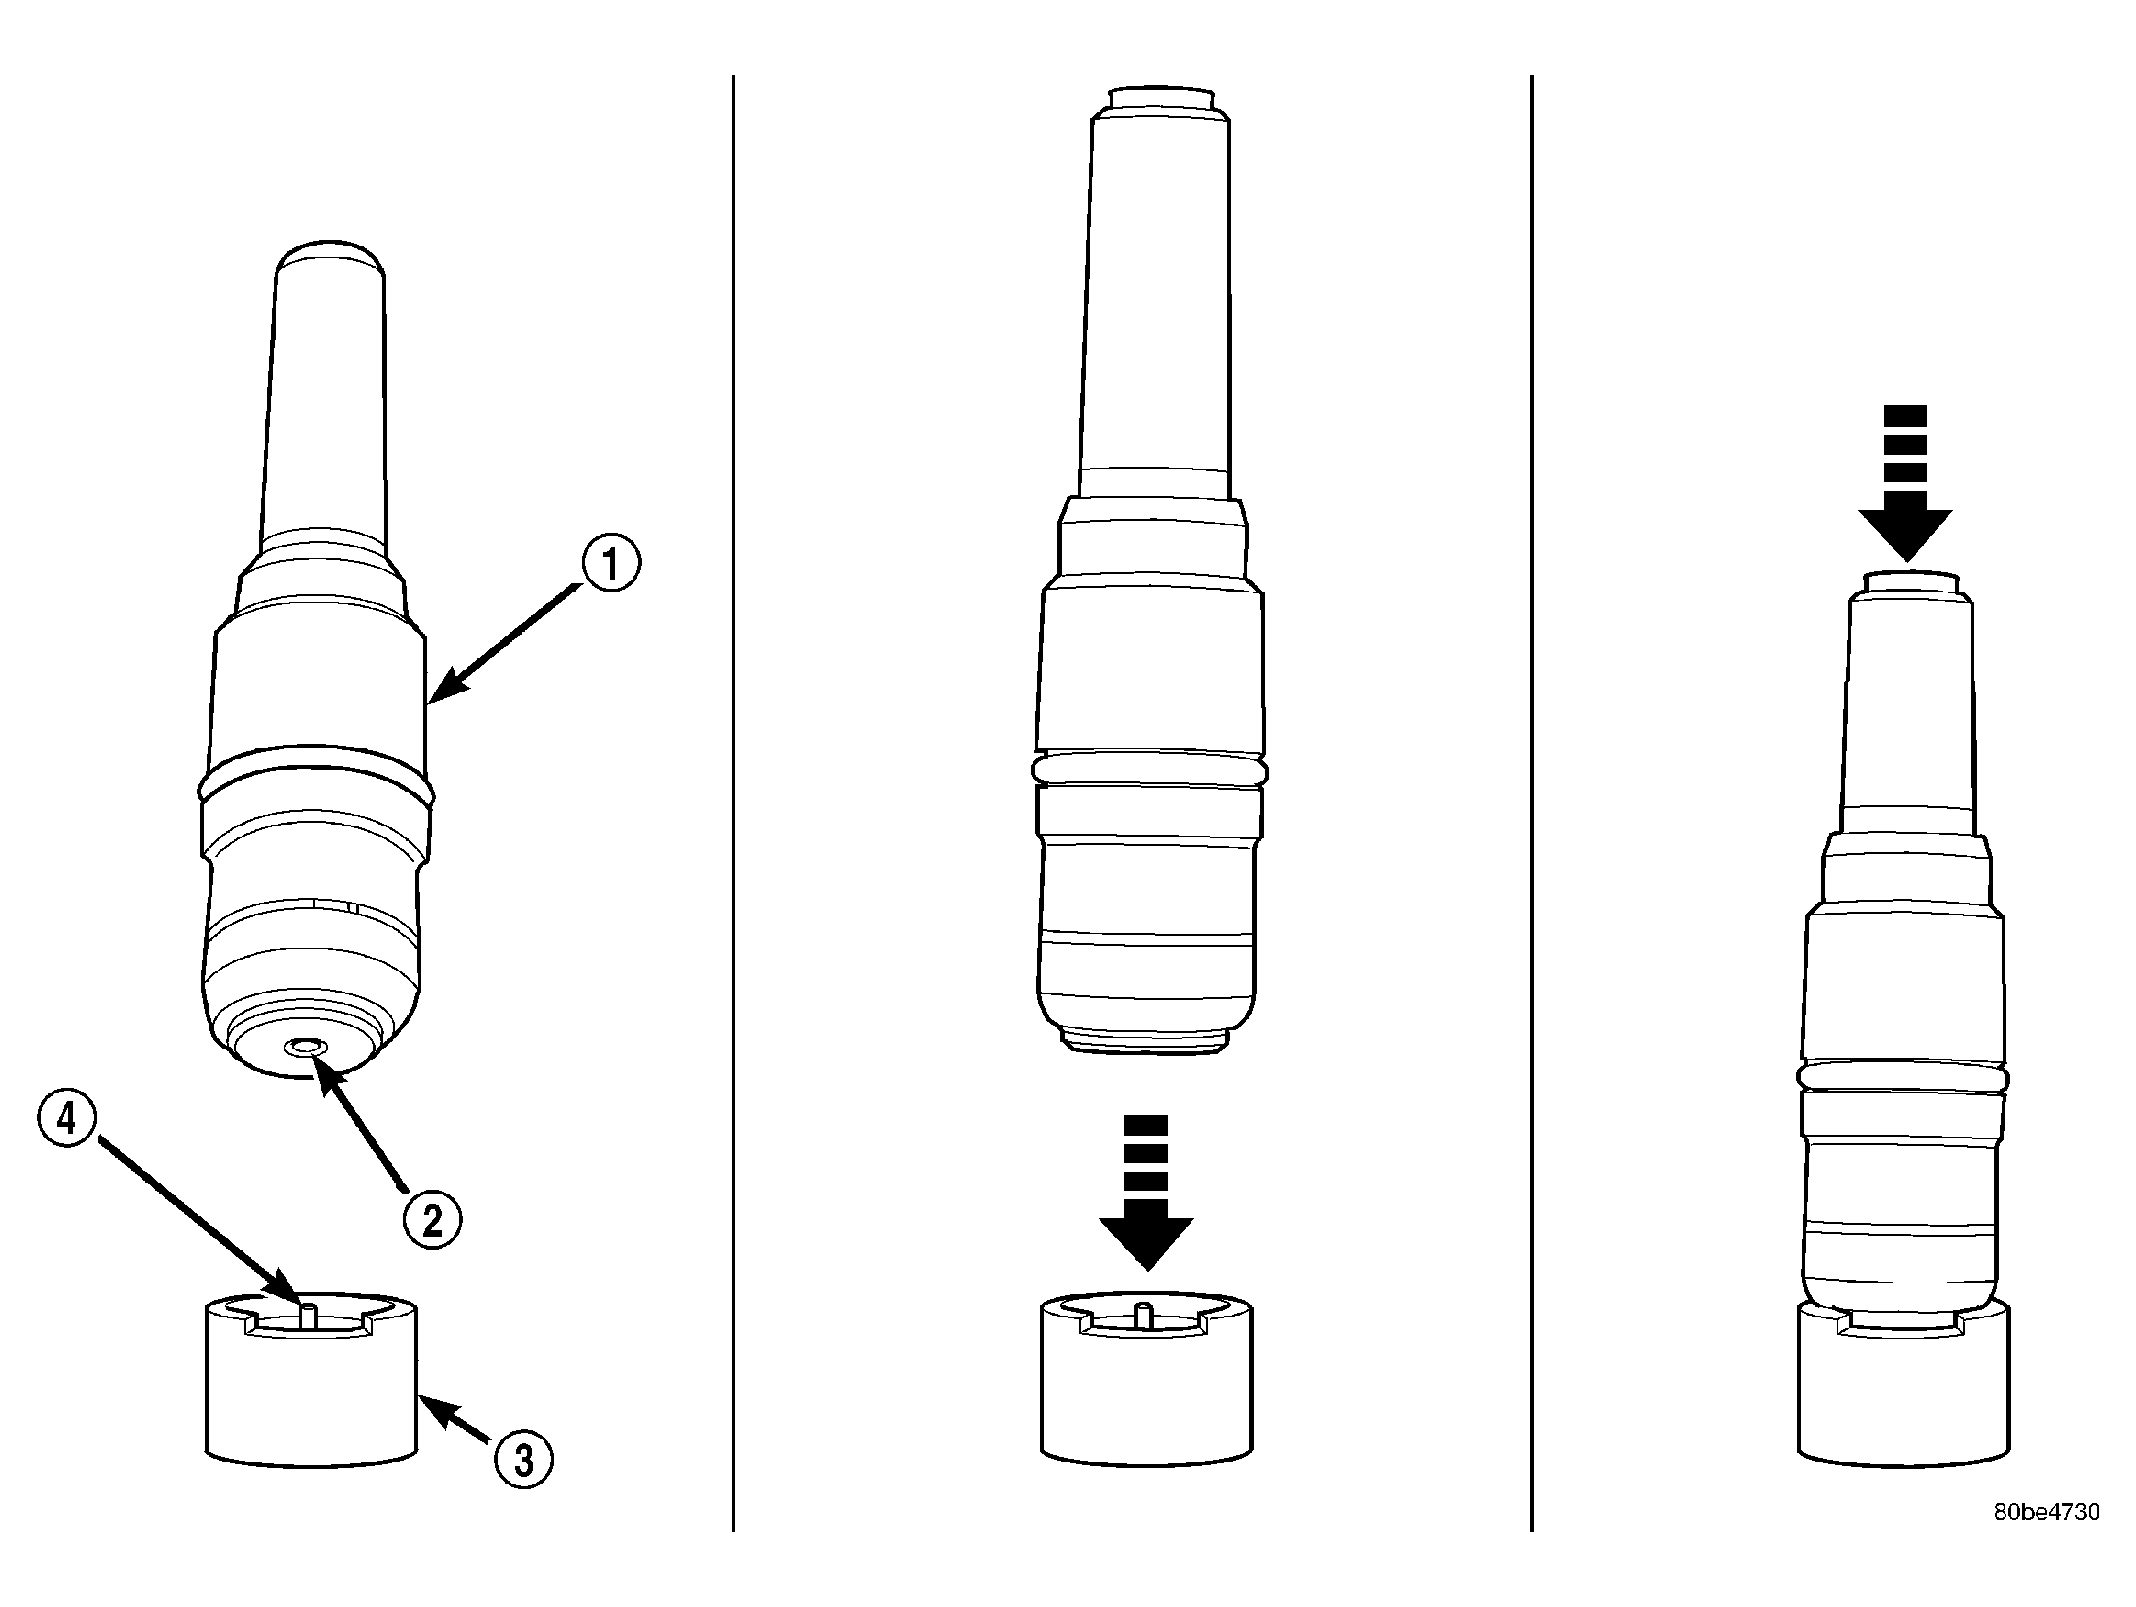
To reset the primary timing chain tensioner, engine oil will first need to be purged from the tensioner.
 Courtesy of CHRYSLER LLC
- Purge oil from timing chain tensioner using the following procedure:
- Place the check ball (2) end of tensioner into the shallow end of Special Tool 8186 (3).
- Using hand pressure, slowly depress tensioner until oil is purged from tensioner.
 Courtesy of CHRYSLER LLC
- Reset timing chain tensioner using the following procedure:
- Position cylinder plunger (4) into the deeper end of Special Tool 8186 (3).
- Apply a downward force until tensioner is reset.
NOTE:
If oil was not first purged from the tensioner, use slight finger pressure to assist the center arm pin of Special Tool 8186 to unseat the tensioner's check ball.
CAUTION:
Ensure the tensioner is properly reset. The tensioner body (4) must bottom against the top edge of Special Tool 8186 (3). Failure to properly perform the resetting procedure may cause tensioner jamming.
NOTE:
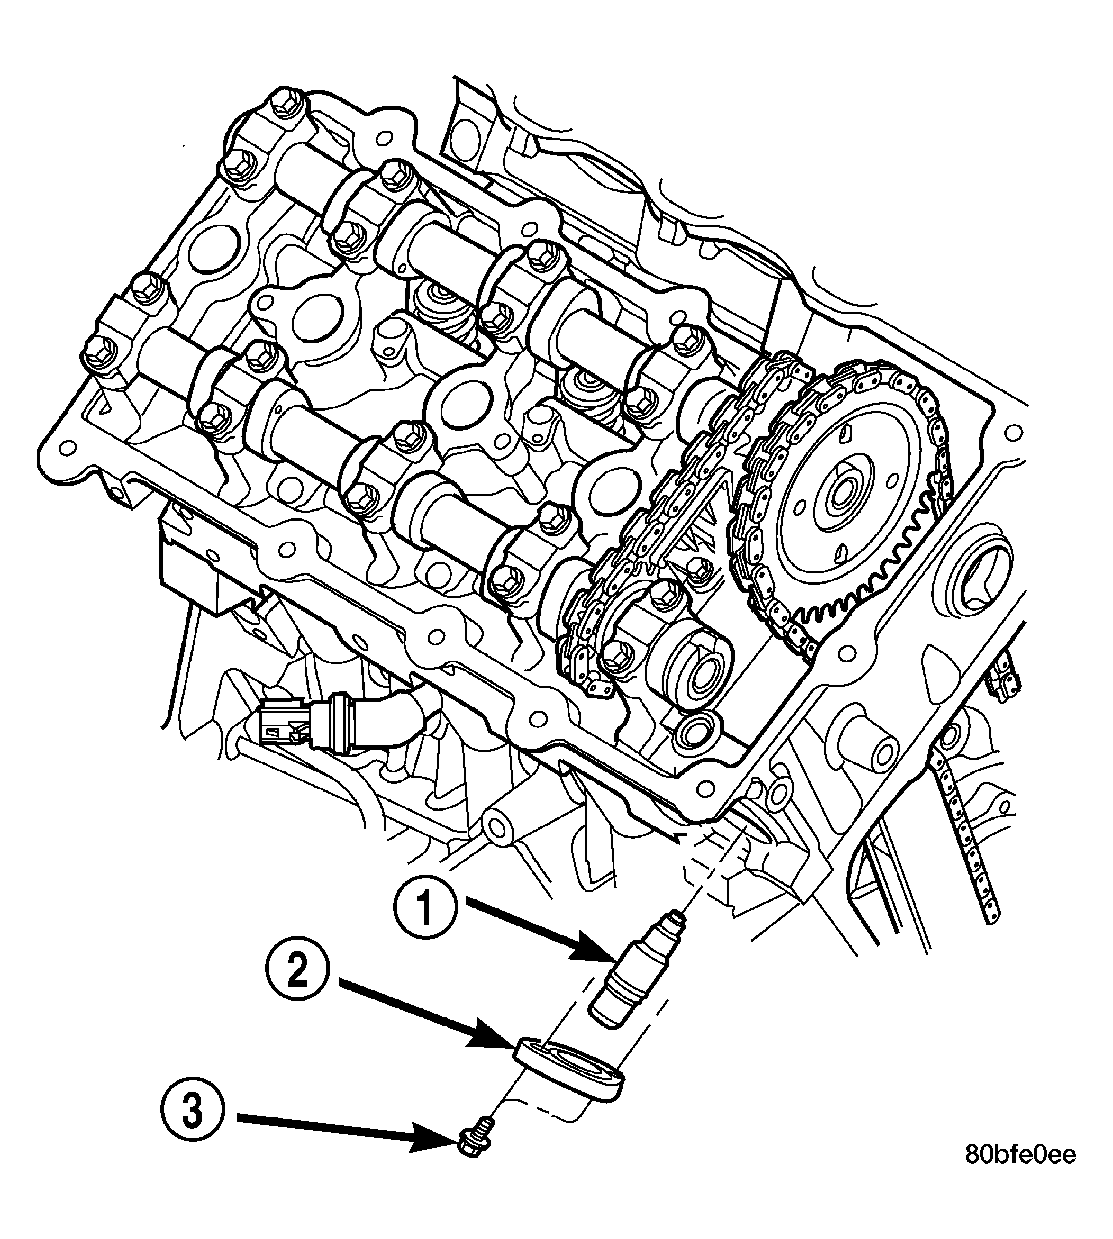
Inspect the tensioner O-ring (2) for nicks or cuts and make sure the snap ring (1) is correctly installed, replace as necessary.
 Courtesy of CHRYSLER LLC
- Install the reset chain tensioner (1) into the right cylinder head.
- Position tensioner retaining plate (2) and tighten bolts (1) to 12 N.m (105 in. lbs.).
 Courtesy of CHRYSLER LLC
- Starting at the right cylinder bank, first position the camshaft damper (1) (if equipped) on camshaft hub, then insert a 3/8" square drive extension with a breaker bar into intake camshaft drive hub. Rotate camshaft until the camshaft hub aligns to the camshaft sprocket and damper attaching holes. Install the sprocket attaching bolts and tighten to 28 N.m (250 in. lbs.).
- Turn the left side camshaft by inserting a 3/8" square drive extension with a breaker bar into intake camshaft drive hub and rotate camshaft until the sprocket attaching bolts can be installed. Tighten sprocket bolts to 28 N.m (250 in. lbs.).
- Rotate engine slightly clockwise to remove timing chain slack, if necessary.
 Courtesy of CHRYSLER LLC
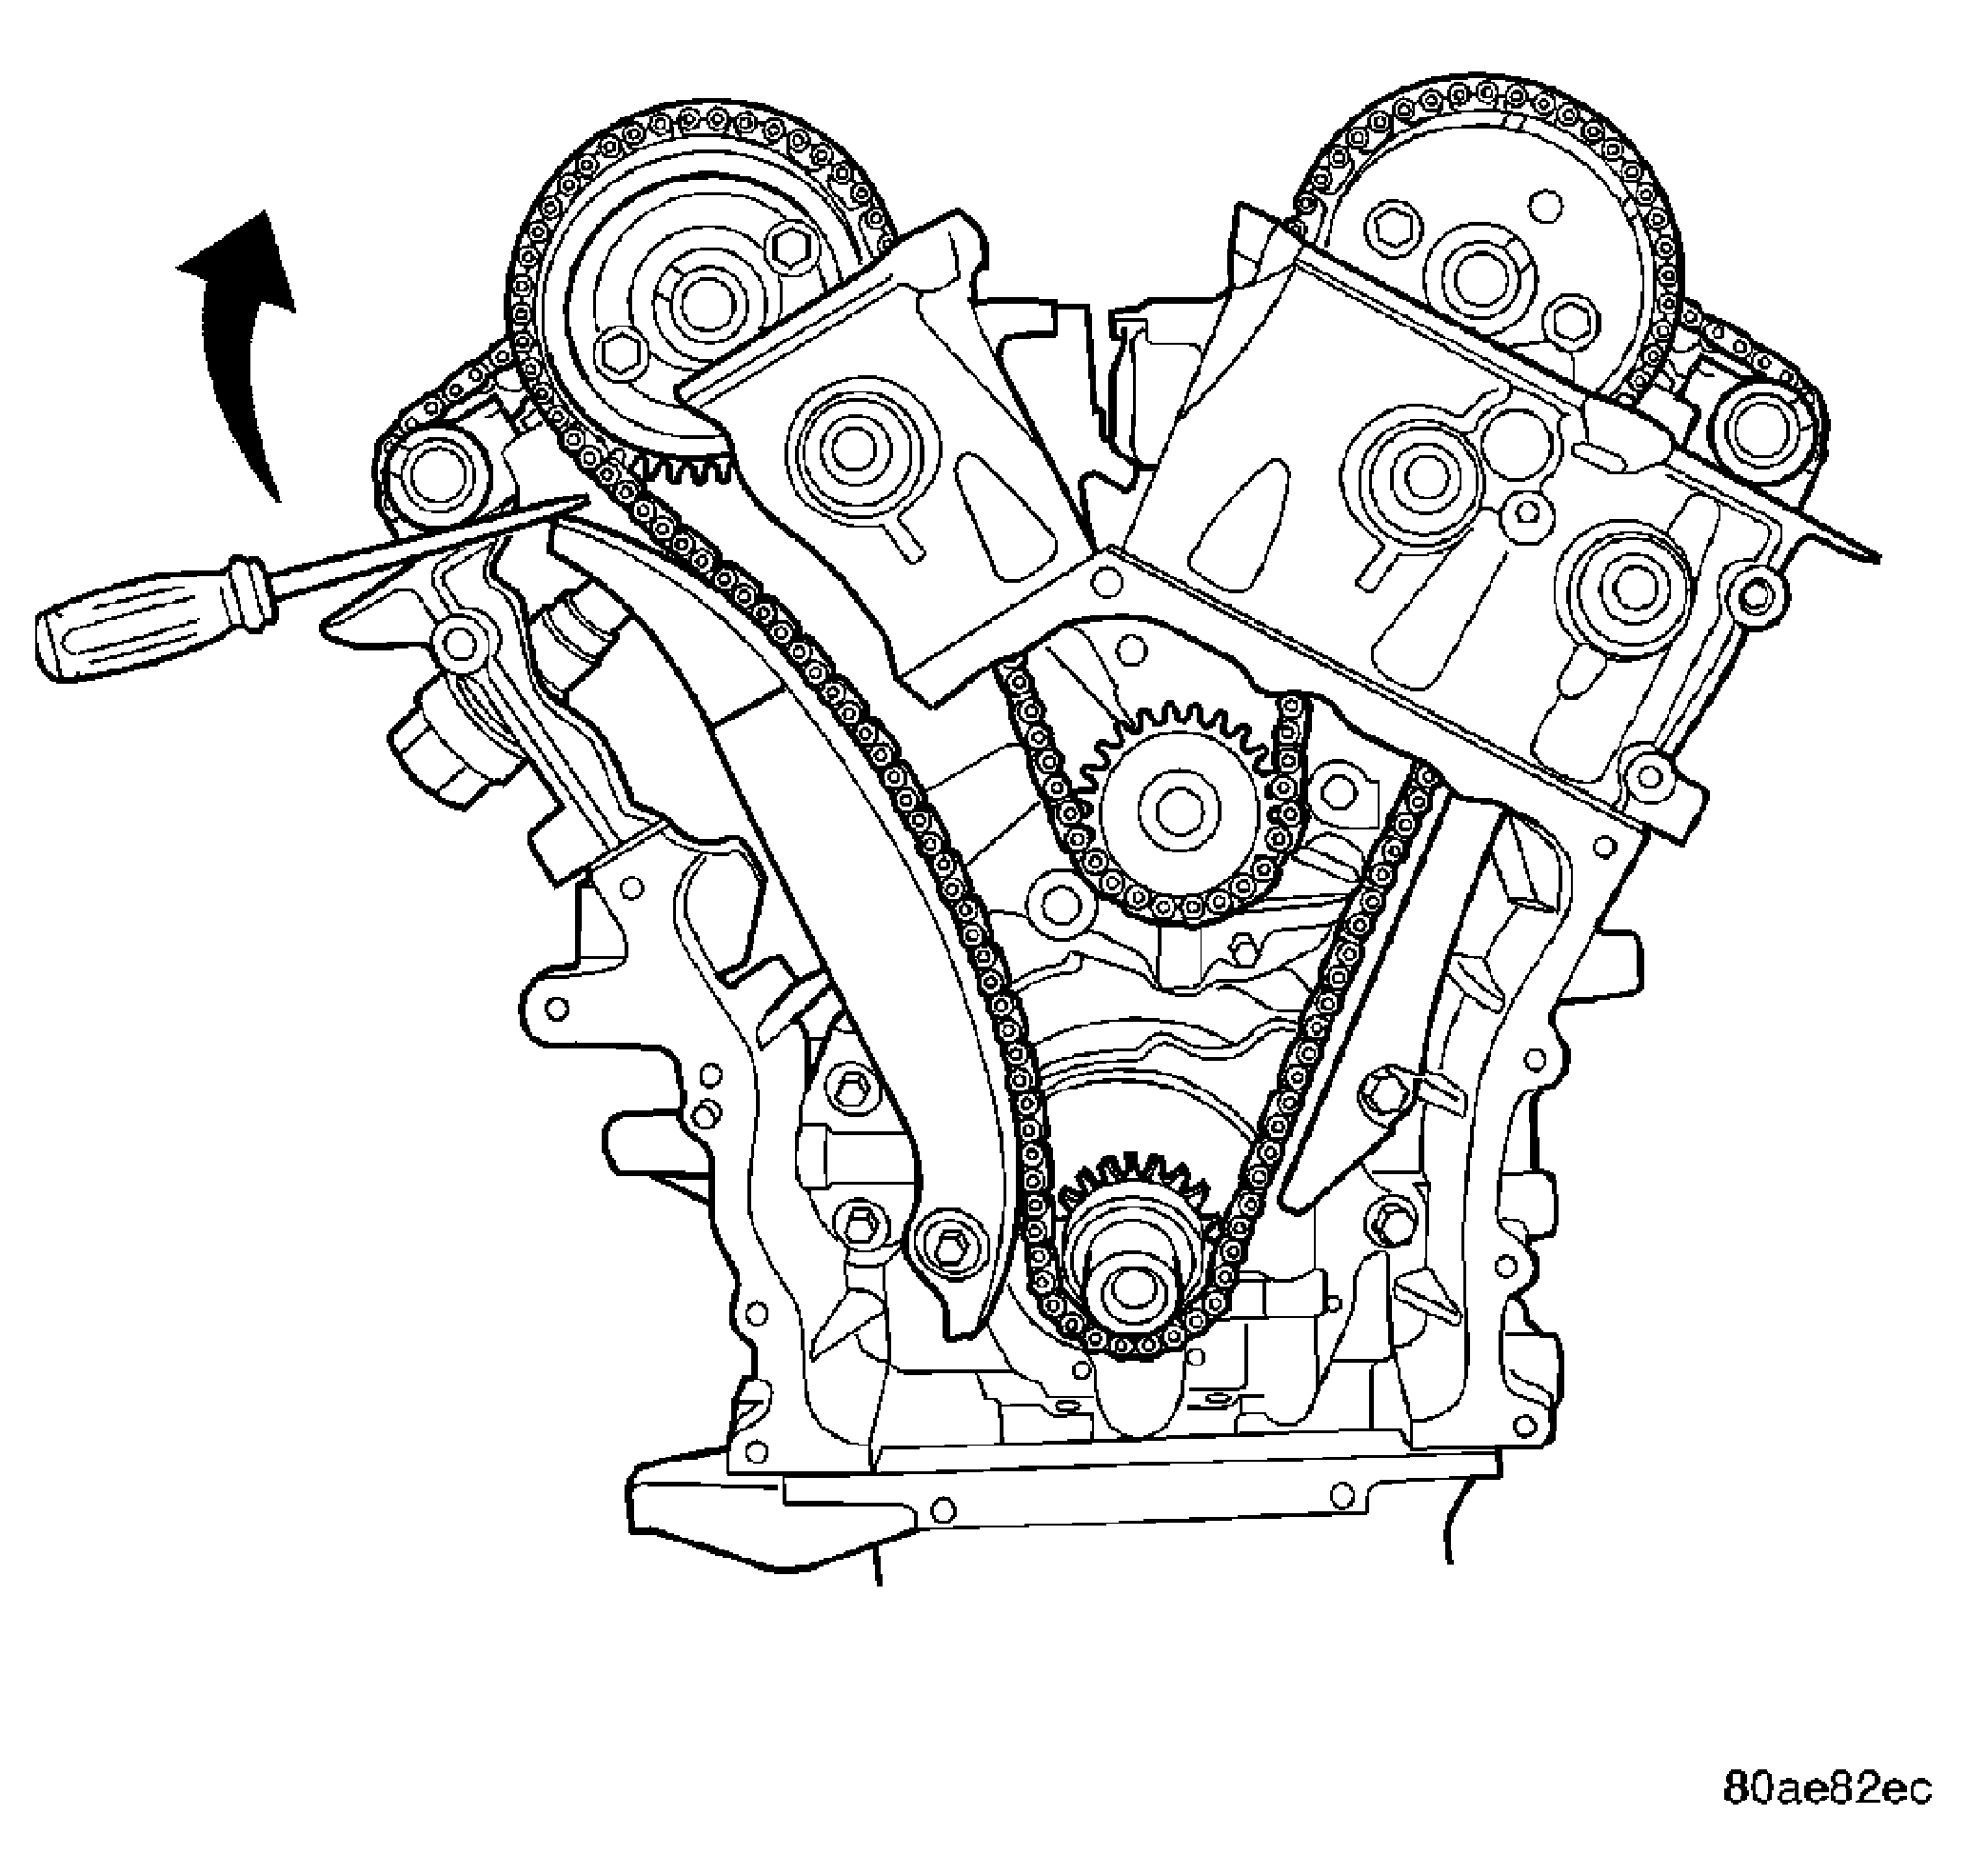
- Activate the timing chain tensioner by using a flat bladed pry tool to gently pry tensioner arm towards the tensioner slightly. Then release the tensioner arm. Verify the tensioner is activated (extends).
 Courtesy of CHRYSLER LLC
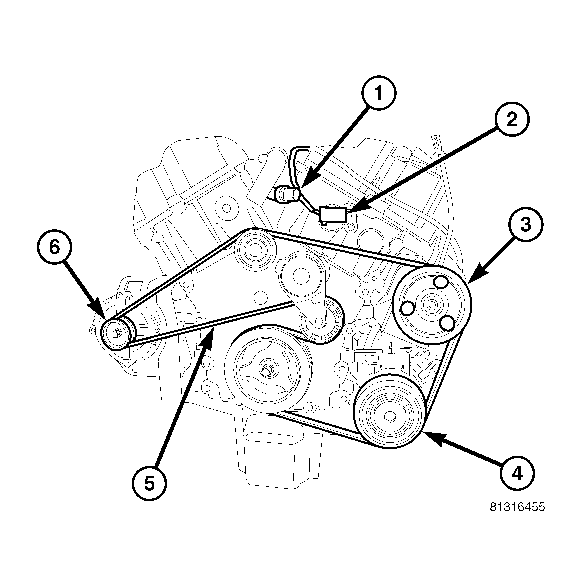
- Install camshaft position sensor (2) and connect electrical connector.
- Install the timing chain cover. See INSTALLATION . Install crankshaft vibration damper. See INSTALLATION . Install cylinder head covers. See INSTALLATION .
- Install upper intake manifold. See INSTALLATION .
NOTE:
After installation of a reset tensioner, engine noise will occur after initial start-up. This noise will normally disappear within 5-10 seconds.
- Fill cooling system.
 Courtesy of CHRYSLER LLC
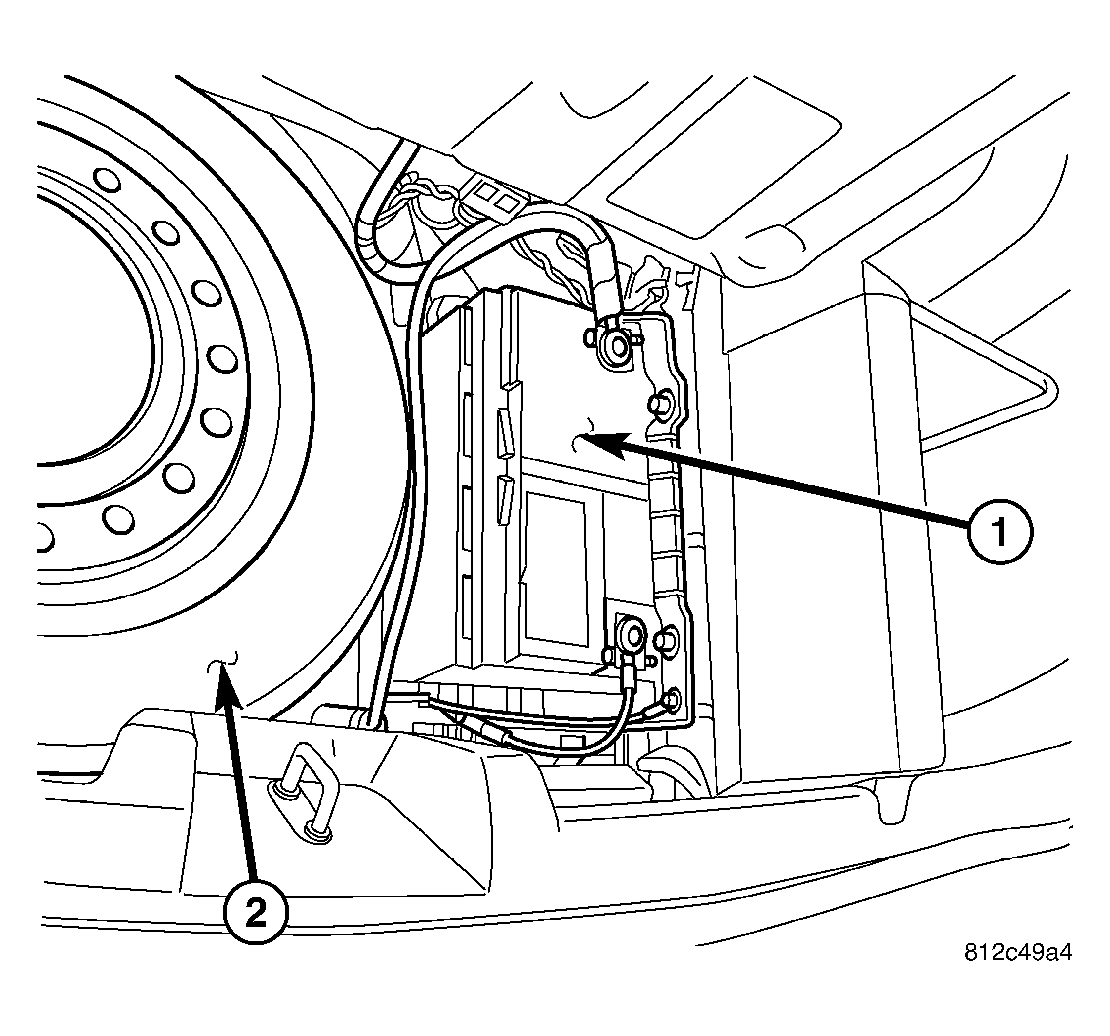
- Connect negative battery (1) cable.