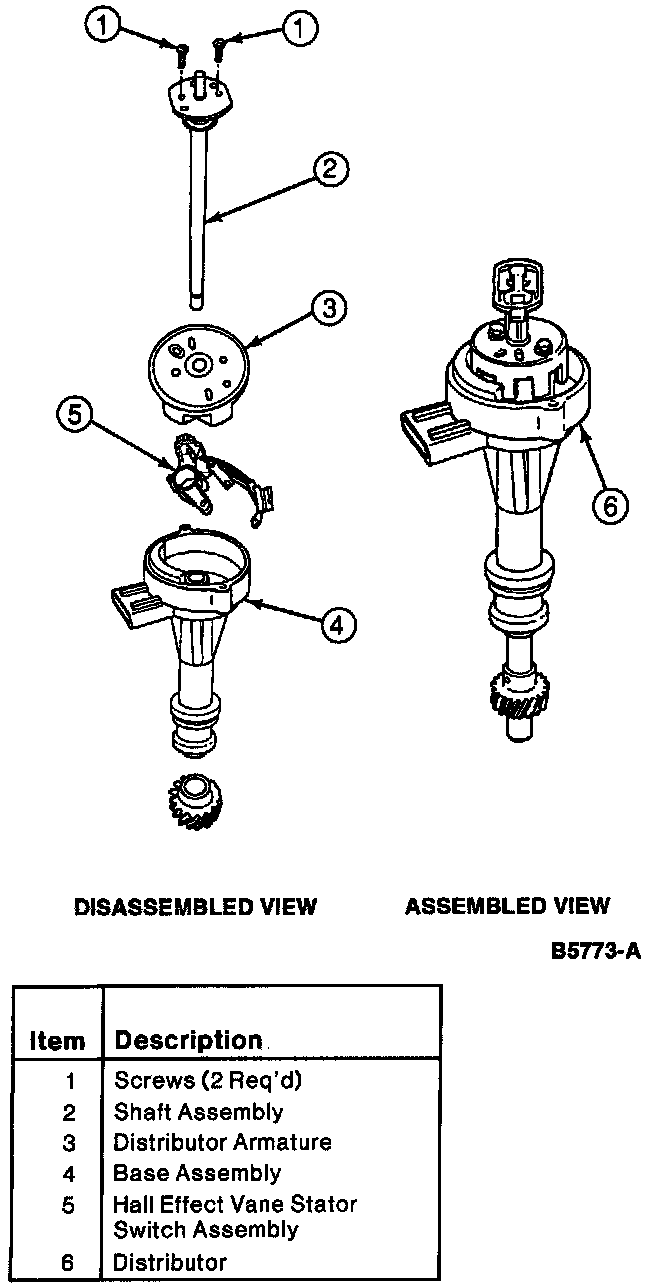
Hall Effect Sensor: Service and Repair
REMOVALCAUTION: The drive gear on EEC IV distributors are not released for service. If any nicks or cracks occur during the disassembly or reassembly procedures, a new EEC IV distributor must be used. The EEC IV distributor drive gear is matched to the EEC IV distributor at assembly and should never be replaced. Although some of the drive gears for other distributors may physically fit the EEC IV distributor, they must not be used. Whenever damage or excessive wear is noted on the drive gear, it must be replaced with a new EEC IV distributor.
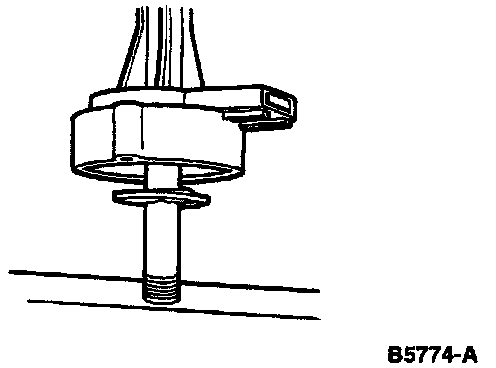
1. Remove distributor assembly.
2. Remove two armature retaining screws.
NOTE: Hold drive gear to loosen the armature screws; do not hold the distributor armature.
3. Remove distributor armature.
4. Mark the distributor armature and distributor gear with a felt tip pen for reference when reinstalling the distributor gear.
5. Remove and discard the roll pin from the gear.
Removal Of Distributor Gear:
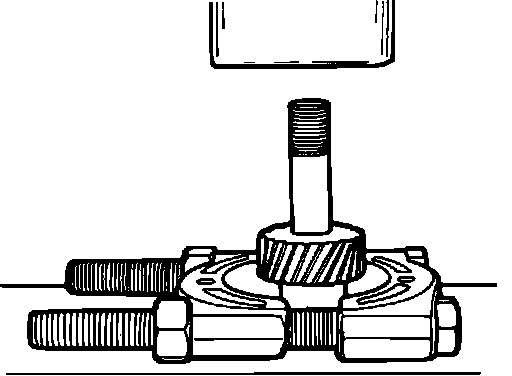
6. Invert the distributor and place in the Axle Bearing/Seal Plate T75L-1165-B. Press off the gear using Bearing Pulling Attachment D79L-4621-A or equivalent.
7. Remove the thrust washer from the distributor.
8. Deburr and polish the shaft with emery cloth so the shaft assembly will slide out freely from the distributor base.
Distributor Assembly:
9. Remove the shaft assembly.
10. Remove the distributor stator assembly screw and retainer.
11. Remove the distributor [1][2]stator from the top of the bowl.
INSTALLATION
1. Inspect distributor base housing and bushings for any indication of excessive heat concentration, cracks, or wear. Replace complete distributor if damage is found.
2. Position distributor [1][2]stator on the bushing of the distributor base housing and press into place.
3. Install the distributor stator assembly screws and retainer. Tighten screws to 2-4 Nm (18-35 in lb).
4. Lightly lubricate the shaft assembly with a coating of fresh motor oil or with Engine Assembly Lubricant D9AZ-19579-D or equivalent meeting Ford specification ESR-M99C80-A.
5. Install the shaft assembly into the distributor base housing.
6. Place a 1/2-inch deep well socket over the end of the shaft assembly.
7. Invert the distributor and place in the Axle Bearing/Seal Plate T75L-1175-B.
8. Install the gear thrust washer on the distributor.
9. Install the distributor gear on the shaft assembly and align the distributor gear with the felt tip reference.
NOTE: The hole in the drive gear and shaft assembly must be aligned as accurately as possible to allow for ease of the roll pin insertion.
CAUTION: The drive gear on EEC-IV distributors are not released for service. If any nicks or cracks occur during the disassembly or reassembly procedures, a new EEC-IV distributor must be used. The EEC-IV distributor drive gear is matched to the EEC-IV distributor at assembly and should never be replaced.

10. Place a 5/8-inch deep well socket centered around gear hole and press the distributor gear onto the shaft assembly.
NOTE: If the hole in the drive gear and shaft assembly will not align, the gear must be removed and attempted again. The gear cannot be turned for alignment.
11. Insert new roll pin through the distributor gear. The pin should have proper extrusion.
12. Install distributor armature.
13. Install the armature retaining screws and tighten screws to 3-4 Nm (27-35 in lb).
NOTE: Hold drive gear to tighten the armature screws; do not hold the distributor armature.
14. The distributor shaft should rotate freely, without any binding.
NOTE: If the distributor armature contacts the distributor [1][2]stator, the entire distributor must be replaced.
15. Install the distributor assembly and reset initial timing.