How to Remove and Install the PCM For Testing
How to Remove and Install the PCM for TestingIf DTC troubleshooting requires voltage or resistance checks at the PCM connectors, remove the PCM and test it:
1. Jump the SCS line with the HDS.
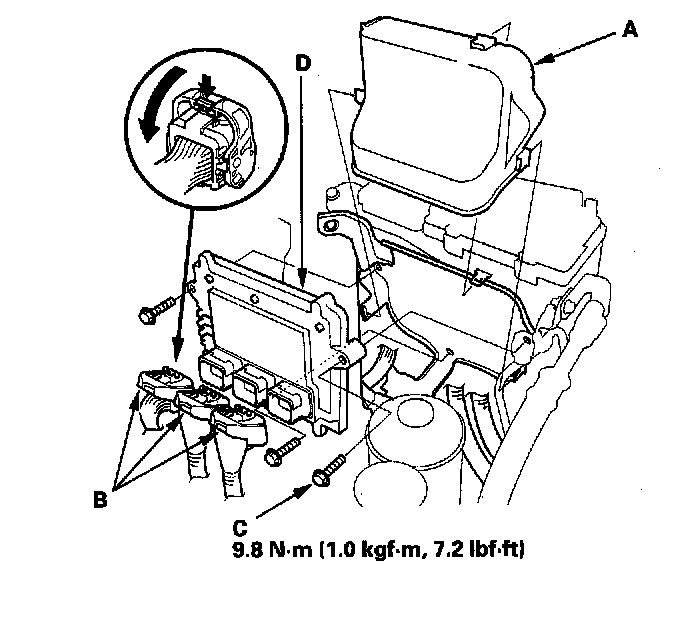
2. Remove the covers (A).
3. Disconnect the PCM connectors (B).
4. Remove the bolts (C), then remove the PCM (D).
5. Install the PCM in the reverse order of removal.
6. Exit the SCS mode with the HDS.
7. Turn the ignition switch ON (II).
NOTE: If DTC P0630 VIN Not Programmed or Mismatch is stored at this time, ignore it and continue this procedure.
8. Input the VIN to the PCM with the HDS.
9. Rewrite the immobilizer code with the PCM replacement procedure in the HDS; it allows you to start the engine.
10. Reset the PCM with the HDS.
11. Do the PCM idle learn procedure.