Rearview Monitor Mirror Input Test/Replacement
Rearview Monitor Mirror Input Test/ReplacementNOTE: With the temperature normal, turn the ignition switch to ON (II), and check the automatic dimming inside mirror indicator operation. If the indicator turns on after flashing two times, there is a malfunction in the mirror. Replace it.
1. Remove the roof console.
2. Disconnect the 12P connector (A) from the roof wire harness (B).
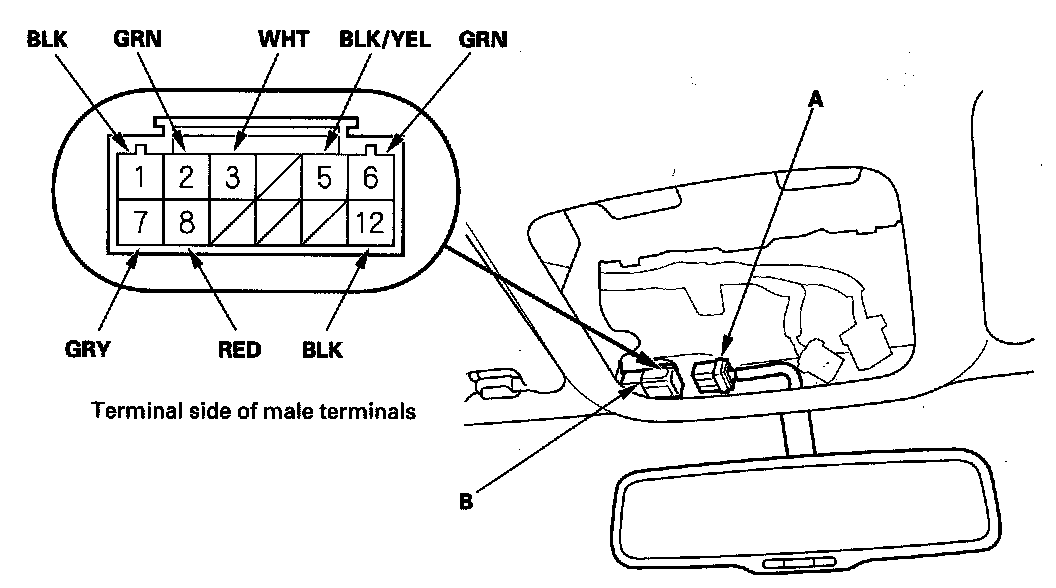
3. Inspect the connector and socket terminals to be sure they are all making good contact.
- If the terminals are bent, loose or corroded, repair them as necessary, and recheck the system.
- If the terminals look OK, go to step 4.
4. Remove the tailgate lower trim panel to access the rearview camera 6P connector.
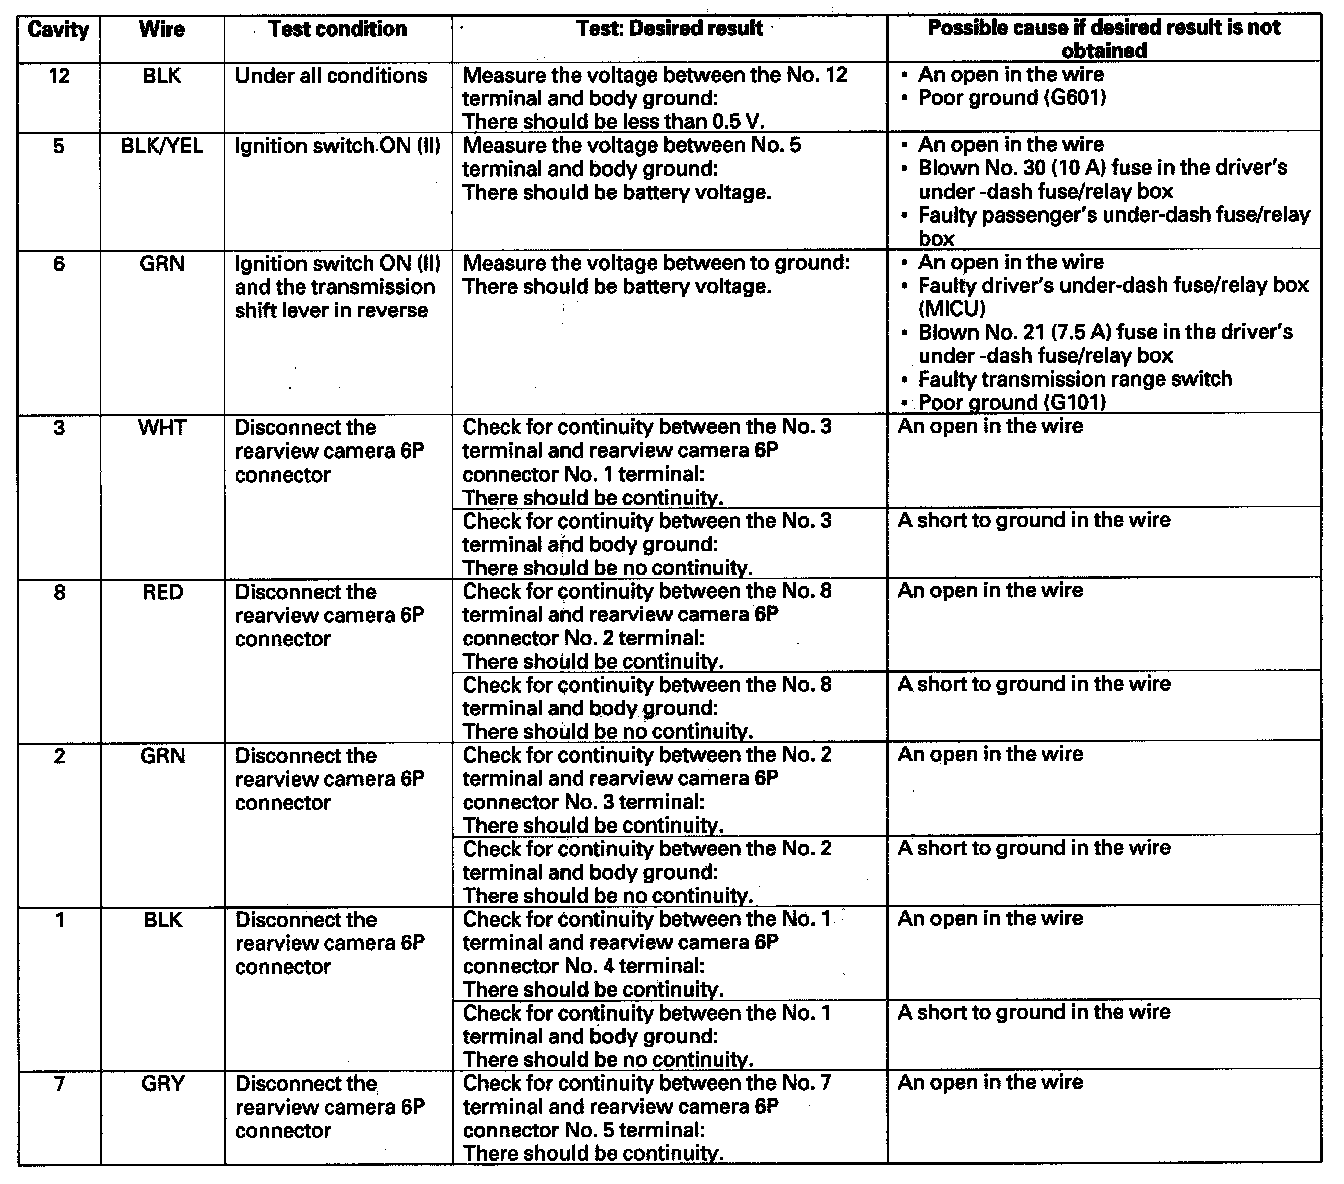
5. With the connector still disconnected, make these input tests at the connector.
NOTE: Make sure the connector is connected while testing terminals 12, 5, and 6. Make sure the connector is disconnected while testing terminals 3, 8, 2, 1, and 7.
- If any test indicates a problem, find and correct the cause, then recheck the system.
- If all the input tests prove OK. Substitute and connect a known-good rearview camera and check the monitor image in reverse. If the symptom is gone, the rearview camera is faulty; replace it. If the symptom is still present, the rearview mirror is faulty; replace it.
6. Reconnect the 12P connector to the roof harness at the rearview mirror.
