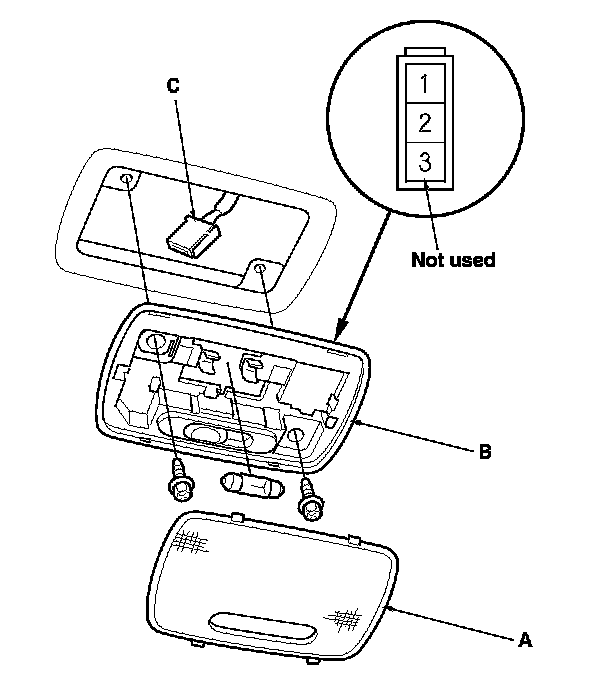
Ceiling Light Test/Replacement
Ceiling Light Test/Replacement
1. Turn the ceiling light switch OFF.
2. Carefully pry the lens (A) off with a small screwdriver.

3. Remove the screws, then remove the ceiling light (B).
4. Disconnect the 3P connector (C) from the ceiling light.
5. Check for continuity between the terminals.
- There should be continuity between terminals No. 1 and No. 2 with the switch in the MIDDLE (DOOR) position.
- There should be continuity between terminals No. 2 and body ground with the switch in the ON position.
- There should be no continuity between terminals No. 1 and No. 2, and between terminals No. 2 and body ground with the switch in the OFF position.
6. If the continuity is not as specified, check the bulb. If the bulb is OK, replace the ceiling light.
7. Install the light in the reverse order of removal.