Splash Shield Replacement
Splash Shield Replacement
NOTE:
- Put on gloves to protect your hands.
- Take care not to scratch the body.
- When prying with a flat-tip screwdriver, wrap it with protective tape to prevent damage.
1. Remove the splash shield (A).
1. Remove the clips (B) that secure the front inner fender (C) and the splash shield.
2. From under the front bumper (D), remove the clips (E) that secure the splash shield and the front bumper skid trim.
3. From under the body, remove the clips (F, G) that secure the splash shield on the front suspension subframe (H).
4. Pull the splash shield out.
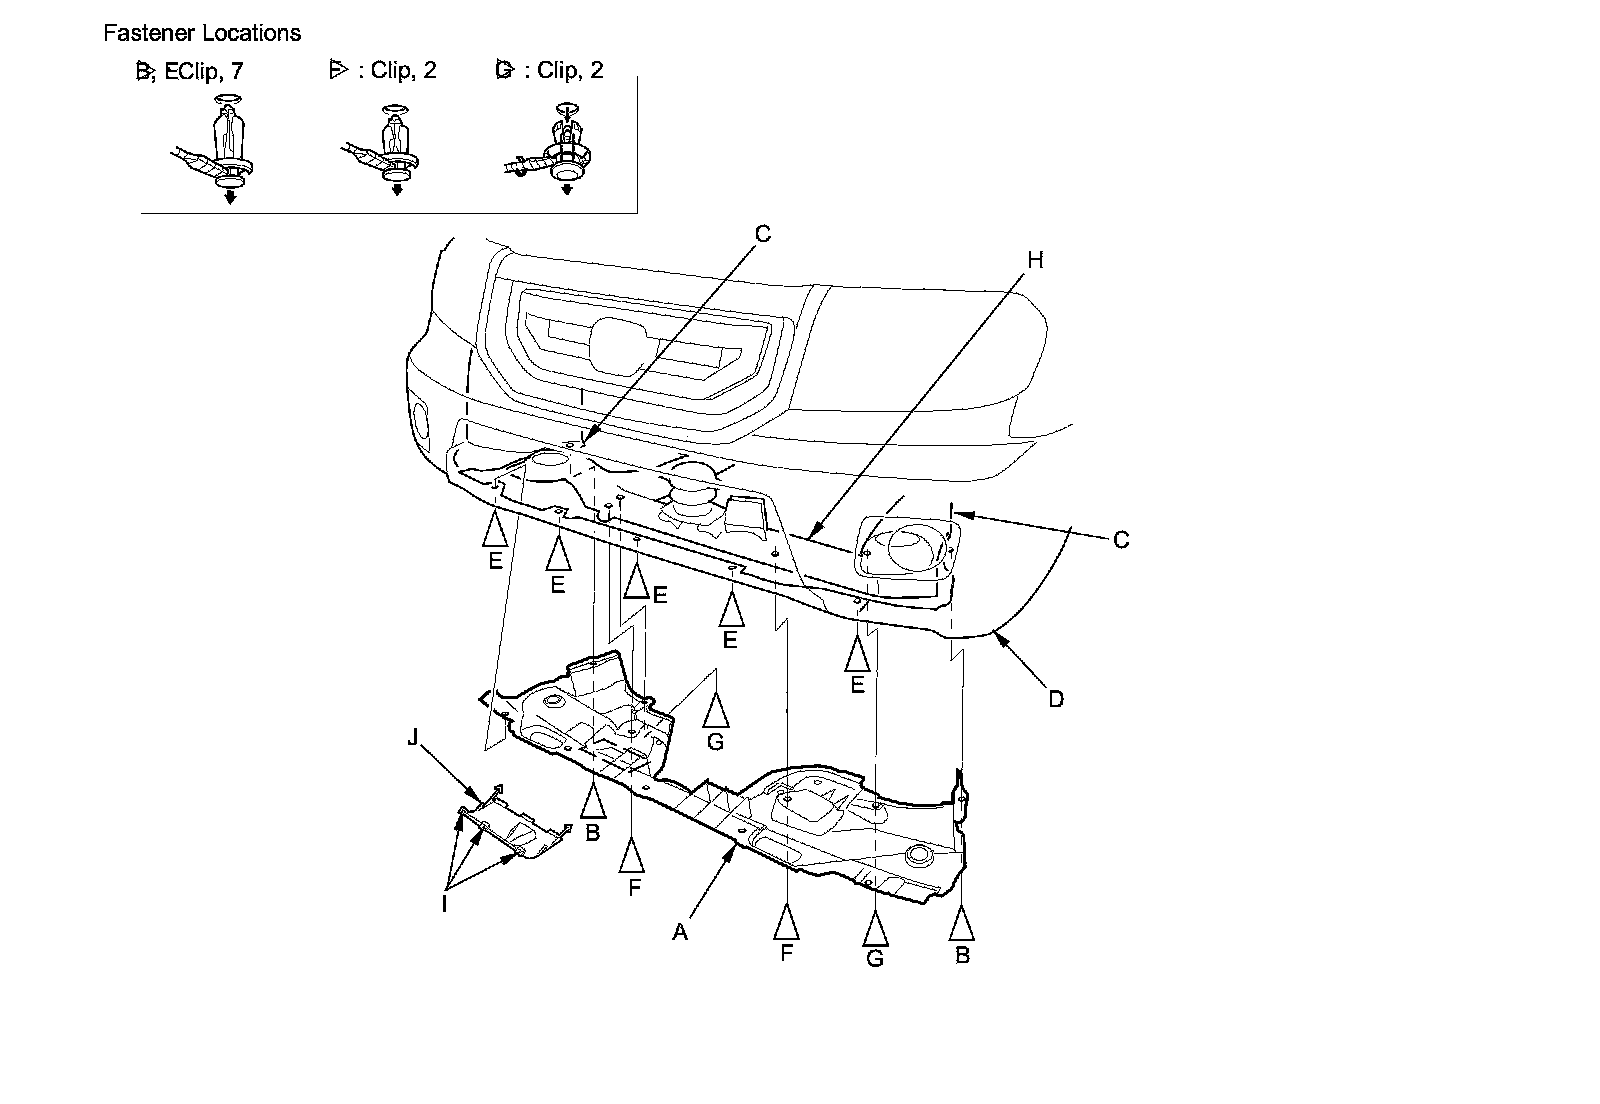
2. If necessary, release the lock tabs (I), then remove the splash shield cover (J).
3. Install the splash shield in the reverse order of removal, and note these items:
- If the clips are damaged or stress-whitened, replace them with new ones.
- Push the clips into place securely.