SRS Unit Replacement
SRS Unit Replacement
Removal
NOTE: If you are only disconnecting SRS unit connector A, skip step 2.
1. Do the battery terminal disconnection procedure, then wait at least 3 minutes before starting work.
2. Disconnect both front seat belt tensioner 4P connectors.
3. Remove the dashboard center lower cover Dashboard Center Lower Cover Removal/Installation.
4. Disconnect SRS unit connector A (28P), B (28P), and C (28P) from the SRS unit (D).
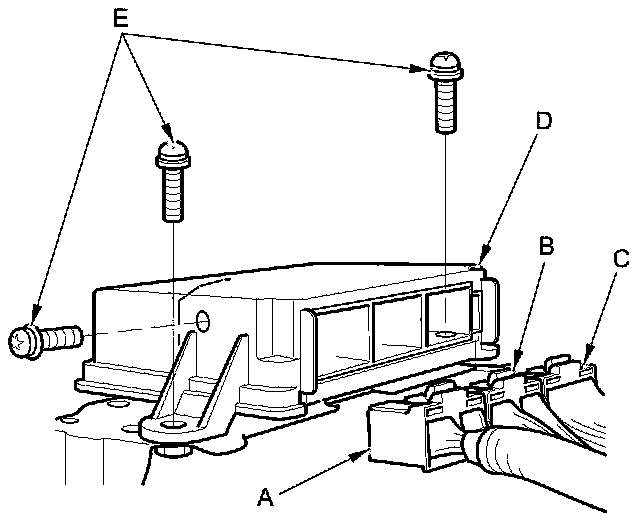
5. Pull down the carpet, then remove the TORX bolts (E) using a TORX T30 bit. Pull out the SRS unit.
Installation
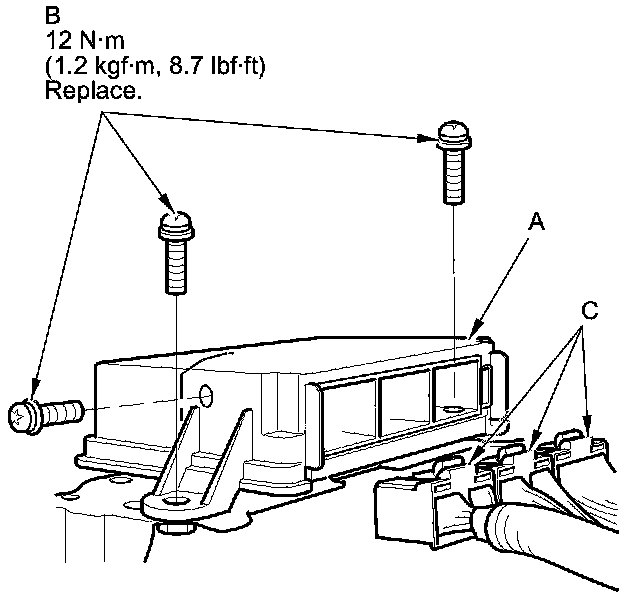
1. Install the SRS unit (A) with the new TORX bolts (B) using a TORX T30 bit. Connect the connectors (C) to the SRS unit; push them into position until they click.
NOTE: Be sure the SRS unit is sitting squarely against its bracket before torquing the TORX bolts.
2. Reinstall the dashboard center lower cover Dashboard Center Lower Cover Removal/Installation.
3. Reconnect both front seat belt tensioner 4P connectors.
4. Do the battery terminal reconnection procedure.
5. Do the ODS unit initialization Programming and Relearning.
6. Check the operation of the ODS unit with the HDS ODS Unit Operation Check.
7. Confirm proper SRS operation: Turn the ignition switch to ON (II), and check that the SRS indicator comes on for about 6 seconds and then goes off.