September 30: LEMON manuals is back up on a temporary server! Slowness is possible
Fuel Pressure (Except Accent, Elantra & Tiburon)
- Release fuel pressure. See FUEL PRESSURE RELEASE . Disconnect negative battery terminal and reconnect fuel pump harness connector.
- Disconnect high-pressure fuel hose from fuel delivery pipe. Cover hose connection using rags to avoid spraying of fuel.
- Using Fuel Pressure Gauge Adapter (09353-38000), install fuel pressure gauge (09353-24100) to fuel delivery pipe. See Fig 1 or Fig 2
. Tighten fuel gauge adapter bolts to 18-26 ft. lbs. (24.4-35.3 N.m). Connect negative battery cable.
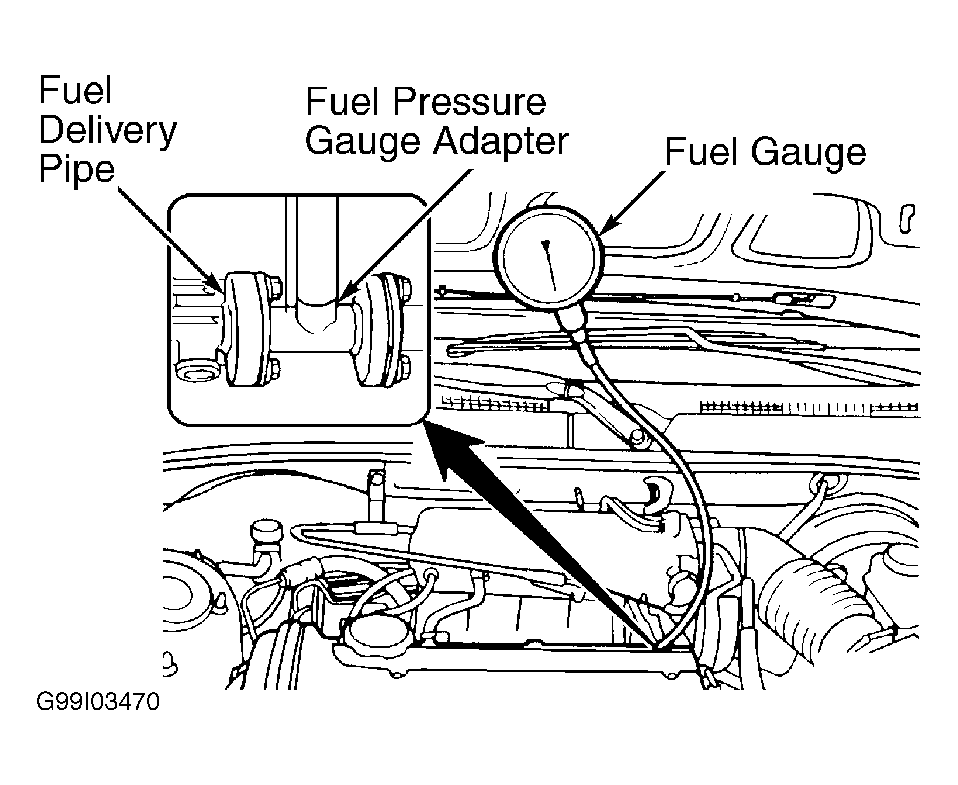 Courtesy of HYUNDAI MOTOR CO.
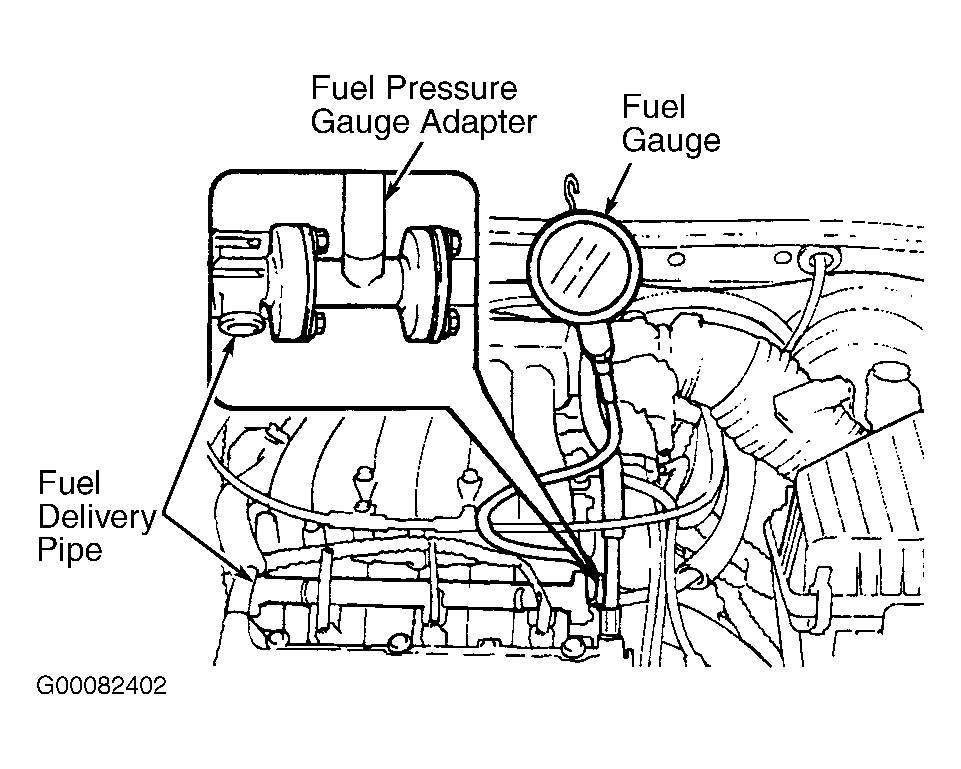 Courtesy of HYUNDAI MOTOR CO.
- Locate fuel pump check connector. See FUEL PUMP CHECK CONNECTOR LOCATOR table. Apply battery voltage at fuel pump check connector terminal No. 9 to activate fuel pump. See Figure. Ensure no fuel leakage is present at pressure gauge or connection. If no leaks are present, start engine and allow it to idle. Go to next step.
- Disconnect vacuum hose from fuel pressure regulator, and plug hose end. Measure and record fuel pressure at idle. Reconnect vacuum hose, and again measure and record fuel pressure. See REGULATED FUEL PRESSURE (AT IDLE) table. If fuel pressures are as specified, go to step 9. If fuel pressures are less than specified, go to next step. If fuel pressures are greater than specified, go to step 7. If fuel pressure does not change when regulator vacuum hose is connected and disconnected, go to step 8.
- Check for following conditions:
- Restricted fuel filter.
- Fuel pressure regulator leaking fuel to fuel return side.
- Leaking in-tank fuel pick-up hose.
- Low fuel pump discharge pressure.
Repair or replace as necessary, and recheck fuel pressure. After repair, go to step 10.
- Check for sticking fuel pressure regulator, restricted or bent fuel return hose or pipe. Repair or replace fuel hoses or pipe, or replace fuel pressure regulator.
- Check for following conditions:
- Restricted or damaged vacuum hose.
- Restricted manifold vacuum port.
- Sticking or poorly seated fuel pressure regulator valve.
Repair or replace as necessary, and recheck fuel pressure. After repair, go to step 10.
- If fuel pressures are as specified, stop engine and check for decrease in fuel pressure gauge. Fuel pressure should hold for approximately 5 minutes. If fuel pressure decreases slowly after engine is stopped, check for leaking injector. Replace as necessary. If fuel pressure decreases immediately after engine is stopped, fuel pump check valve is not working. Replace fuel pump. After repairs are completed, recheck fuel pressure and go to next step.
- After testing is completed, release fuel pressure. See FUEL PRESSURE RELEASE . Disconnect fuel pressure gauge from adapter. Ensure hose connection is covered by shop towel to prevent fuel spray. Remove adapter bolts and adapter. Install NEW "O" ring and reinstall fuel line with original bolts and tighten fuel hose bolts to 18-26 ft. lbs. (24.4-35.3 N.m). Apply battery voltage to fuel pump check connector terminal No. 9. See Figure. Check for fuel leaks.