Fuel Filter: Service and Repair
FUEL FILTER REPLACEMENT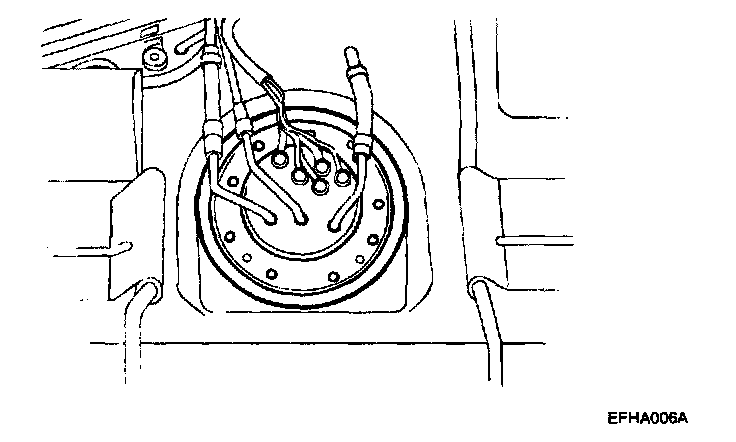
1. Reduce the internal pressure of the fuel lines and hoses and perform the following operations.
- Disconnect the fuel pump harness connector in the trunk room.
- Start the engine and, after it stops, turn the ignition switch to OFF.
- Disconnect the battery negative (-) terminal.
- Connect the fuel pump harness connector.
2. Remove the two fitting nuts while holding the fuel filter nuts securely.

3. Remove the fuel filter mounting bolts, and then remove the fuel filter from the fuel filter clamp.
Tightening torque:
Fuel filter fitting nut
25-35 Nm (250-350 kg.cm, 18-25 lb.ft)
INSPECTION
1. Check the hoses and the pipes for cracks or damage.
2. Check the fuel tank cap fer proper operation.
3. Check the fuel tank for deformation, corrosion or cracking.
4. Check the fuel tank inside for dirt or contamination.
5. Check the in-tank fuel filter for damage or restriction.
6. Test the two-way valve for proper operation.
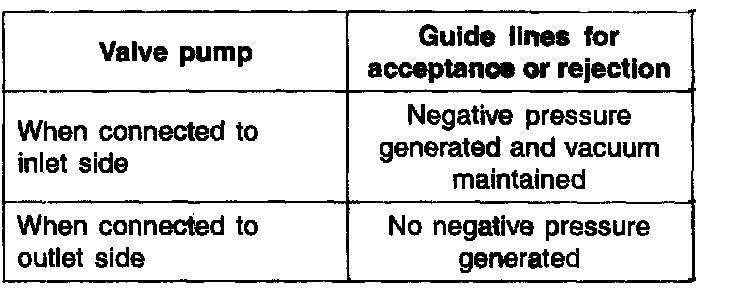
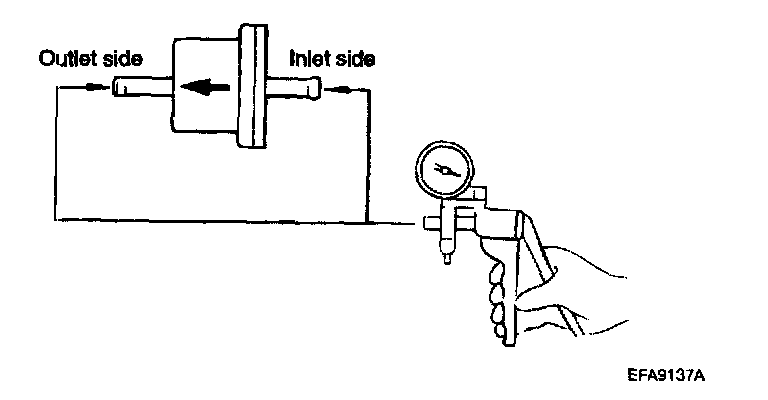
7. Using a vacuum hand pump, check the operation of the two-way valve.
FUEL PRESSURE TEST
1. Turn the ignition switch to the OFF position.
2. Apply battery voltage to the fuel pump drive connector to check that the pump operates.
NOTE:
The fuel pump is in-tank type and its operating sound is hard to hear without removing the fuel tank cap.
3. Pinch the hose to check that fuel pressure is felt.
FUEL PRESSURE TEST
1. Reduce the internal pressure of the fuel pipes and hoses by the following procedures.
- Open the trunk door and disconnect the fuel pump harness connector in the trunk room
- Start the engine and after it stalls, turn the ignition switch to the OFF position.
- Disconnect the battery negative (-) terminal.
- Connect the fuel pump harness connector.
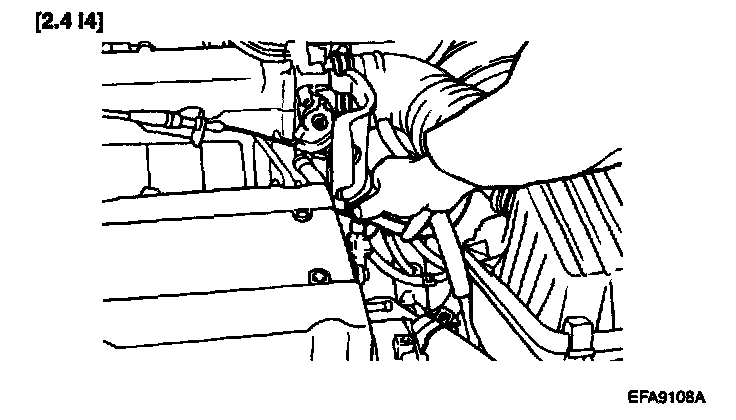
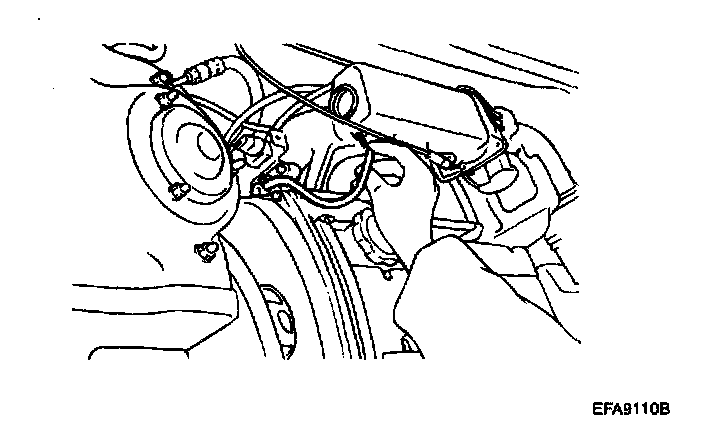
2. Remove the bolt connecting the fuel line to the fuel delivery pipe.
CAUTION: Cover the hose connection with a shop towel to prevent splashing of fuel caused by fuel residual pressure In the fuel line.
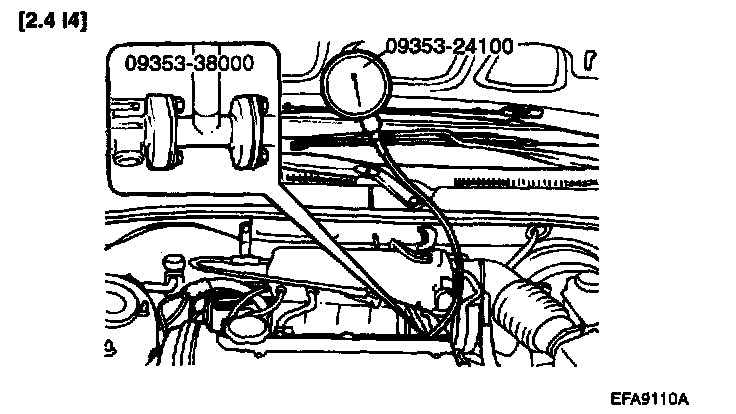
3. Using the fuel pressure gauge adapter, install the fuel- pressure gauge to the fuel pressure gauge adaptor. Tighten the bolt to the specified torque.
Fuel pressure gauge to fuel delivery pipe
25-35 Nm (250-350 kg.cm, 18-26 lb.ft)
4. Connect the battery's negative (-) terminal.
5. Apply battery voltage to the terminal for the pump drive and activate the fuel pump: then, with fuel pressure applied, check for fuel leakage from the pressure gauge or connection part.
6. Start and run the engine at curb idle speed.
7. Disconnect the vacuum hose from the pressure regulator, and plug the end of the hose. Measure the fuel pressure at idle.
Standard value :
320-340 kPa (3.26-3.47 kg/sq.cm, 46-49 psi)
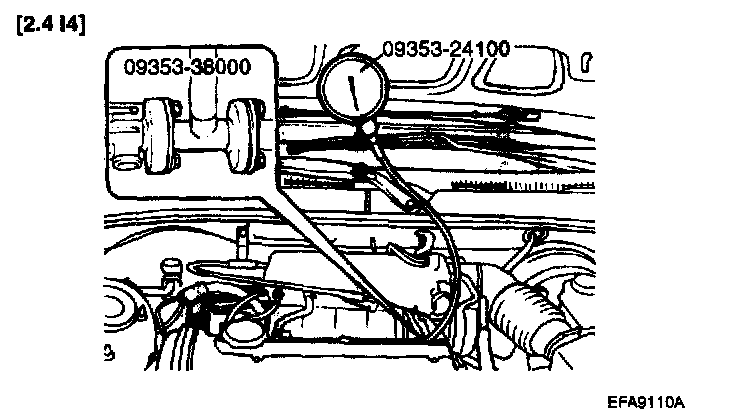
8. Measure the fuel pressure when the vacuum hose is connected to the pressure regulator.
Standard value:
Approx.255 kPa (2.57 kg/sq.cm, 37 psi)
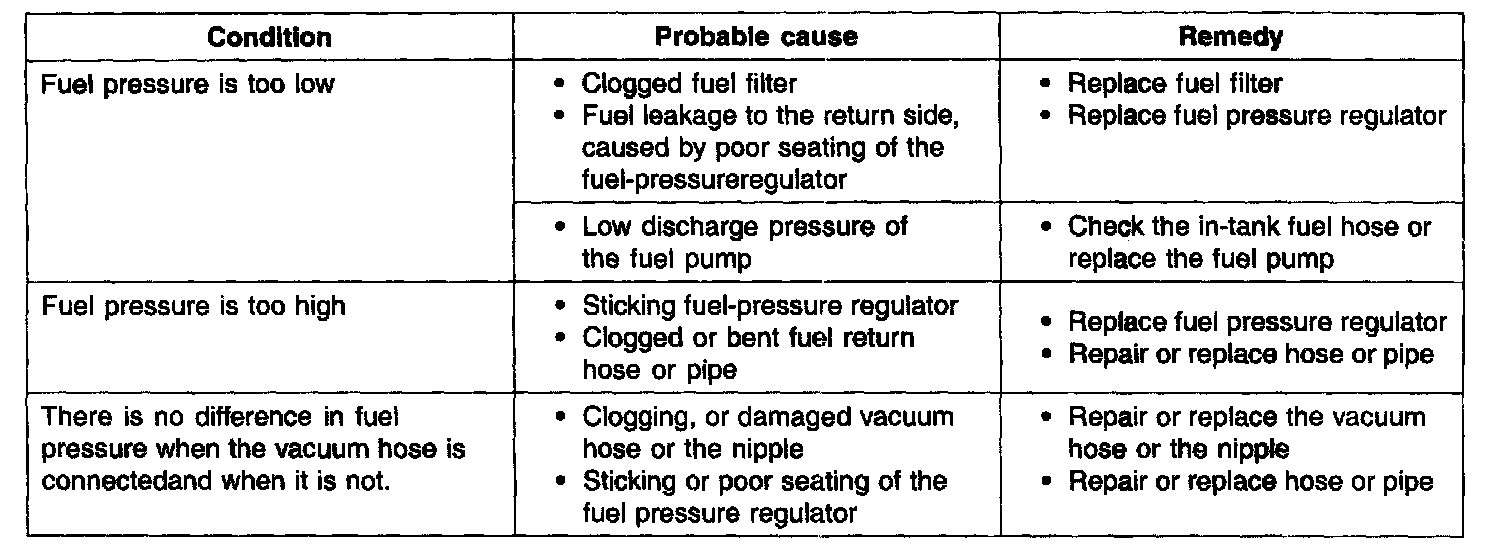
9. If the results of the measurements made in steps (7) and (8) are not within the standard value, use the table to determine the probable cause, and make the necessary repairs.

10. Stop the engine and check for a change in the fuel pressure gauge reading,which should hold for approximately 5 minutes. If the gauge indication drops,observe the rate of drop. Determine and remove the causes according to the table.
11. Reduce the pressure in the fuel line.
12. Disconnect the hose and the gauge.
CAUTION: Cover the hose connection with a shop towel to prevent splashing of fuel caused by fuel residual pressure in the fuel line.
13. Replace the O-ring of the end of the hose.
14. Connect the fuel hose to the delivery pipe and tighten with the specified.
15. Check for fuel leakage.