Sanden Compressor
Oil Level Check - Sanden CompressorFig. 1 Oil Level Check Component Location. Sanden Compressor:
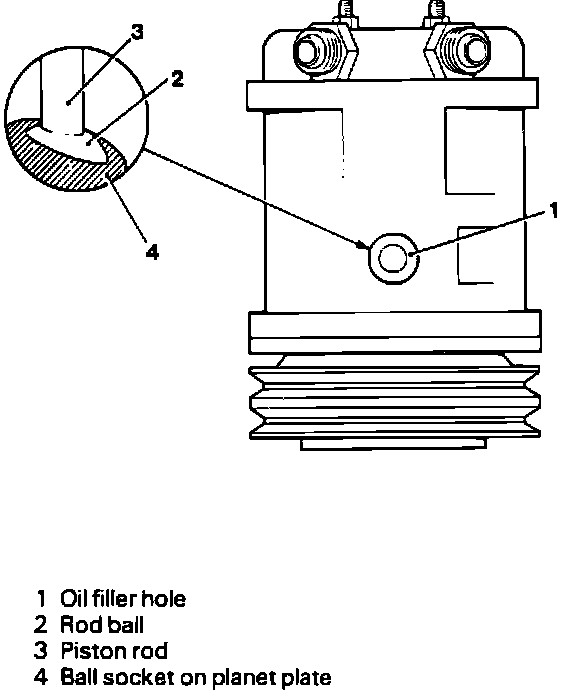
Fig. 2 Compressor Mounting Angle & Dipstick. Sanden Compressor:
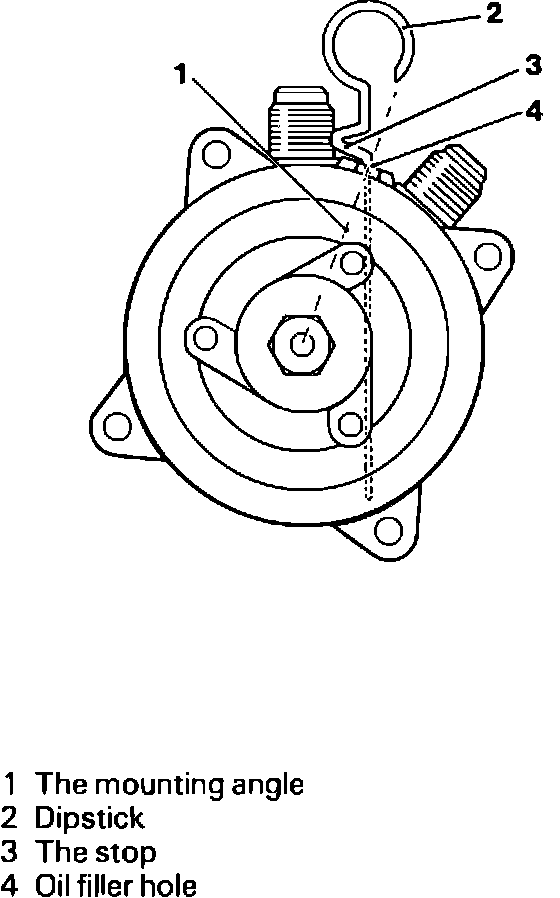
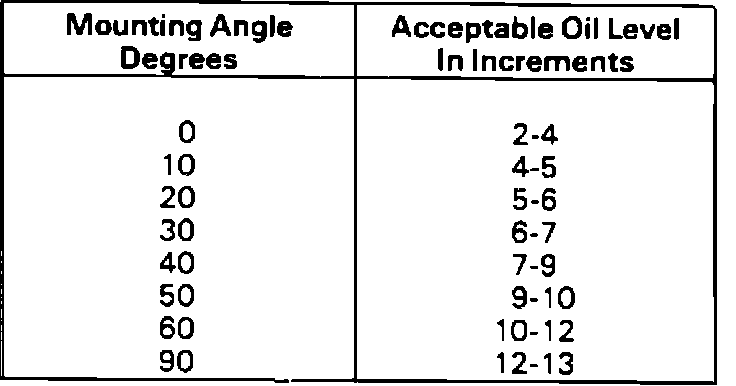
Fig. 3 Oil Level Chart:
Whenever a component has been replaced in the refrigerant system or there is an obvious oil leak, the following procedures should be performed.
1. Determine compressor mounting angle, then remove oil filler plug.
2. Look through oil filler plug hole and rotate clutch front plate to position internal components as shown in Fig. 1.
3. Center components as they are moving to rear of compressor (discharge stroke). This is necessary to allow dipstick to seat fully.
4. Insert dipstick to stop position, Fig. 2. Point of angle must be towards engine, with bottom surface of angle flush with surface of filler hole.
5. Refer to Fig. 3 for correct oil level in relation to corresponding mounting angle of compressor.
6. If incrementation indication on dipstick does not match chart, add or subtract oil to mid-point value.
7. Install oil filler plug, ensuring O-ring seal is clean and not twisted.
8. Torque oil filler plug to 6-9 ft. lbs. Do not overtighten plug to stop a leak.