- Reduce the internal pressure of the fuel lines and hoses.
- Disconnect the fuel pump harness connector in the trunk room.
- Start the engine and, after it stops, turn the ignition switch to OFF.
- Disconnect the battery negative (-) terminal.
- Connect the fuel pump harness connector.
- Remove the battery and engine cover.
- Detach the air cleaner.
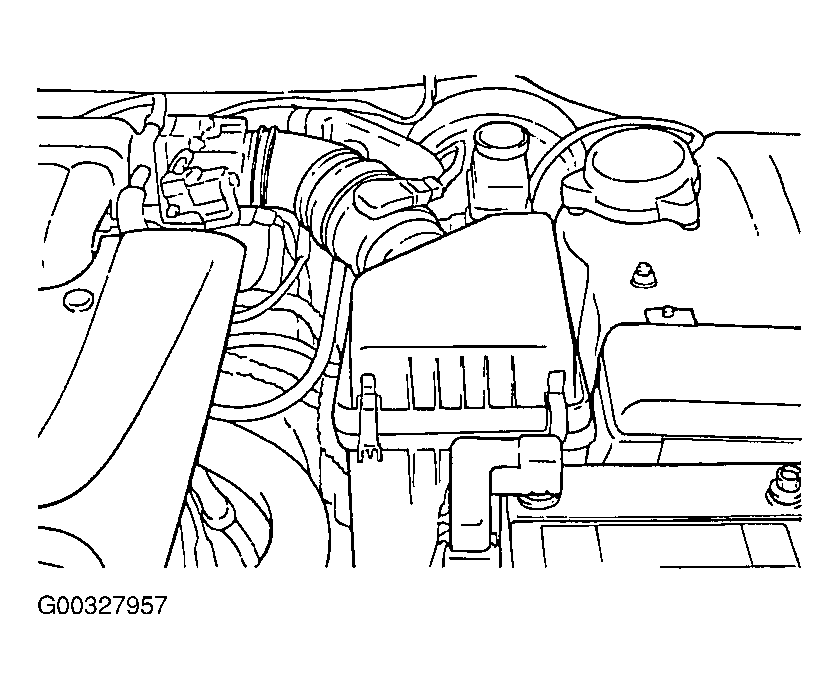 Courtesy of KIA MOTORS AMERICA, INC.
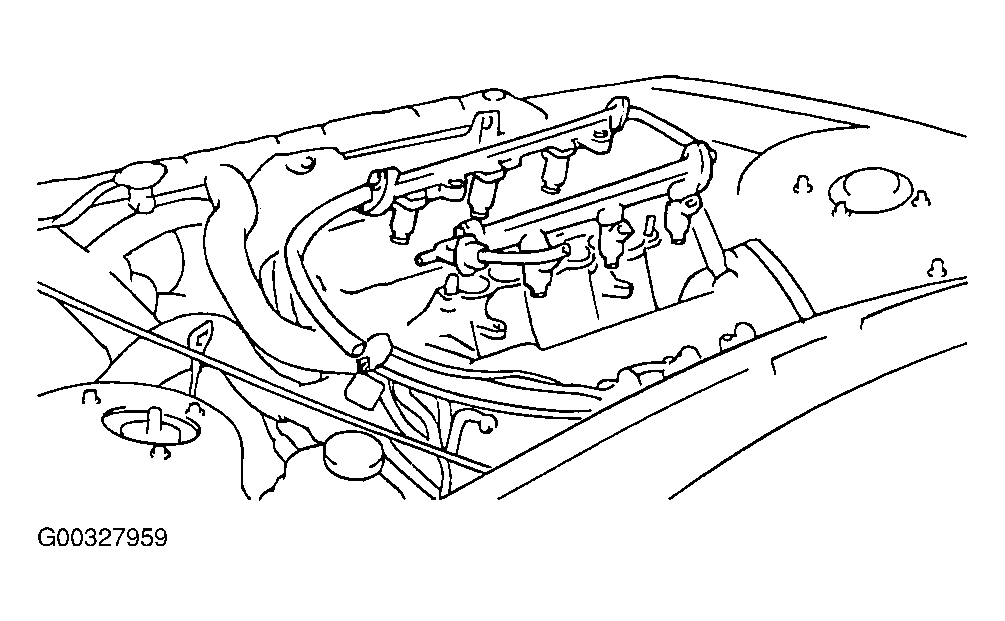
- Disconnect the connectors for the engine harness.
- Disconnect the connectors for the alternator harness, the oil pressure switch and the oil pressure sensor.
- Drain the engine coolant.
- Disconnect the transaxle oil cooler hoses.
NOTE:
When disconnecting the hoses, make identification marks to avoid making any mistakes when installing them.
CAUTION:
Be careful not to spill any of the oil or fluid out of the hoses. Plug the openings to prevent the entry of foreign material.
- Disconnect the radiator upper and lower hoses on the engine side, and then remove the radiator assembly.
 Courtesy of KIA MOTORS AMERICA, INC.
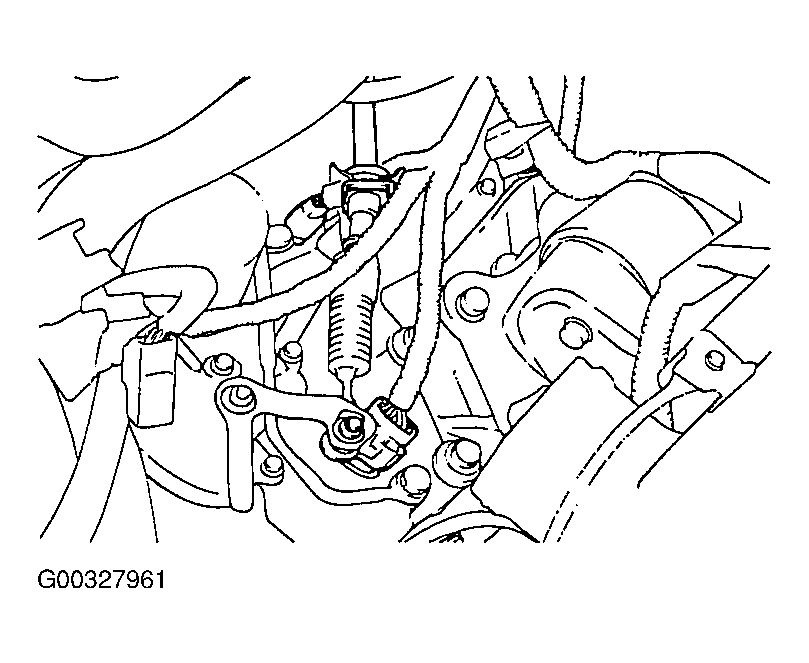
- Disconnect the high tension cable and all wires to the distributor from the ignition coil.
- Disconnect the engine ground.
- Disconnect the brake booster vacuum hose.
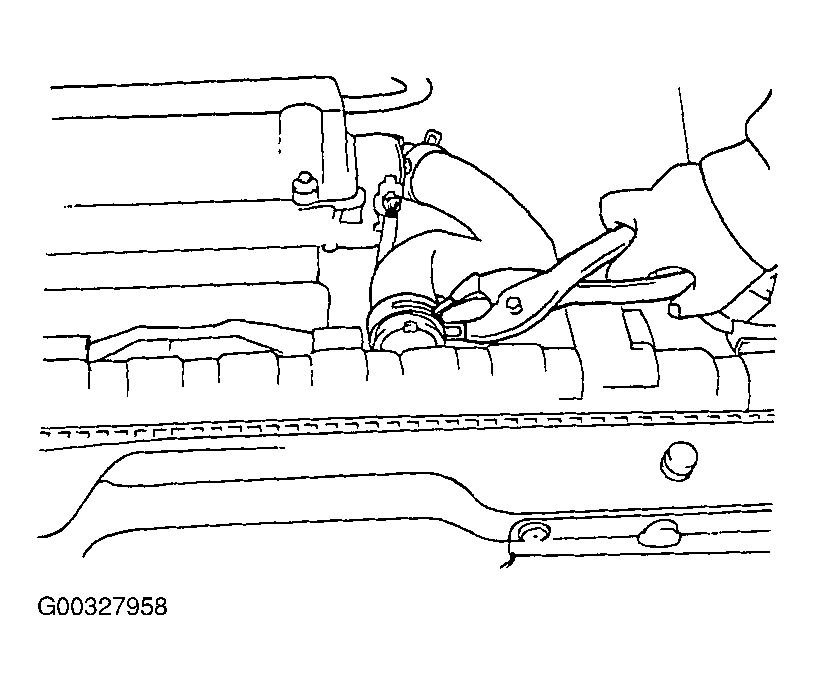
- Remove the main fuel line, and the return and vapor hoses from the engine side.
 Courtesy of KIA MOTORS AMERICA, INC.
- Disconnect the heater hoses (inlet and outlet) on the engine side.
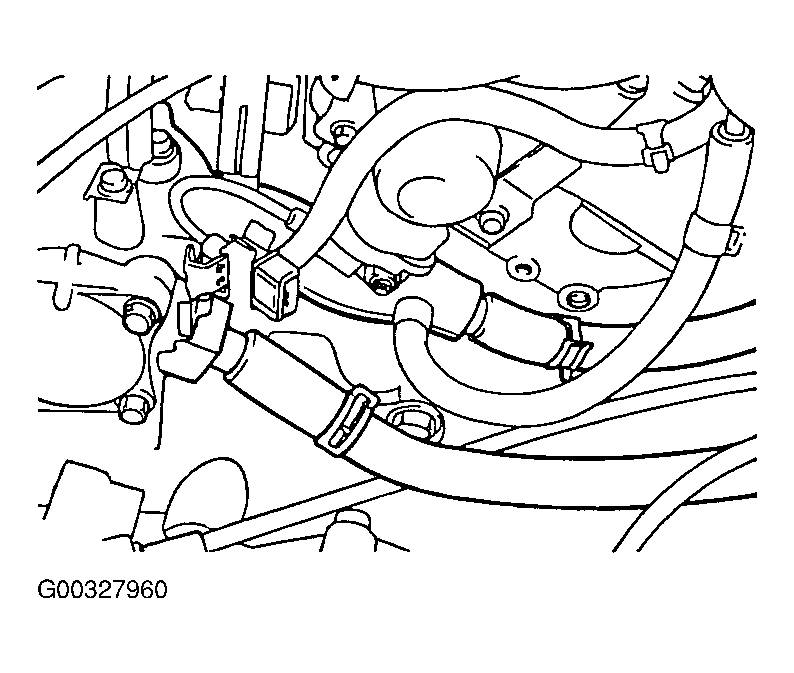 Courtesy of KIA MOTORS AMERICA, INC.
- Disconnect the accelerator cable and cruise control cable at the engine side.
- Remove the control cable from the transaxle.
- Disconnect the speedometer cable from the transaxle.
 Courtesy of KIA MOTORS AMERICA, INC.
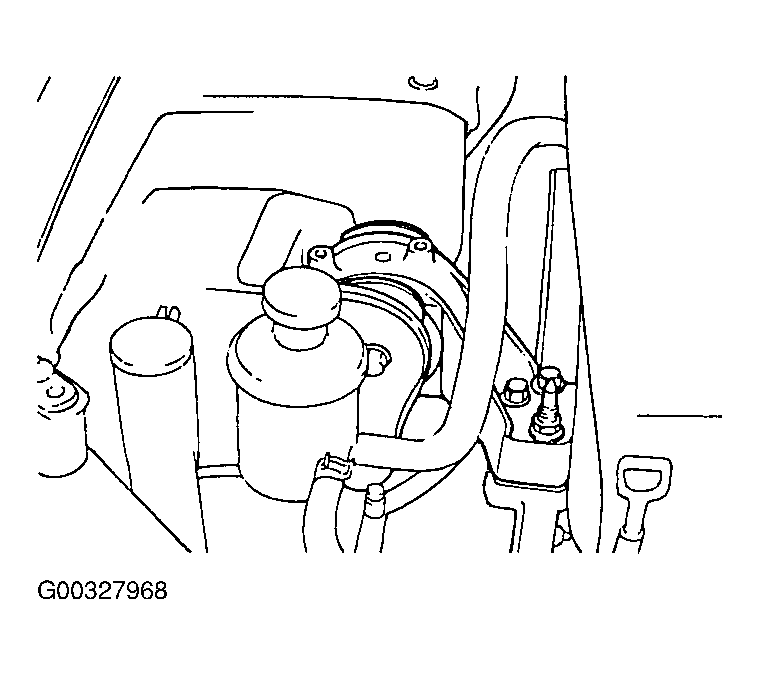
- Remove the power steering oil pump hose.
- Raise the vehicle.
- Remove the oil pan shield.
- Drain the transaxle oil.
 Courtesy of KIA MOTORS AMERICA, INC.
- Disconnect the front exhaust pipe from the manifold.
NOTE:
Use a wire to suspend the exhaust pipe from the bottom of the vehicle.
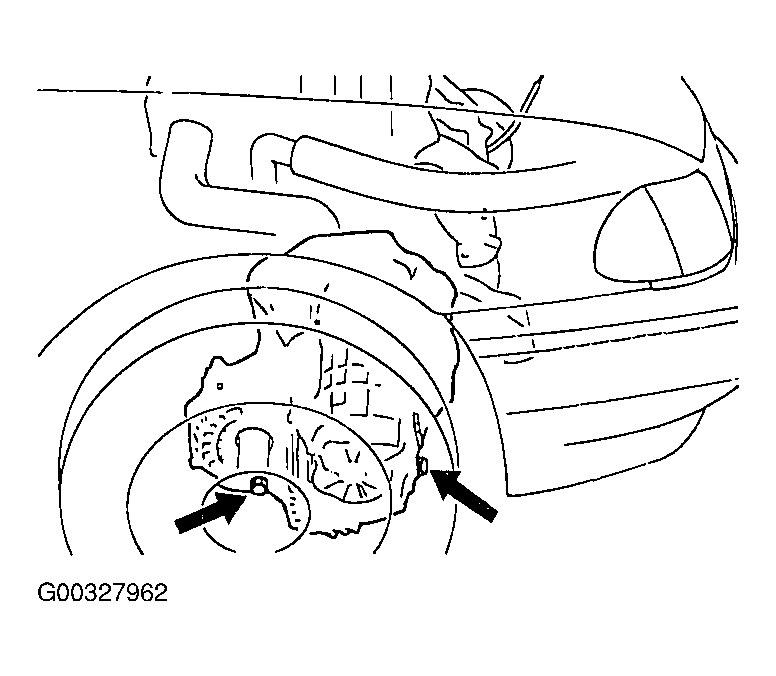
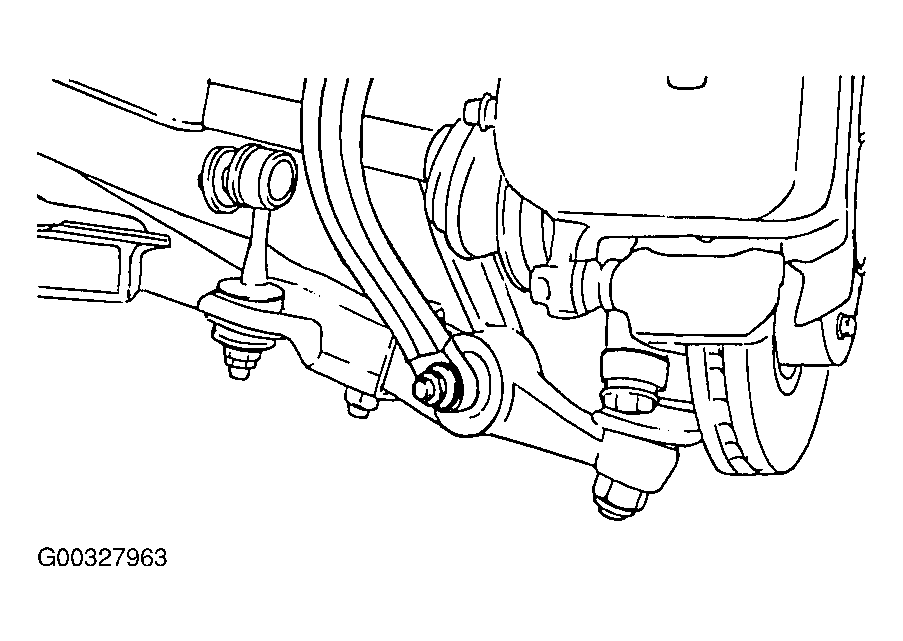
- Remove the lower arm ball joint bolts and upper arm bolt from the knuckle.
 Courtesy of KIA MOTORS AMERICA, INC.
 Courtesy of KIA MOTORS AMERICA, INC.
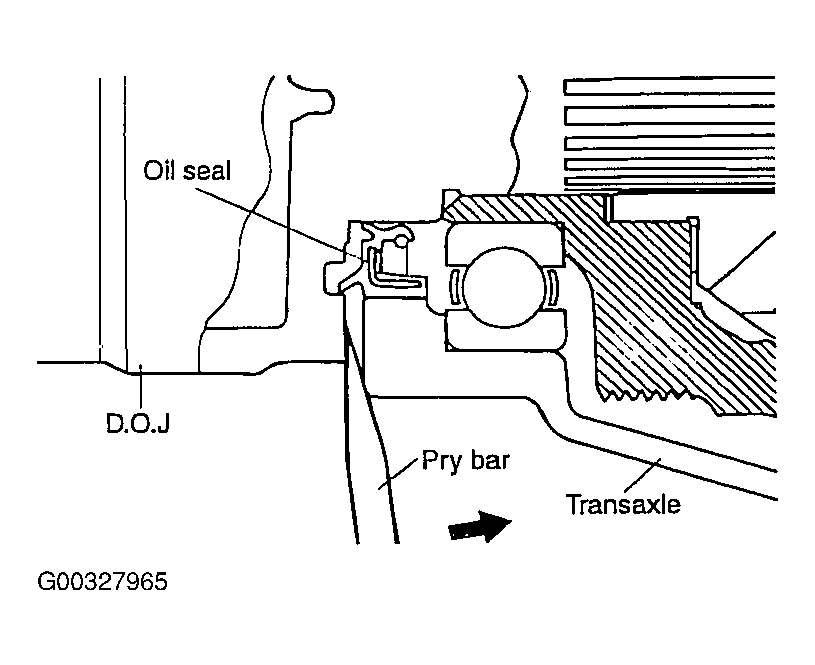
- Remove the axle shafts from the transaxle housing.
CAUTION:
- Plug up the holes of the transaxle case to prevent entry of foreign material.
- The circlips on the axle shafts should be replaced when installing again.
 Courtesy of KIA MOTORS AMERICA, INC.
- Attach a cable to the engine, and use a chain hoist to lift the engine only enough to pull the cable tight.
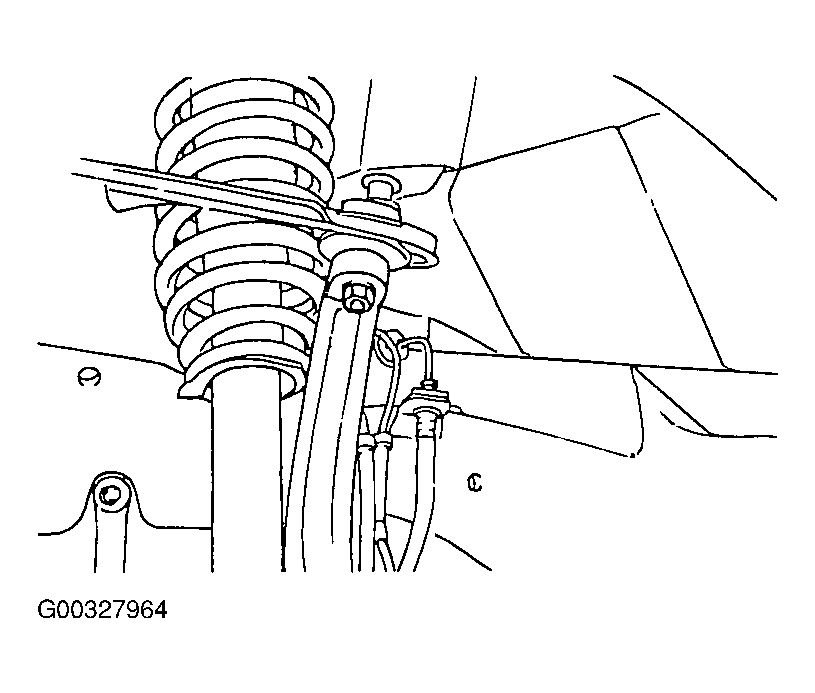
- Remove the front roll stopper.
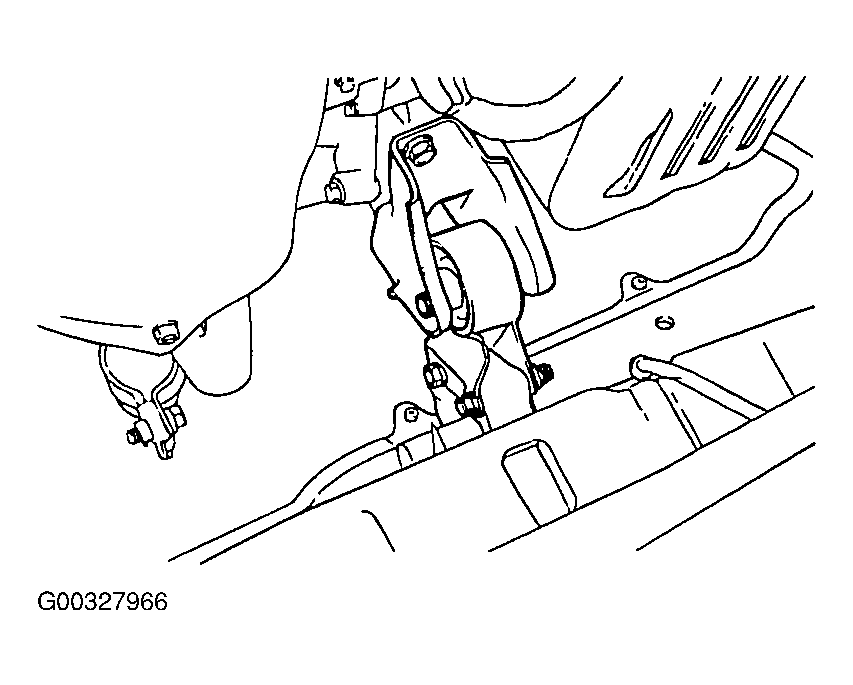 Courtesy of KIA MOTORS AMERICA, INC.
- Remove the rear roll stopper.
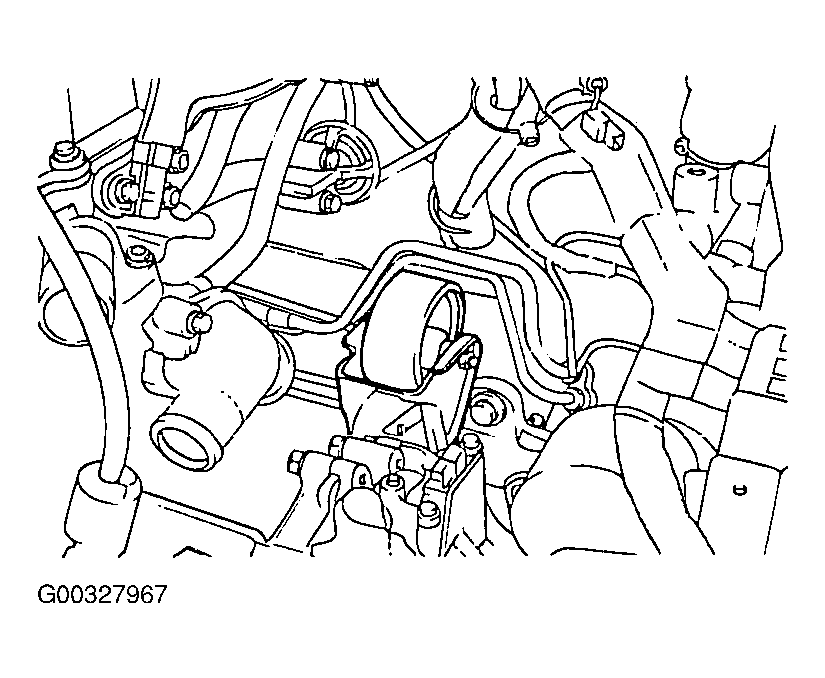 Courtesy of KIA MOTORS AMERICA, INC.
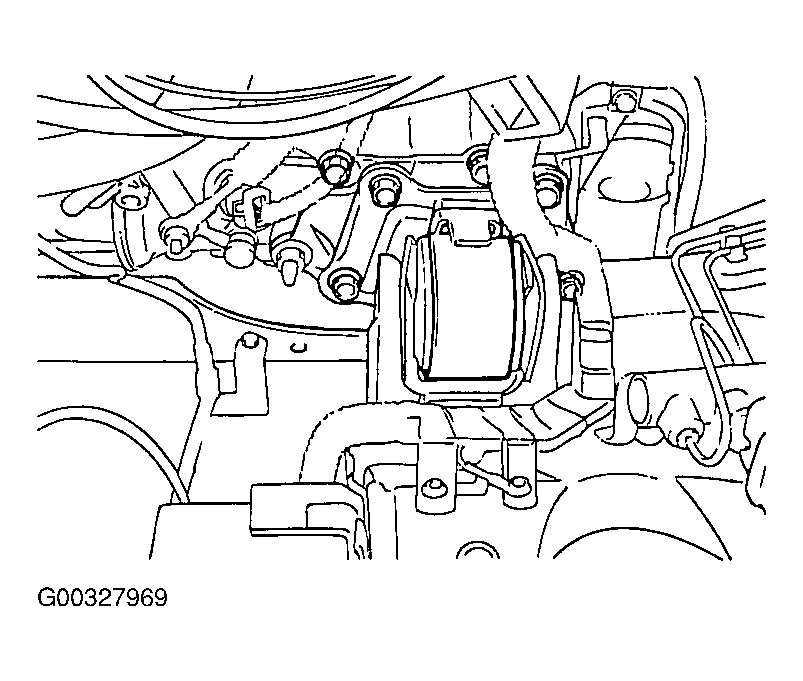
- Disconnect the connector of starter motor harness.
- Remove the engine mount bolts.
- Remove the bolts and nuts that fasten the engine mount bracket to the body.
 Courtesy of KIA MOTORS AMERICA, INC.
- Slowly raise the engine and transaxle and temporarily hold it in the raised condition.
CAUTION:
Confirm that all of the cables, hoses, harnesses, connectors etc., are disconnected from the engine.
- Remove the transaxle mounting bracket bolts.
 Courtesy of KIA MOTORS AMERICA, INC.
- Remove the left mount insulator bolt.
- While directing the transaxle side downward, lift the engine and transaxle assembly up out of the vehicle.