Lighting System: Rheostat: Inspection
- Disconnect the negative (-) battery terminal.
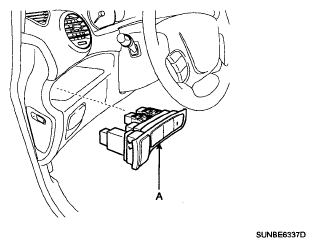
- Remove the lower crash pad switch assembly (A) by using the trim remover tool.
 Courtesy of KIA MOTORS AMERICA, INC.
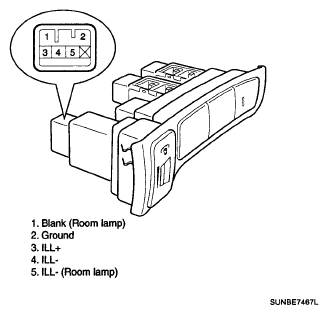
- Disconnect the rheostat switch connector.
 Courtesy of KIA MOTORS AMERICA, INC.
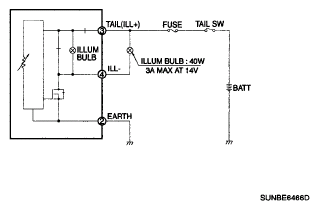
- Check for intensity of new rheostat switch. If the light intensity of the lamps changes smoothly without any flickering when the rheostat is turned, it can be assumed that the rheostat is normal.
 Courtesy of KIA MOTORS AMERICA, INC.