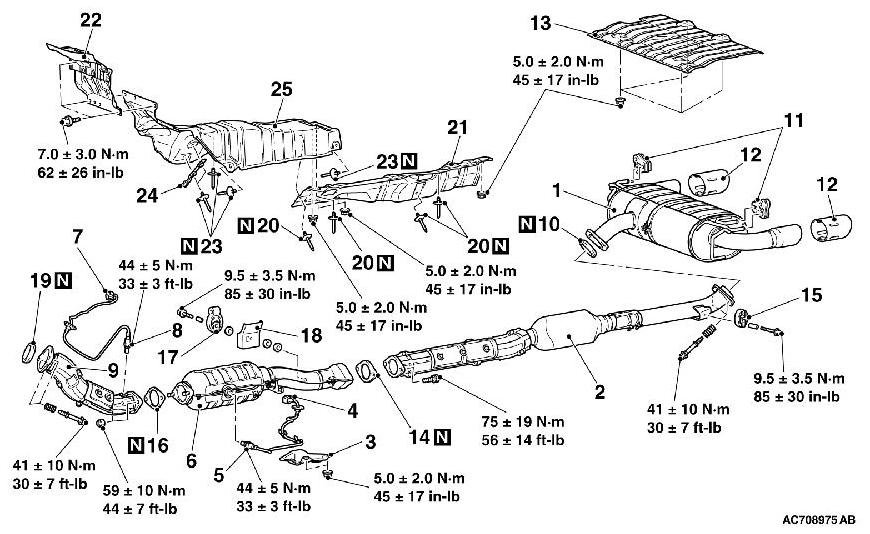
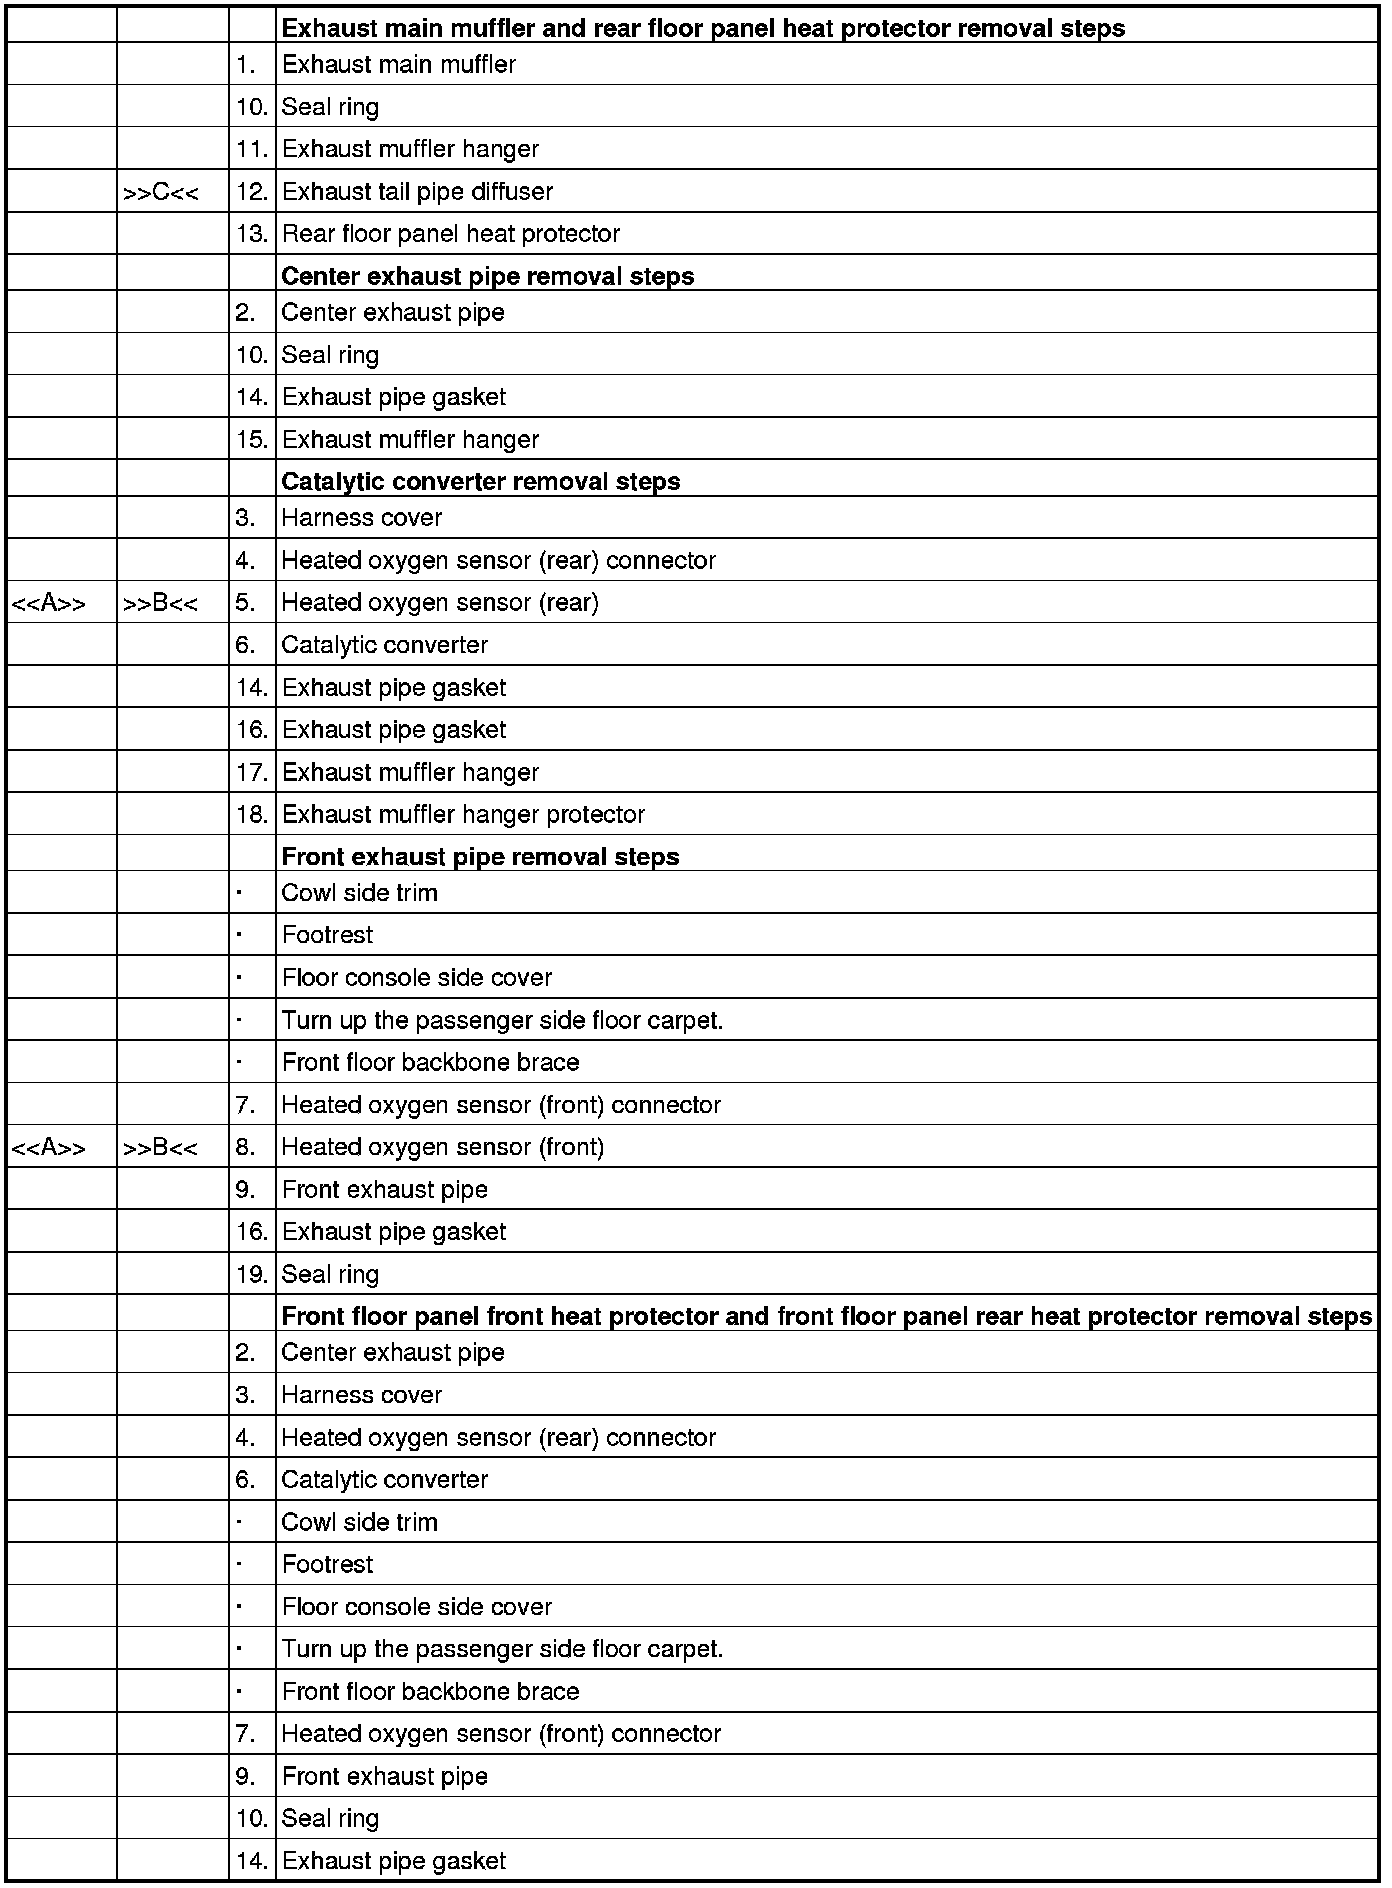
Oxygen Sensor: Service and Repair
REMOVAL AND INSTALLATION
Required Special Tool:
- MB991953: Oxygen Sensor Wrench
REMOVAL SERVICE POINTS
[[A]] HEATED OXYGEN SENSOR REMOVAL
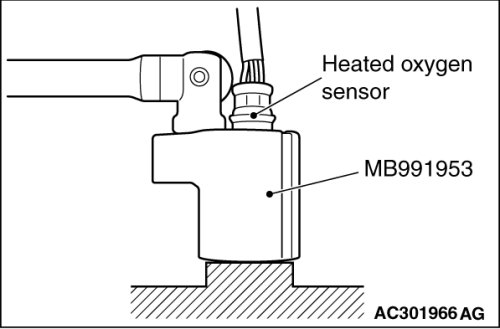
Use special tool MB991953 to remove the heated oxygen sensor.
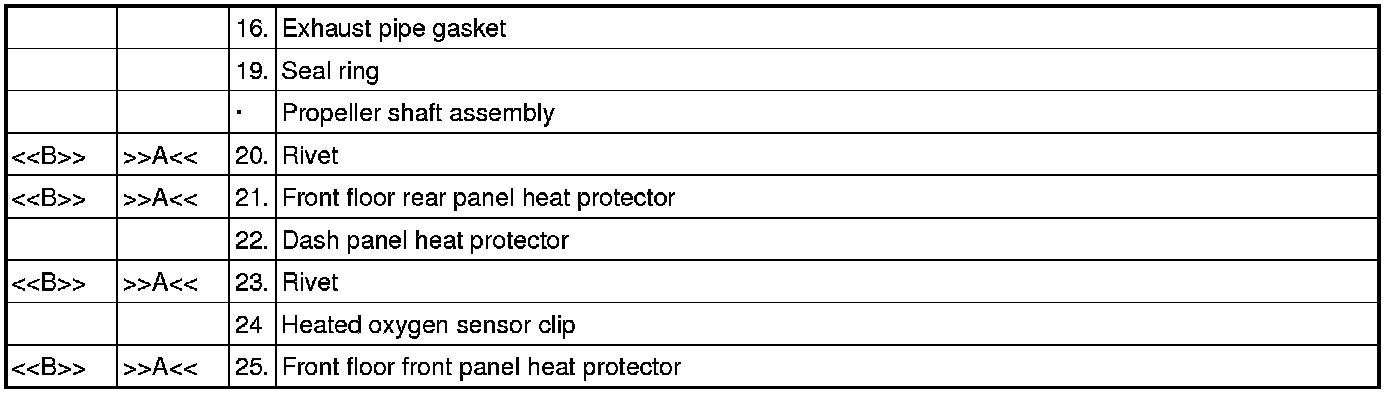
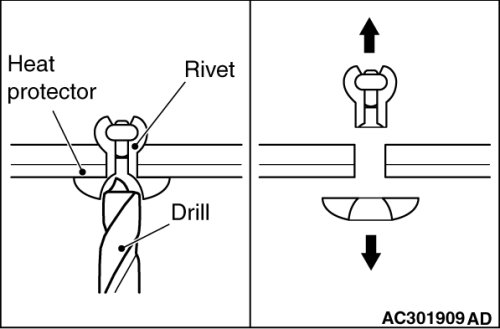
[[B]] RIVET/FRONT FLOOR REAR PANEL HEAT PROTECTOR/FRONT FLOOR FRONT PANEL HEAT PROTECTOR REMOVAL
1.
CAUTION:
Be careful not to score the heat protector by drill.
Use a 6.0 / diameter / mm drill to make a hole in the flange of rivet as shown.
2. Break the rivet, and remove the rivet and heat protector.
INSTALLATION SERVICE POINTS
]]A[[ RIVET/FRONT FLOOR FRONT PANEL HEAT PROTECTOR/FRONT FLOOR REAR PANEL HEAT PROTECTOR/RIVET INSTALLATION
Use a riveter to tighten the rivet by the following procedure.
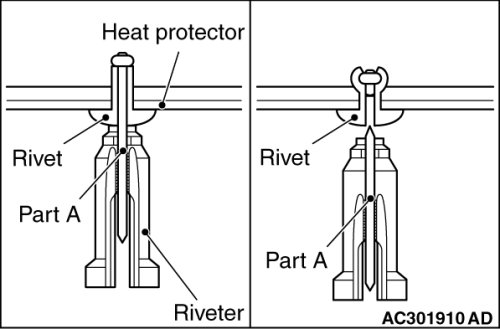
1. Insert part A of rivet into the riveter, and insert the rivet into the assembling area.
2. Operate the tool's handle while pushing the flange surface of rivet by riveter.
Part A of rivet is cut and the rivet is tightened.
]]B[[ HEATED OXYGEN SENSOR INSTALLATION
Tighten the heated oxygen sensor to the specified torque by using special tool MB991953.
Tightening torque: 44± 5Nm (33± 3 ft-lb)
]]C[[ EXHAUST TAIL PIPE DIFFUSER INSTALLATION
When the part is reused, make sure that there is no excessive play after installation and that the part is securely fixed.