Compressor Installation
INSTALLATION
IMPORTANT: Keep compressor level during installation to avoid any oil loss from the low or high side ports.
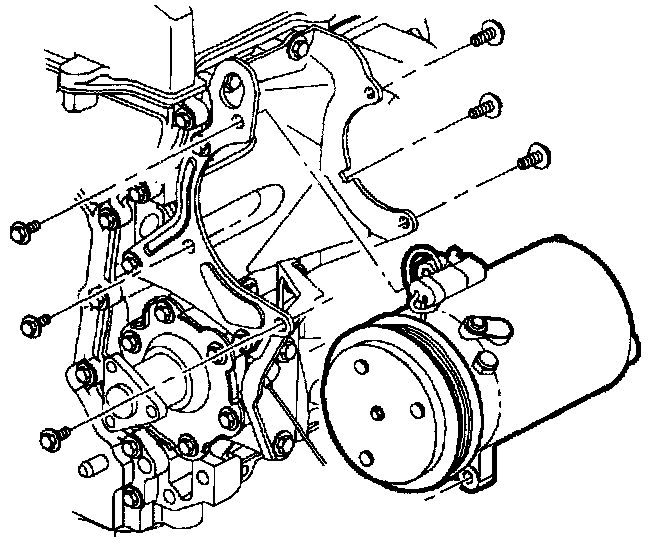
1. Install compressor to front bracket with three bolts. Finger tighten only.
2. Install compressor to rear bracket with three bolts. Tighten front and rear bolts to specifications.
Front Bolts:
Torque: 49 N.m (36 ft-lbs)
Rear Bolts:
Torque: 25 N.m (19 ft-lbs)
NOTICE: Use only R-12 Refrigerant oil (mineral) to lubricate O-rings. Use of R-134a (PAG) oil will cause premature corrosion of fitting joints.
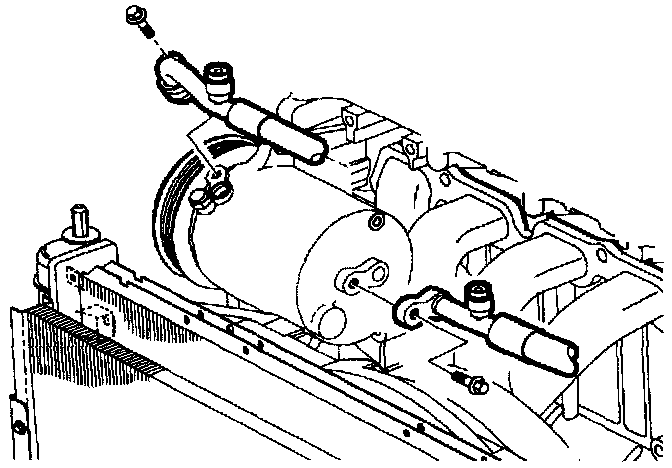
3. Remove plugs or plastic bags from suction and discharge hoses. Lubricate O-rings with R-12 Refrigerant oil (mineral) and install.
4. Install hoses to the compressor low and high side ports. Tighten bolts to specifications.
Suction Hose:
Torque: 25 N.m (19 ft-lbs)
Discharge Hose:
Torque: 25 N.m (19 ft-lbs)
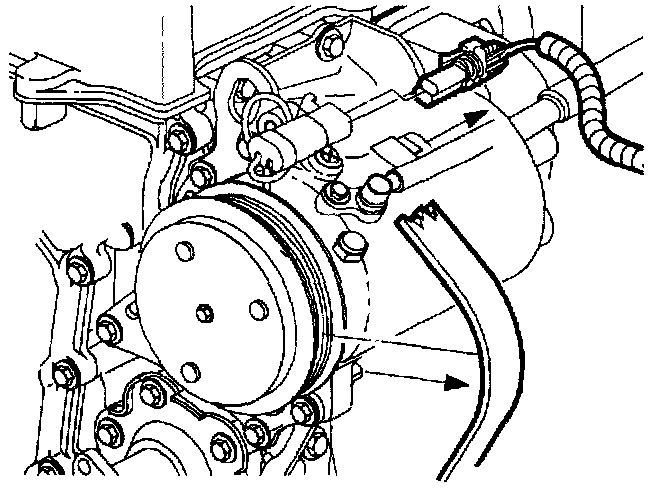
5. Connect compressor clutch electrical connector.
6. Install accessory drive belt.
7. Connect negative battery cable.
Torque: 17 N.m (151 in-Lbs)
8. Set clock to proper time.
9. Evacuate, charge, and leak test A/C system.
10. Run A/C performance test.