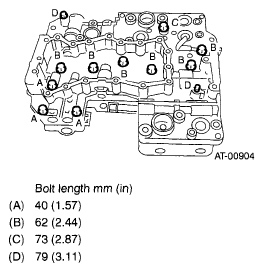
- Remove oil strainer from lower control valve body.
NOTE:
Arrange the removed bolts in good order to assemble in the same place as disassembly, because the bolt lengths are different.
 Courtesy of SUBARU OF AMERICA, INC.
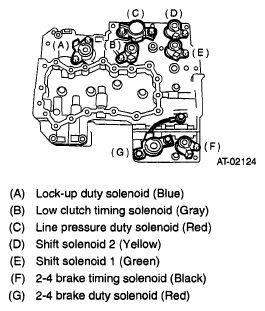
- Remove the duty solenoids, solenoids and sensor from the lower valve body.
NOTE:
Arrange the removed bolts in good order to assemble in the same place as disassembly, because the bolt lengths are different.
 Courtesy of SUBARU OF AMERICA, INC.
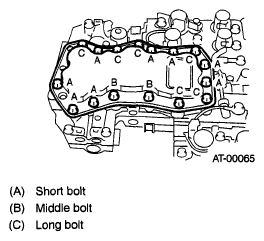
- Remove the upper-lower valve body tightening bolts.
NOTE:
Arrange the removed bolts in good order to assemble in the same place as disassembly, because the bolt lengths are different.
 Courtesy of SUBARU OF AMERICA, INC.
- Remove the lower valve body.
- Remove the oil filter and plate.
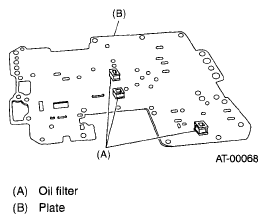 Courtesy of SUBARU OF AMERICA, INC.
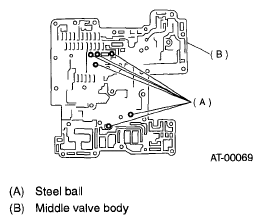
- Remove six steel balls from middle valve body.
 Courtesy of SUBARU OF AMERICA, INC.
- Remove the middle valve body.
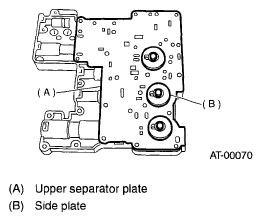
- Remove upper separator plate from middle valve body.
 Courtesy of SUBARU OF AMERICA, INC.
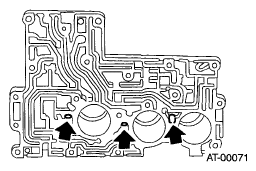
- Remove valve springs and four steel balls from upper valve body.
- Place a shop cloth to the piston removal hole.
- Using an air compressor, apply air slowly to each piston hole and remove the pistons.
 Courtesy of SUBARU OF AMERICA, INC.
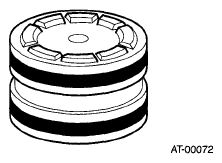
- Remove the seal ring from piston.
 Courtesy of SUBARU OF AMERICA, INC.