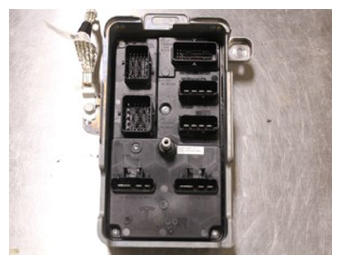
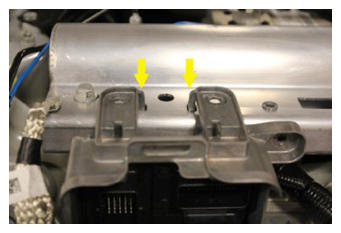
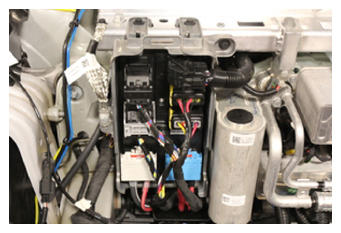
- Position the front body controller module for installation and secure the ground cable to the multi system beam.
NOTE:
2x locating tabs, 1x ground cable
 Courtesy of TESLA, INC. Courtesy of TESLA, INC.
|
 Courtesy of TESLA, INC. Courtesy of TESLA, INC.
|
 Courtesy of TESLA, INC. Courtesy of TESLA, INC.
|
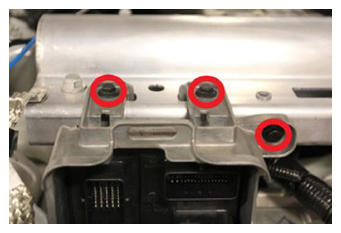
- Install the bolts (x3) that attach the front body controller module to the body.
NOTE:
10 mm, 10 N.m. Start with the side bolt
 Courtesy of TESLA, INC. Courtesy of TESLA, INC.
|
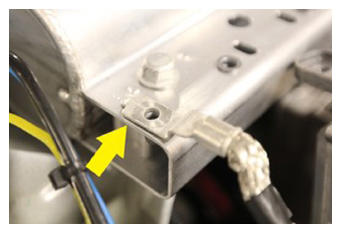
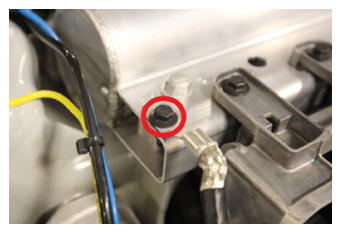
- Install the bolt that attaches the ground cable for the front body controller module.
NOTE:
10 mm, 10 N.m
 Courtesy of TESLA, INC. Courtesy of TESLA, INC.
|
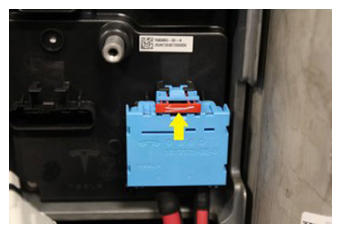
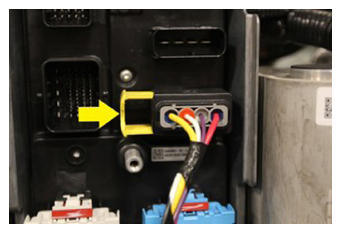
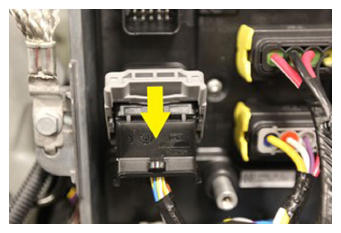
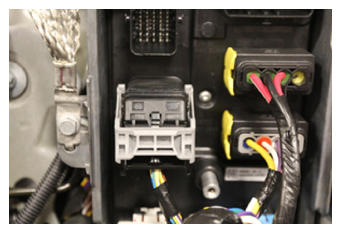
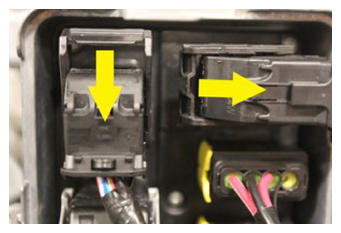
- Secure the lower locking connectors (x2) on the front body controller module.
NOTE:
Engage red locking tab
 Courtesy of TESLA, INC. Courtesy of TESLA, INC.
|
 Courtesy of TESLA, INC. Courtesy of TESLA, INC.
|
 Courtesy of TESLA, INC. Courtesy of TESLA, INC.
|
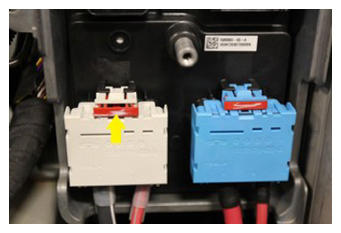
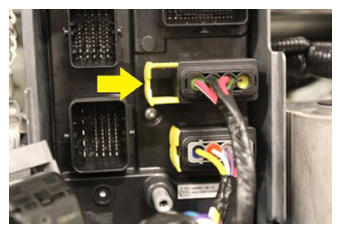
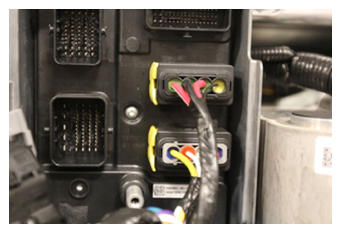
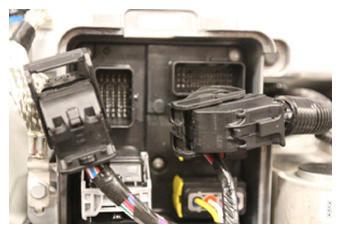
- Secure the RH middle locking connectors (x2) on the front body controller module.
NOTE:
Verify that the yellow locking tabs are fully opened. Seat connectors and mechanism will begin to engage.
 Courtesy of TESLA, INC. Courtesy of TESLA, INC.
|
 Courtesy of TESLA, INC. Courtesy of TESLA, INC.
|
 Courtesy of TESLA, INC. Courtesy of TESLA, INC.
|
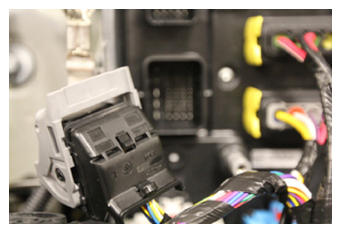
- Secure the LH locking connector for the front body controller module.
NOTE:
Verify the lever is fully opened. Seat connector and lever will begin to engage.
 Courtesy of TESLA, INC. Courtesy of TESLA, INC.
|
 Courtesy of TESLA, INC. Courtesy of TESLA, INC.
|
 Courtesy of TESLA, INC. Courtesy of TESLA, INC.
|
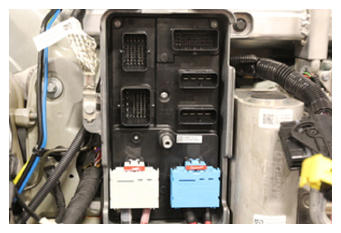
- Secure the upper locking connectors (x2) for the front body controller module.
NOTE:
Verify levers are fully opened. Seat connectors and levers will begin to engage.
 Courtesy of TESLA, INC. Courtesy of TESLA, INC.
|
 Courtesy of TESLA, INC. Courtesy of TESLA, INC.
|
 Courtesy of TESLA, INC. Courtesy of TESLA, INC.
|
- Connect LV power. See LV Power (Disconnect And Connect)
.
- Connect Toolbox 3 to the vehicle. See Toolbox 3 (Connect and Disconnect)
.
- In Toolbox, click Actions/Autodiag
, and then search for Service_Redeploy
.
- Click UPDATE_SERVICE-REDEPLOY
, and then click Run
. Allow the routine to complete.
NOTE:
Click X
at top right of window to close once the routine is complete.
- Adjust the headlights. See Headlights - Adjust (Wall Method) or Headlights - Adjust - NA (Tool Method) .
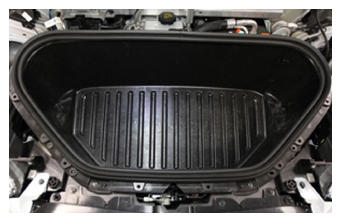
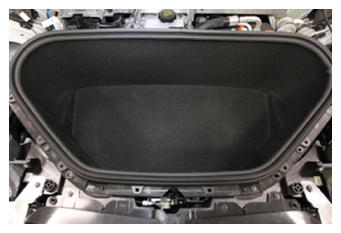
- Install the underhood storage unit. See Underhood Storage Unit (Remove and Replace)
.
- Install the underhood storage unit carpet.
NOTE:
Verify the carpet is properly seated under the seal.
 Courtesy of TESLA, INC. Courtesy of TESLA, INC.
|
 Courtesy of TESLA, INC. Courtesy of TESLA, INC.
|
- Install the underhood storage unit access panel. See Underhood Storage Unit Access Panel (Remove and Replace)
.
- Install the front underhood apron. See Underhood Apron - Front (Remove and Replace)
.
- Install the LH and RH underhood aprons. See Underhood Apron - LH (Remove and Replace)
.
- Install the rear underhood apron. See Underhood Apron - Rear (Remove and Replace)
.