- With an assistant, position the front subframe to the front subframe lifting tool.
NOTE:
Make sure the 2 guides align.
 Courtesy of TESLA, INC. Courtesy of TESLA, INC.
|
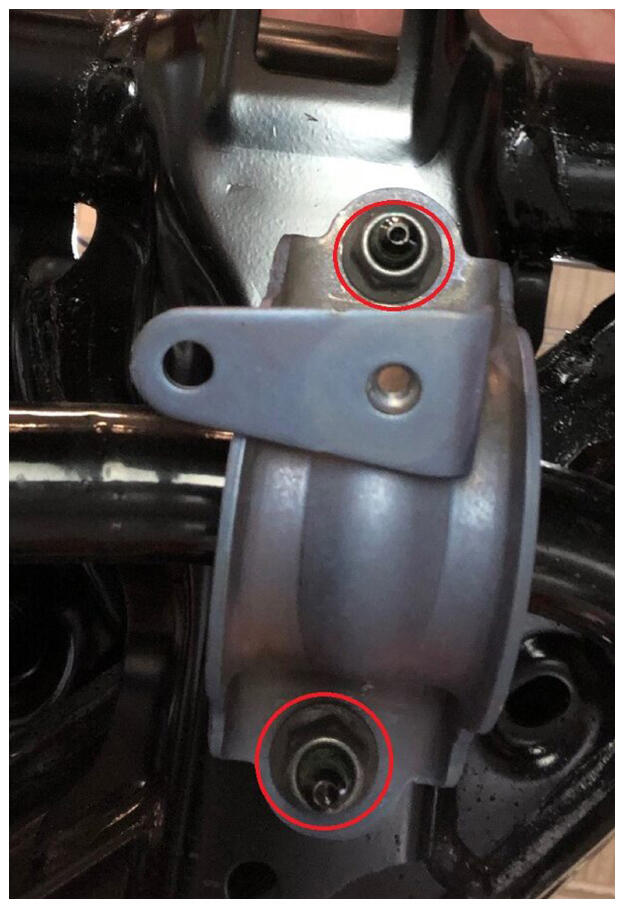
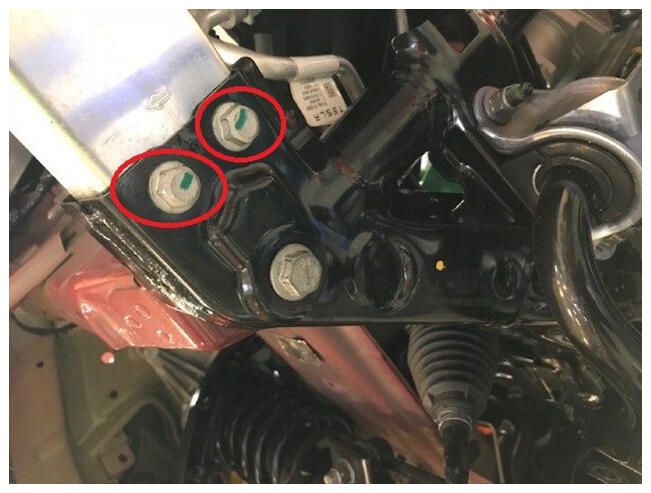
- Hand-tighten the bolts (x2) that attach the LH front subframe crush can assembly to the front subframe, then repeat this step on the RH side.
NOTE:
LH Shown, RH Similar
 Courtesy of TESLA, INC. Courtesy of TESLA, INC.
|
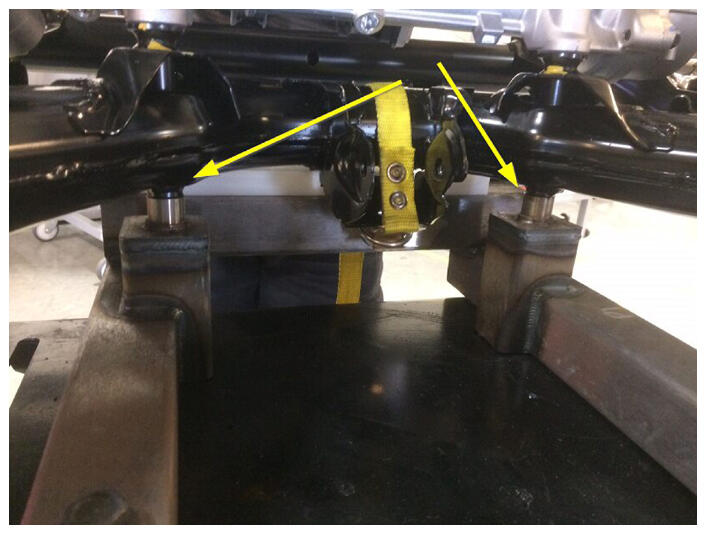
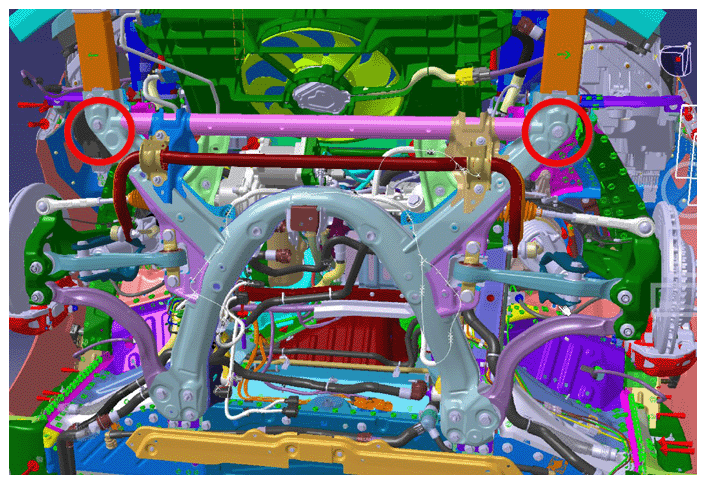
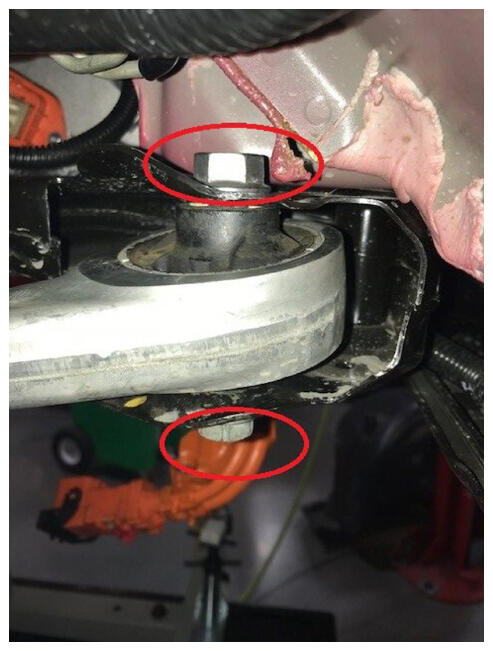
- With an assistant, install and mark the LH nuts (x2) that attach the front stabilizer bar to the front subframe, then repeat this step on the RH side.
 35 N.m (25.8 lbs-ft)
NOTE:
LH Shown, RH Similar
 Courtesy of TESLA, INC. Courtesy of TESLA, INC.
|
 Courtesy of TESLA, INC. Courtesy of TESLA, INC.
|
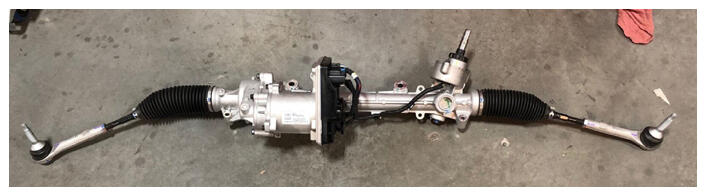
- Position the steering gear assembly to the front subframe for installation.
 Courtesy of TESLA, INC. Courtesy of TESLA, INC.
|
- Hand-tighten the rear bolts (x2) that attach the steering gear assembly to the front subframe.
 Courtesy of TESLA, INC. Courtesy of TESLA, INC.
|
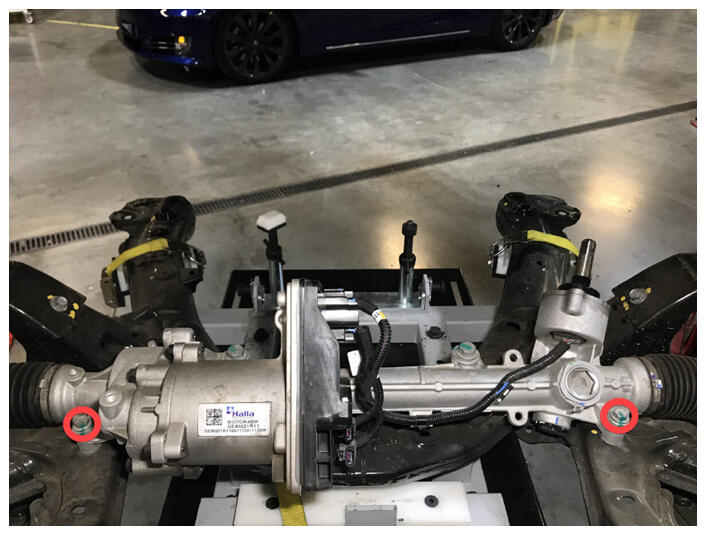
- Hand-tighten the front bolts (x2) that attach the steering gear assembly to the front subframe.
 Courtesy of TESLA, INC. Courtesy of TESLA, INC.
|
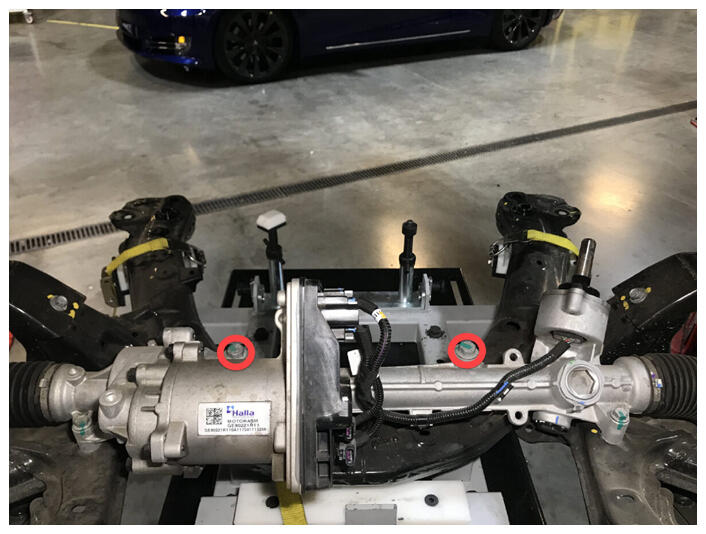
- Torque the front bolts that attach the steering gear assembly to the front subframe.
47 N.m (34.7 lbs-ft)
 Courtesy of TESLA, INC. Courtesy of TESLA, INC.
|
- Torque the rear bolts that attach the steering gear assembly to front subframe.
75 N.m (55.3 lbs-ft)
 Courtesy of TESLA, INC. Courtesy of TESLA, INC.
|
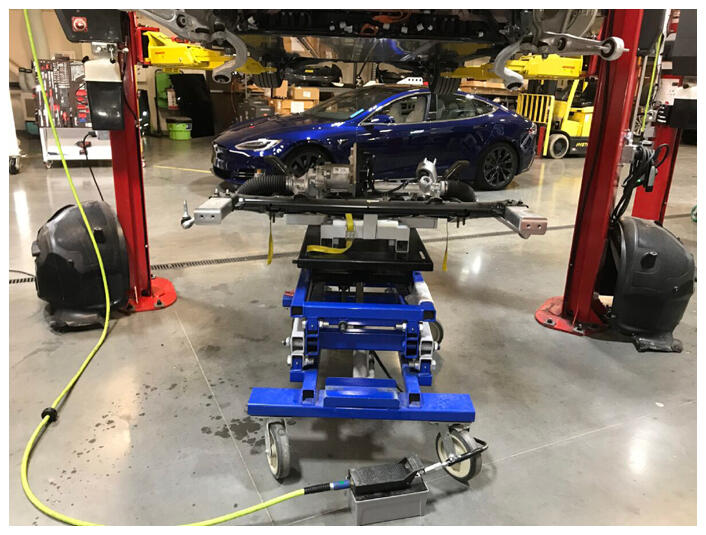
- Position the front subframe lifting tool and front subframe under the vehicle for installation.
 Courtesy of TESLA, INC. Courtesy of TESLA, INC.
|
- Connect an air hose to the front subframe lifting tool.
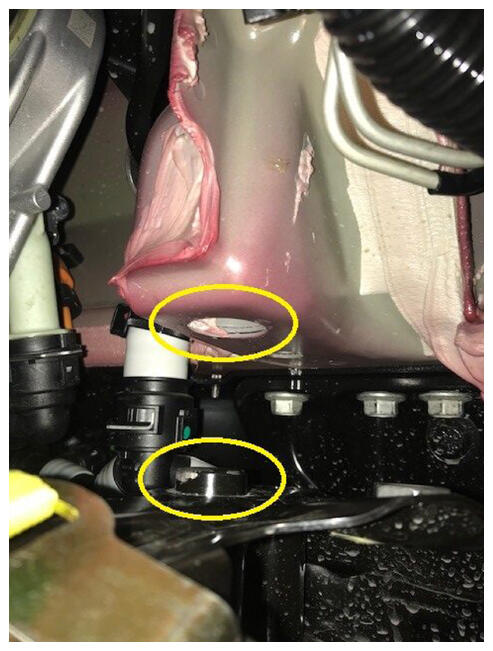
- With an assistant, raise the front subframe lifting tool until the front subframe and body meet.
NOTE:
Make sure to line up the rear locator pins on the subframe.
WARNING:
The video(s) included in this procedure are meant as an overview for supplemental purposes only. Follow all of the steps listed in the procedure to avoid damage to components and/or personal injury.
 Courtesy of TESLA, INC. Courtesy of TESLA, INC.
|
 Courtesy of TESLA, INC. Courtesy of TESLA, INC.
|
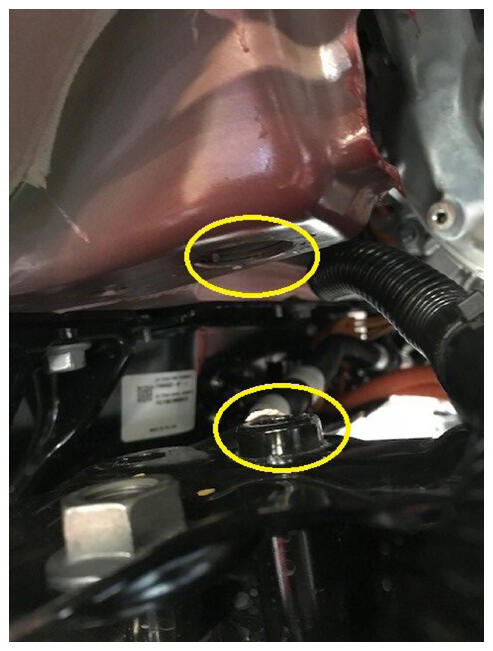
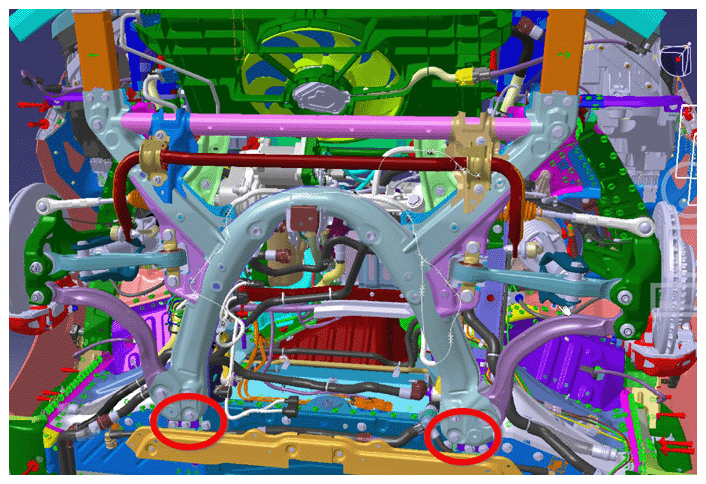
- Hand-tighten the larger bolts (x2) that attach the rear portion of the front subframe to the body.
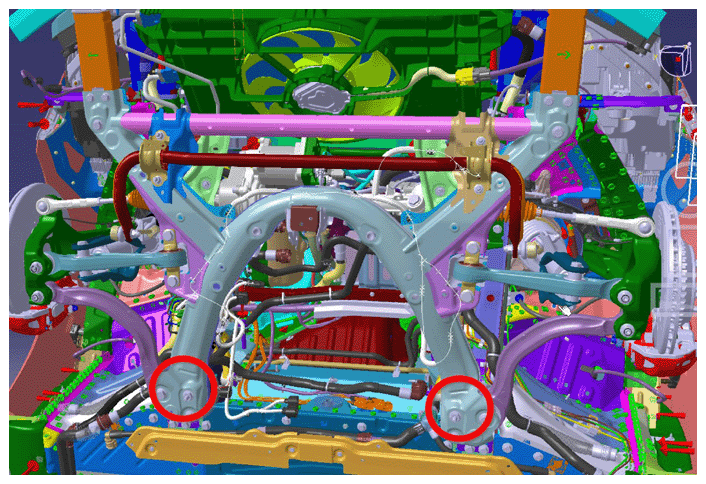 Courtesy of TESLA, INC. Courtesy of TESLA, INC.
|
- Hand-tighten the smaller bolts (x2) that attach the rear portion of the front subframe to the body.
 Courtesy of TESLA, INC. Courtesy of TESLA, INC.
|
- Hand-tighten the bolts (x2) that attach the front portion of the front subframe to the body.
 Courtesy of TESLA, INC. Courtesy of TESLA, INC.
|
- Hand-tighten the bolt that attaches the LH mid mount to the body, then repeat this step on the RH side.
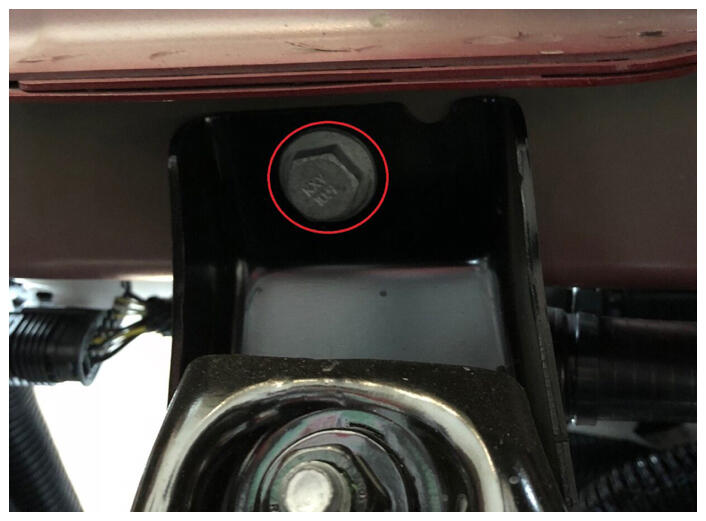 Courtesy of TESLA, INC. Courtesy of TESLA, INC.
|
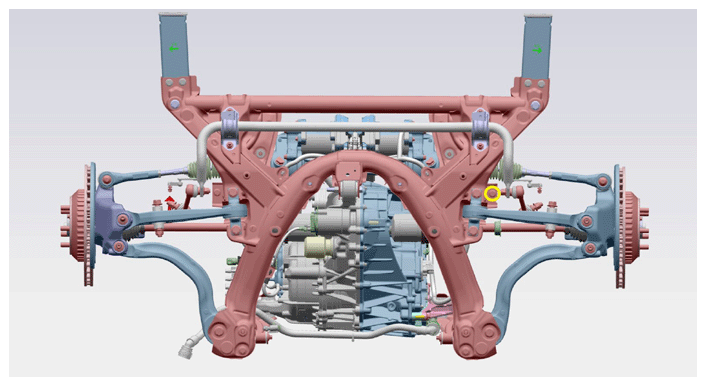 Courtesy of TESLA, INC. Courtesy of TESLA, INC.
|
- Hand-tighten the bolts (x2) that attach the front end carrier to the LH front subframe crash can assembly, then repeat this step on the RH side of the vehicle.
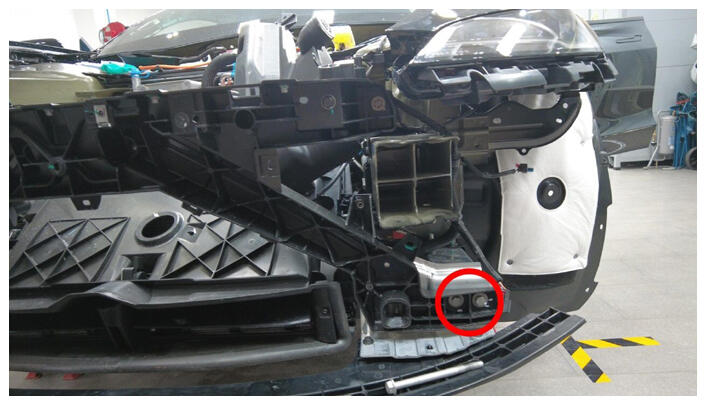 Courtesy of TESLA, INC. Courtesy of TESLA, INC.
|
- Torque the larger bolts (x2) that attach the rear portion of the front subframe to body.
125 N.m (92.2 lbs-ft)
 Courtesy of TESLA, INC. Courtesy of TESLA, INC.
|
- Torque the smaller bolts (x2) that attach the rear portion of the front subframe to the body.
50 N.m (36.9 lbs-ft)
 Courtesy of TESLA, INC. Courtesy of TESLA, INC.
|
- Torque the bolts (x2) that attach the front portion of the front subframe to the body.
72 N.m (53.1 lbs-ft)
 Courtesy of TESLA, INC. Courtesy of TESLA, INC.
|
- Torque the bolt that attaches the LH mid mount to the body, then repeat this step on the RH side.
50 N.m (36.9 lbs-ft)
 Courtesy of TESLA, INC. Courtesy of TESLA, INC.
|
- Torque the bolts (x2) that attach the front subframe to the LH front subframe crush can assembly, then repeat this step on the RH side.
53 N.m (39.1 lbs-ft)
 Courtesy of TESLA, INC. Courtesy of TESLA, INC.
|
- Torque the bolts (x2) that attach the front end carrier to the LH front subframe crash can assembly, then repeat this step on the RH side of the vehicle.
16 N.m (11.8 lbs-ft)
 Courtesy of TESLA, INC. Courtesy of TESLA, INC.
|
- Lower the front subframe lifting tool from the vehicle.
- Disconnect the air hose from the front subframe lifting tool.
- Remove the front subframe lifting tool from under the vehicle.
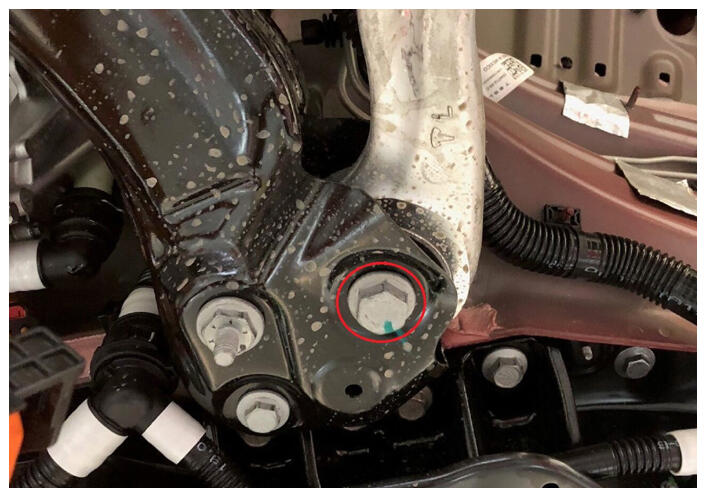
- Hand-tighten the nut and bolt that attach the LH strut to the LH front lower lateral link.
 Courtesy of TESLA, INC. Courtesy of TESLA, INC.
|
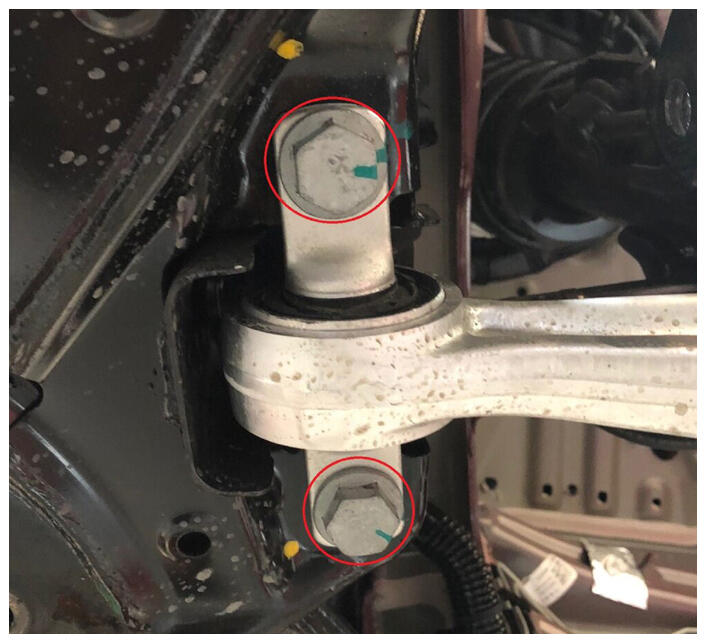
- With an assistant, hand-tighten the new bolts (x2) that attach the LH front lower lateral link to the front subframe.
 Courtesy of TESLA, INC. Courtesy of TESLA, INC.
|
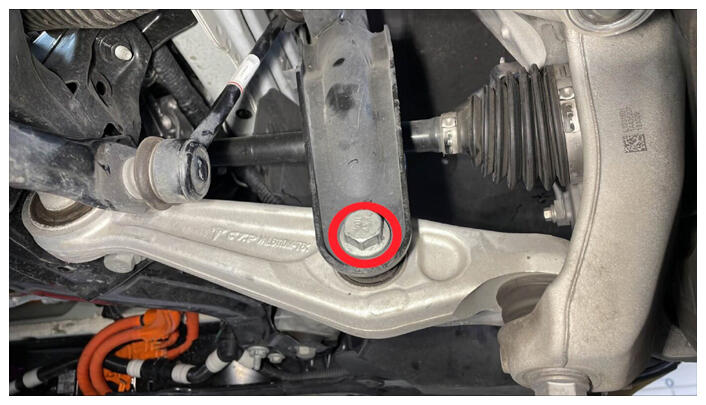
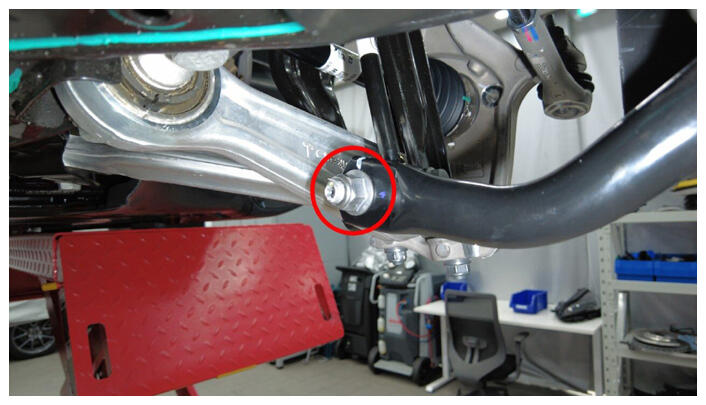
- With an assistant, install the bolt and nut that attach the LH front lower compliance link to the front subframe.
115 N.m (84.8 lbs-ft)
 Courtesy of TESLA, INC. Courtesy of TESLA, INC.
|
 Courtesy of TESLA, INC. Courtesy of TESLA, INC.
|
- Torque the bolts (x2) that attach the LH front lower lateral link to the front subframe.
135 N.m (99.6 lbs-ft)
 Courtesy of TESLA, INC. Courtesy of TESLA, INC.
|
- Repeat step 26 through step 29 on the RH side of the vehicle.
- Lower the vehicle.
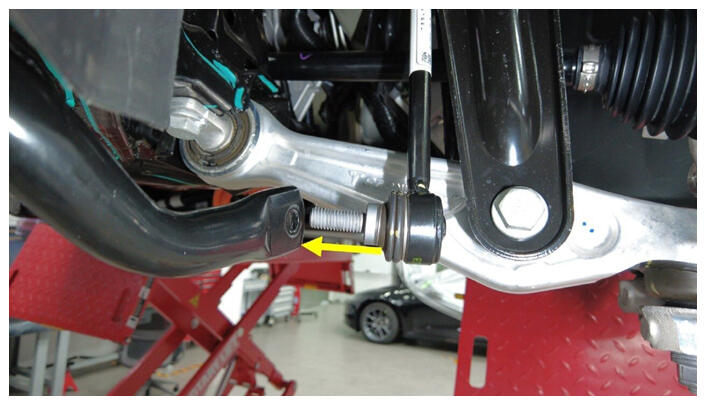
- Position the LH front stabilizer bar link assembly to the front stabilizer bar.
NOTE:
Pull down on the sway bar to allow the end link to engage.
 Courtesy of TESLA, INC. Courtesy of TESLA, INC.
|
- Install the nut that attaches the front stabilizer bar link to the LH front stabilizer bar.
98 N.m (72.3 lbs-ft)
 Courtesy of TESLA, INC. Courtesy of TESLA, INC.
|
- Position the LH front tie rod end to the LH front knuckle.
- Install the nut that attach the LH tie rod end to the LH front knuckle.
180 N.m (132.7 lbs-ft)
- Repeat step 32 through step 35 on the RH side of the vehicle.
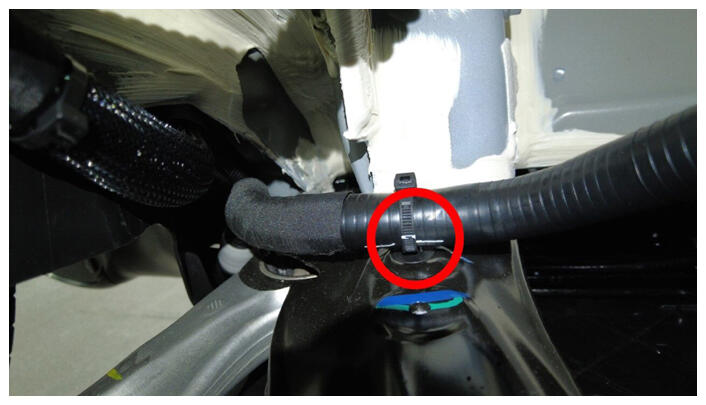
- Install the clip that attaches the front drive unit bypass hose to the front subframe.
 Courtesy of TESLA, INC. Courtesy of TESLA, INC.
|
- Install the lug nuts (x5) that attach the hub jack adapter onto the LH front hub.
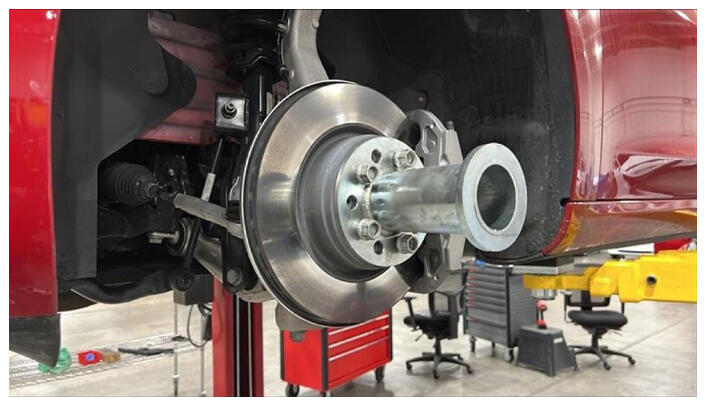 Courtesy of TESLA, INC. Courtesy of TESLA, INC.
|
- Raise and adjust the support stand to the ride height.
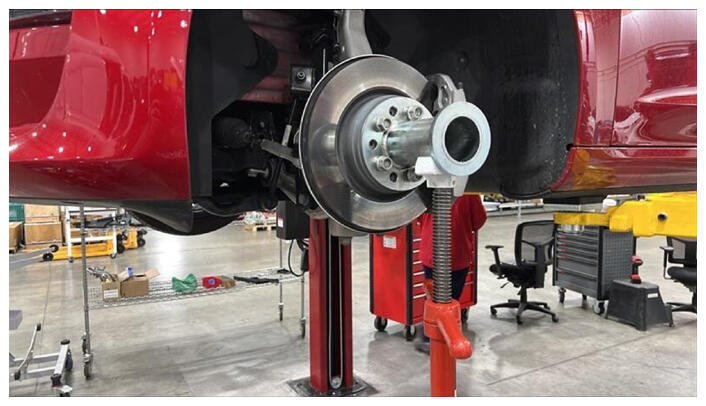 Courtesy of TESLA, INC. Courtesy of TESLA, INC.
|
- Measure from the bottom of the fender to the center of the axle to make sure the LH suspension is set close to the ride height (423 mm).
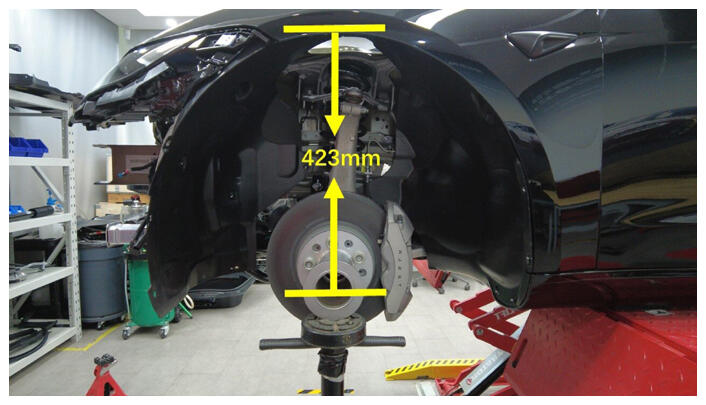 Courtesy of TESLA, INC. Courtesy of TESLA, INC.
|
- Torque the nut and bolt that attach the LH strut to the LH front lower lateral link.
106 N.m (78.2 lbs-ft)
 Courtesy of TESLA, INC. Courtesy of TESLA, INC.
|
- Remove the support stand from underneath the LH front suspension.
 Courtesy of TESLA, INC. Courtesy of TESLA, INC.
|
- Remove the lug nuts (x5) that attach the hub jack adapter to the LH front hub.
NOTE:
Gently tap with a dead blow to aid in removal.
 Courtesy of TESLA, INC. Courtesy of TESLA, INC.
|
- Install the LH front wheel. See WHEEL ASSEMBLY - REMOVE AND INSTALL
.
- Repeat step 38 through step 44 on the RH side of the vehicle.
- Lower the vehicle fully.
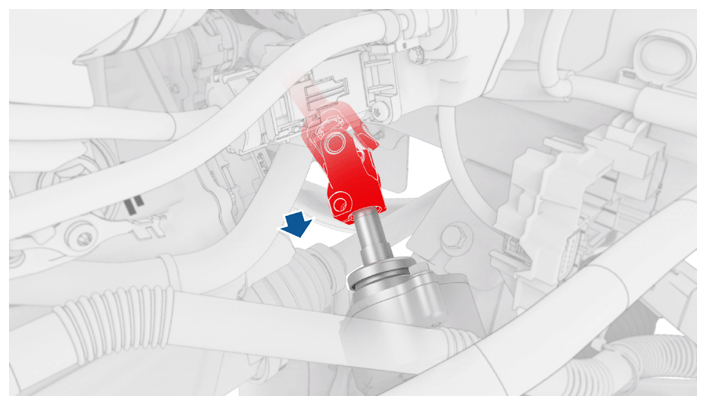
- Slide the intermediate shaft assembly downward to install it to the steering gear assembly
NOTE:
Ensure the intermediate shaft is aligned and fully seated, if necessary, align the shaft to steering gear.
 Courtesy of TESLA, INC. Courtesy of TESLA, INC.
|
- Install the bolt that attaches the intermediate shaft assembly to the steering gear assembly.
18 N.m (13.3 lbs-ft)
- Connect the steering gear assembly electrical connectors (x4).
- Install the front fascia. See FRONT BUMPER FASCIA - FASCIA ASSEMBLY - FRONT - REMOVE AND REPLACE
.
- Install the underhood storage unit. See EXTERIOR FITTINGS - LUGGAGE COMPARTMENT TRIM - FRONT LUGGAGE STORAGE COMPARTMENT - FRUNK ASSEMBLY - REMOVE AND REPLACE
.
- Install the LH and RH wheel caps.
- Remove the vehicle from the 2 post lift. See.
- Refer to the Alignment Requirement tables to determine whether an EPAS alignment check (EC) or four wheel alignment check (AC) is necessary. If performed, add the alignment check/adjust as a separate activity. See ALIGNMENT REQUIREMENT - SUSPENSION
.