Rear Window Defogger Grid Inoperative
- Turn ignition on. Using scan tool, read BODY COMPUTER DTCs. Check for rear defogger relay DTCs. If no rear defogger DTCs are set, go to next step. If any rear defogger relay DTCs are set, go to appropriate rear defogger relay DTC repair procedure.
- Operate rear defogger switch off and on and note operation of indicator. If indicator turns off and on with switch, go to next step. If indicator does not turn off and on with switch, go to step 5.
- Turn ignition off. Turn all lights off. Open liftgate. Using DVOM, measure resistance between ground and rear window defogger ground connector terminal (Black wire). If resistance is less than 5 ohms, go to next step. If resistance is greater than 5 ohms, repair open in Black wire between defogger grid and ground. Perform BODY VERIFICATION TEST under VERIFICATION TESTS.
- Turn ignition on and turn rear defogger switch on. Disconnect rear window defogger connector at rear window grid. Using DVOM, measure voltage between ground and rear window defogger output connector terminal (Black/White wire). If voltage is greater than 10 volts, repair open in rear defogger grid. See appropriate REAR WINDOW DEFOGGERS & HEATED MIRRORS article. Perform BODY VERIFICATION TEST under VERIFICATION TESTS. If voltage is less than 10 volts, repair open in Black/White wire between junction block and rear window defogger grid. Perform BODY VERIFICATION TEST under VERIFICATION TESTS.
- Turn ignition on. Using scan tool, read R DEFOG SWITCH input/output display. Operate rear defogger switch off and on and note scan tool display. If scan tool displays R DEFOG SWITCH input/output display turn off and on with switch, go to next step. If R DEFOG SWITCH input/output display does not turn off and on with switch, go to step 12.
- Remove and inspect fuse No. 2 (40-amp) from Power Distribution Center (PDC) located in engine compartment. See Figure. If fuse is blown, go to next step. If fuse is okay, go to step 9.
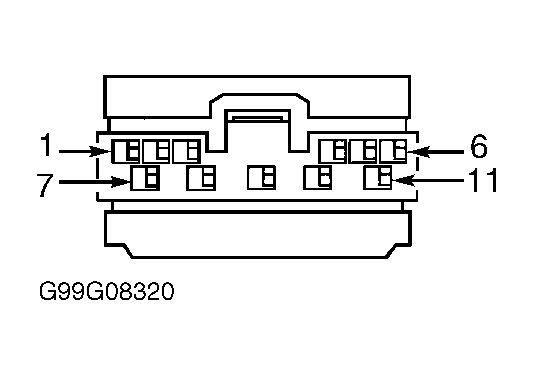
- Access junction block on left side of instrument panel. See Figure. Remove rear window defogger relay. Using DVOM, measure resistance between rear window defogger relay terminals No. 85 and 86. See Figure. If resistance is 50-100 ohms, go to next step. If resistance is not between 50-100 ohms, replace defogger relay and fuse No. 2. Perform BODY VERIFICATION TEST under VERIFICATION TESTS.
- Disconnect rear window defogger connector at rear window defogger grid. Using DVOM, measure resistance between ground and rear window defogger connector terminal (Black/White wire). If resistance is less than 5 ohms, repair short to ground in Black/White wire between junction block and rear window defogger grid. Perform BODY VERIFICATION TEST under VERIFICATION TESTS. If resistance is greater than 5 ohms, replace defective fuse No. 2. Perform BODY VERIFICATION TEST under VERIFICATION TESTS.
- Access junction block on left side of instrument panel. See Figure. Remove rear window defogger relay. Using DVOM, measure voltage between rear window defogger relay cavities No. 30 and 85 and ground. See Figure. If voltage is greater than 10 volts, go to next step. If voltage is less than 10 volts, repair open in fused B+ circuit between junction block and PDC. Perform BODY VERIFICATION TEST under VERIFICATION TESTS.
- Install a known-good rear window defogger relay in junction block. Turn ignition on. Recheck rear window defogger operation. If rear window defogger does not operate, go to next step. If rear window defogger operates properly, replace rear window defogger relay. Perform BODY VERIFICATION TEST under VERIFICATION TESTS.
- Using test light, backprobe between junction block connector C1 terminal No. 50 (Black/White wire). See Figure and Figure
. Using scan tool, activate R DEFOG RELAY on and off. If test light does not react to scan tool activation, replace junction block. Perform BODY VERIFICATION TEST under VERIFICATION TESTS. If test light flashes on and off, test is complete. Perform BODY VERIFICATION TEST under VERIFICATION TESTS.
- Turn ignition off. Disconnect Body Control Module (BCM) connector C2. See Figure. On vehicles equipped with manual air conditioning, disconnect A/C-heater control panel connector. On vehicles equipped with automatic air conditioning, disconnect Automatic Zone Control (AZC) module connector. On vehicles equipped with manual air conditioning, using DVOM, measure resistance of Black/White wire between A/C-heater control panel connector C1 terminal No. 5 and BCM connector C2 terminal No. 12. See Figure and Fig 1
. On vehicles equipped with automatic air conditioning, using DVOM, measure resistance of Black/White wire between AZC module connector C1 terminal No. 14 and BCM connector C2 terminal No. 12. See Figure. On all models, if resistance is less than 5 ohms, go to next step. If resistance is greater than 5 ohms, repair open in Black/White wire. Perform BODY VERIFICATION TEST under VERIFICATION TESTS.
- Using DVOM, measure resistance between BCM connector C2 terminal No. 12 (Black/White wire) and ground. If resistance is greater than 5 ohms, go to next step. If resistance is less than 5 ohms, repair short to ground in Black/White wire between BCM and A/C-heater control panel (manual A/C) or AZC module (automatic A/C). Perform BODY VERIFICATION TEST under VERIFICATION TESTS.
- Check BCM and A/C-heater control panel (manual A/C) or AZC module (automatic A/C) connectors for poor connection or damaged terminals. Repair as necessary. On all models, turn ignition on. Using DVOM, measure voltage between BCM connector C2 terminal No. 12 (Black/White wire) and ground. If voltage is not indicated, go to next step. If any voltage is indicated, repair short to voltage in Black/White wire between BCM and A/C-heater control panel (manual A/C) or AZC module (automatic A/C). Perform BODY VERIFICATION TEST under VERIFICATION TESTS.
- Turn ignition off. Reconnect BCM connectors. On vehicles equipped with manual air conditioning, connect a fused jumper between A/C-heater control panel connector C1 terminal No. 5 (Black/White wire) and ground. On vehicles equipped with automatic air conditioning, connect a fused jumper between AZC module connector C1 terminal No. 14 (Black/White wire) and ground. On all models, turn ignition on. Using scan tool, read R DEFOG SWITCH status. If scan tool does not display R DEFOG SWITCH: CLOSED, go to next step. If scan tool displays R DEFOG SWITCH: CLOSED, replace A/C-heater control panel or AZC module. See appropriate
MANUAL or AUTOMATIC A/C-HEATER SYSTEMS article in AIR CONDITIONING & HEATING. Perform BODY VERIFICATION TEST under VERIFICATION TESTS.
- Replace BCM. See BODY CONTROL MODULE under REMOVAL & INSTALLATION. Perform BODY VERIFICATION TEST under VERIFICATION TESTS.
 Courtesy of CHRYSLER CORP.